Agvance users often have the need to print documents on a variety of pre-printed forms like invoice forms, checks, and statements, as well as plain paper. Laser printers with multiple trays can handle these forms, conveniently eliminating the need to continually swap forms with plain paper. Agvance can be configured to automatically print invoices to a particular printer tray and checks to another tray. Your default printer instance should be the one that is set to use the tray that holds your plain paper. Once set up, the tray and forms management is automatic.
This document explains how to set up your printer instances to accommodate this functionality in Agvance. Below is the goal – to establish as many printer instances as we have trays that we want to access. The printer instances in this document are named to reflect the respective trays.

Assumptions
- This document describes using a printer with 3 trays. Although specific details of the setup may vary slightly, the concept is the same regardless of the printer and/or operating system.
- Tray 1 is usually the manual tray (often the front of the printer folds out to hold forms/paper). Below that is Tray 2 and so on.
- As you complete this printer configuration, you must sit at the LOCAL machine to which the printer is physically attached.
- SSI recommends using a parallel printer cable rather than a USB cable.
Note: Windows will most likely have automatically created a default printer instance for the printer attached to your machine. Even though we will be creating new printer instances for Agvance, you should leave this default instance in place for use by other applications.
Setup
- Go to Start / Devices and Printers .
- Right-click in a blank area of the window and select Add a Printer.
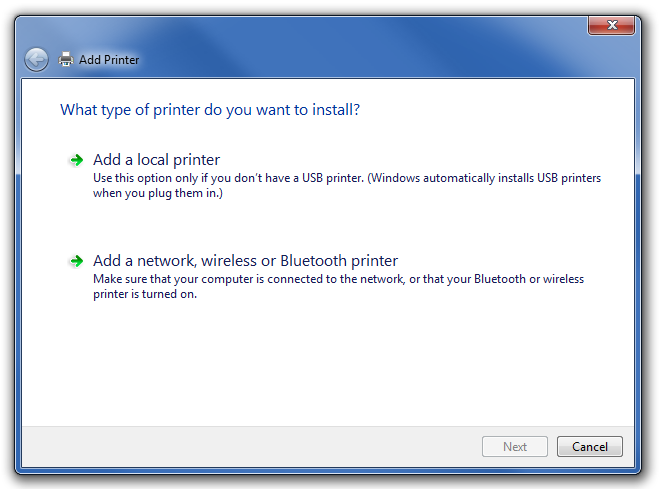
- Choose Add a Local Printer .
- Select Use an Existing Port.
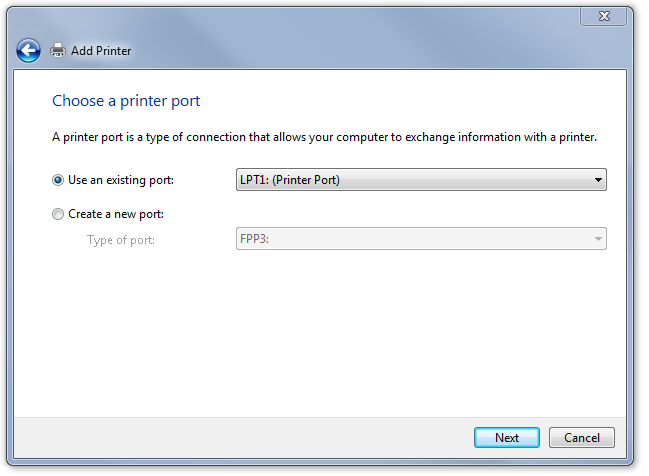
- Choose LPT1 if using a printer attached to the computer's parallel port. Otherwise choose the appropriate port.
- Select Next.
- Choose HP in the Manufacturer area if using an HP printer. Otherwise choose the appropriate Manufacturer.
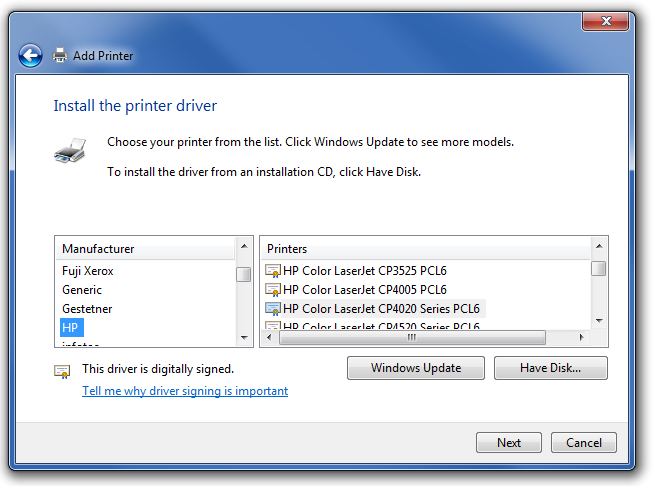
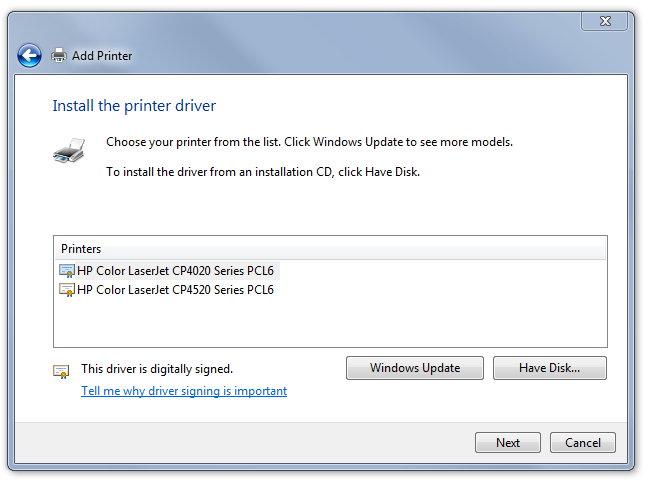
- Double-click the name of the printer model in the Printers section.
- If the printer is not there, load the appropriate drivers.
- Insert the manufacturer’s CD in the CD drive or download the drivers from the manufacturer's website and place them in a folder on the hard drive. For HP printers, the website to download printer drivers is support.hp.com.
- Select Have Disk.
- Choose Browse.
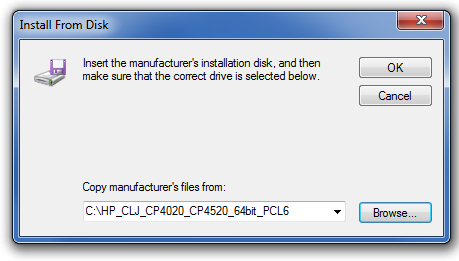
- Go to the Look in drop-down and select the drive and folder with the printer drivers from Step a.
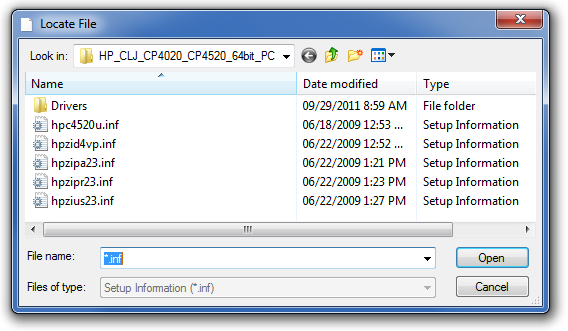
- Select an .inf file. If there are multiple, try each one until the correct one is found.
- Select OK.
- Choose a printer then select Next.
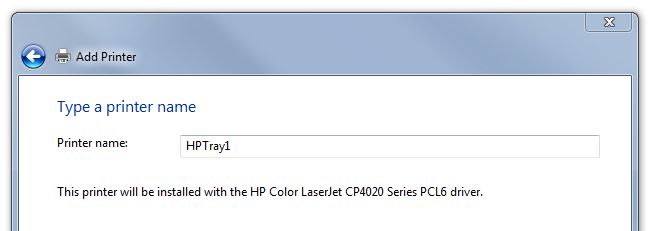
- Name the printer HPTray1 and select Next.
- Check Do not share this printer unless it is preferred to share this printer instance with other users and select Next.
- Leave the Set as the default printer checkbox unchecked.
- Select Print a test page button to confirm the driver is working correctly.
- Select Finish. It is now copying files and may take a few seconds.
- Upon returning to the printer wizard, right-click the printer just installed (HPTray1) and go to Printer Properties.
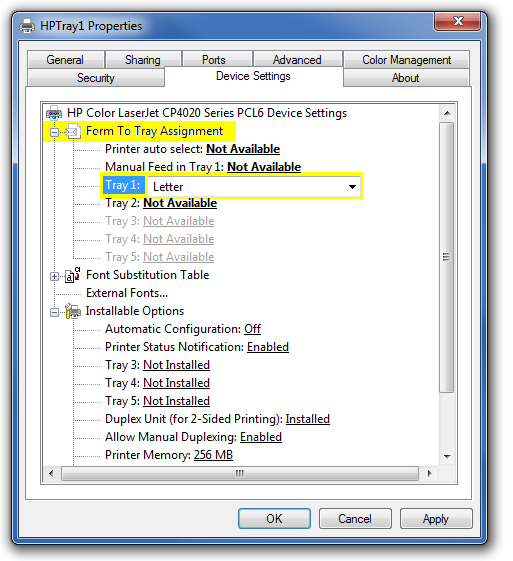
- At the top, select Device Settings.
- Make sure everything under the Form to Tray Assignment section is Not Available except for Tray1.
- Go to the General tab at the top and select Preferences.
- Go to the Paper/Quality tab at the top and, under the Paper Options field, change the Paper Source field from Automatically Select to Tray 1. Below that, change the Type is field from Unspecified to Plain.
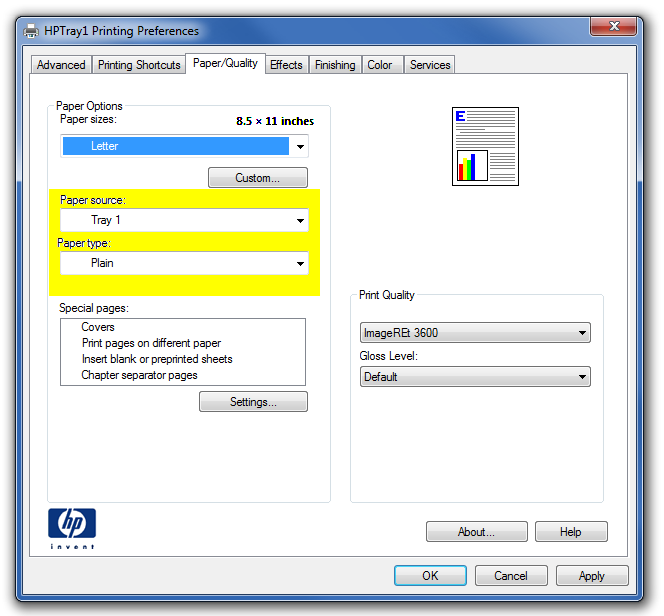
- Choose Apply then select OK. Tray 1 is now set up.
- To begin setting up Tray 2, follow Steps 2 - 8.
- Skip Steps 9 & 10 and go to Step 16. When naming the Printer, type HPTray2.
- Continue through the steps. When setting all trays to Not Available, follow the diagram above, making everything Not Available except Tray 2.
- Follow the remaining steps and stop at Step 22. Make sure everything for Tray 2 is the same as Tray 1.
- Tray 2 is complete.
- To begin setting up Tray 3, follow Steps 2 - 8. Make everything for Tray 3 the same as Trays 1 and 2.
- Setup is complete.
- To test each tray to see if the paper comes out of the correct tray, mark 3 pieces of paper 1, 2, and 3. Put the paper marked 1 in Tray 1, 2 in Tray 2, and so on. Right-click each printer and go to Printer Properties. Select Print Test Page and make sure it comes out of the correct tray. Be sure there is paper in every tray while doing the tests.


