The Preference area found at Accounting / Setup / Preferences allows several options to be set and therefore customize, to a degree, the way the program works. Quite often, these default settings may be overridden as transactions are being entered.
Note: These preference settings are company-wide, not User-specific.
Counters
The counter specifications are determined for Delivery Tickets, Purchase Receipts (Control #), Manufactured Blends, Inter-Company Transfers, Vendor ACH Batches, and Check File Batches globally or for individual locations. The last document number and the option to auto-number documents are also on this screen.
When Auto-number Document is not checked for the Purchase Receipt, the Control # can be entered on the Add a Purchase Receipt window. When checked, the Control # cannot be edited and is incremented automatically.
POS Warnings
This allows customizable point of sale warnings to be established that display during the Point of Sale transactions for specified products and/or customer, and optionally stop the sale. For more information on POS Warnings, see here.
General

- First Fiscal Month of Year – Select the first month of the business’s fiscal year. This input is used by the system at end of month to know what fiscal month end is also the calendar year end.
- Transactional Posting to Inventory Asset Accounts – Selecting this option causes the posting to the inventory asset accounts to be done as inventory is invoiced, purchased, and at the Inventory Adjustment function. The alternative is to have the Inventory Asset accounts remain constant throughout the month and adjust them to actual before running financial reports. To do this, use the Post Inventory to G/L function.
- Accrue Estimated Payables for Purchase Receipts – The value of each Purchase Receipt accrues to the Estimated A/P key account based on the Estimated Average Cost from the Purchase Receipt. The Inventory Departments must be set to use Estimated Average Costs for this option to be available. The entry in the general ledger is reversed when the Purchase Invoice is completed.
- Include consignment products from unprocessed Purchase Receipts when posting inventory value to GL – The value of the Purchase Receipts for consignment products is included when posting inventory to the general ledger.
- Include consignment products in current inventory value when posting inventory value to GL – The value of the consignment products into the company-owned inventory is included when posting inventory to the general ledger.
- Print "See Terms on reverse side" on all "Received by" lines – Choose to print this wording to have terms and conditions preprinted on the back of the delivery documents.
- Display JDF Multi-Use Numbers – With this option selected, any JDF Multi-Use numbers display in entirety. With this option deselected, only the last four digits of the JDF Multi-Use numbers display.
Inventory

Reconcile Estimated Freight
- Reconcile Estimated Freight from P.R. – This option looks to the Purchase Receipt instead of the Purchase Invoice to get the amount of estimated freight.
- Require AP Bill Creation – Creating A/P Bills at the Reconcile Freight/Additional Charges screen is optional unless this is selected. If this option is chosen, creating the A/P Bill is required.
- Require A/P Bill to be on Hold – If an A/P Bill is added from the Reconcile Freight/Additional Charges screen and this option is selected, the A/P Bill is automatically saved with a Hold status.
- Stop Manufactured Inventory transactions that will result in Negative Amount On Hand of Inventoried Products – When selected, this option does not allow inventory to be manufactured if it will cause the finished good or any raw ingredient to have a negative amount on hand.
- Product Cost warning tolerance % – When saving Purchase Invoices, the new cost per unit is checked against the last cost in the product file. If there is a variance by more than the percentage entered here, a warning is given including a chance to edit the cost before saving. If the last cost is within the tolerance, then the average cost is checked.
- Reconcile Estimated Freight warning tolerance % – Optionally enter the tolerance percentage used when reconciling freight. If an amount is entered, at the Reconcile Freight/Additional Charges screen when reconciling and adding an A/P Bill, the variance is checked against this percentage. If the percentage of variance is higher, a message appears warning the variance is greater than the tolerance. It is optional to continue with the save of the transaction.
Grower Order
- Quantity changed to zero and not submitted – When Stop is selected and a quantity on a Grower Order is edited to zero without being submitted to the vendor, the save of the edited Grower Order is not allowed. If Warn is selected and the quantity on the Grower Order is changed to zero but not submitted to the vendor, a message appears to confirm if the change should be saved.
- Require Salesperson – When selected, this option requires a salesperson to be selected on the Grower Orders window before the save of the Grower Order.
- PR, PI, Inv Adj. Disallow Lot Number Balance to go Negative – Set to No Checking, Warning Only, or Disallow Save.
- InvAdj Types – Types of Inventory Adjustments may be defined such as Physical Count or Property Maintenance Use.
- Require Void reason on Inventory Adjustment – Marking this forces a reason to be entered when inventory adjustments are voided. This void reason is then visible on the Inventory Adjustment report and on the Inventory Detail report if the option to Print Notes is selected on the Report Criteria screen.
- Department Classifications – Set the user-defined labels for the six classifications of departments. This allows departments to be categorized so reports can be filtered by various classifications (i.e. Run a report for all Seed departments).
- Department Cross References – Label the cross-reference inputs found at the Department Profile tab. These cross-reference inputs are currently unused but could be used for custom programming or future development.
- Ignore Lot Number Checking – Double-click to select a Product Classification for products that are in Inventory Departments requiring lot number checking but do not have lot numbers. The products in this Product Classification will be ignored by the lot number checking process.
Inventory Purchase

Purchase Order
- Place prepaid Purchase Order Bills on Hold – When a prepaid Purchase Order is entered, the A/P Bill created is automatically set to an On Hold status if this option is selected.
- Allow only 1 discount Date on Purchase Orders – Selecting this option allows only one line to be entered in the Discount Terms on the Purchase Order.
- Require Terms on PO – At the save of a Purchase Order, vendor terms are verified. If the terms are not entered, the Purchase Order is not allowed to be saved.
- Restrict PP PO Void – With this option selected, no prepaid Purchase Orders can be voided.
- Restrict Cost Edit on Received PO Lines – Product costs on Purchase Orders are not allowed to be edited for line items that have been received against it if this option is selected.
- Restrict PP PO Order Invoiced Edit – Selecting this option restricts users from editing a prepaid Purchase Order and choosing the Order Invoiced option to close the Purchase Order.
- Print EPA # on PO line items – Items with an EPA number on the product file prints the EPA number below the product description on the Purchase Order when this is selected.
- Require Start and Expire Dates on a PO – Selecting this option disallows saving a Purchase Order without Start and Expiration Dates entered.
- Allow only 1 Direct Ship Delivery per Product – Selecting this option prevents having more than one Direct Ship Purchase Receipt/Delivery Ticket saved for a product.
- Restrict Price By on Received/Invoiced PO Lines – This option locks down the ability to edit the Price By option ($/Unit or Total $) on a Purchase Order once a Purchase Receipt or Purchase Invoice is entered against the Purchase Order.
- Require GLN on all direct ship POs for electronic vendors – For vendors set as electronic PO vendors, this option requires a GLN on the Ship To tab of the PO to allow the save of the Purchase Order.
- Use alternate XML PO interface – When using the B2B program, this allows creating an XML file for the POs being sent electronically to Aligned Ag.
- Use alternate XML PO validations - This option validates alternate Product IDs and Units of Measure for Purchase Order exports to Aligned Ag.
- Folder to place XML PO files – This is enabled when the Use alternate XML PO interface option is selected. Specify the location where the XML files are to be created. These files are created when the WS XML Purchase Order option is selected on the Print Purchase Order window for Winfield Crop Protection products Purchase Orders.
- Folder to Place ASCII PO Exports – When exporting Purchase Orders to an ASCII file, the export is saved in this specified location. This is only available if the Use alternate XML PO interface option is selected.
- Class of Products that may only be purchased via Direct Shipments – Select the Product Classification containing the products available for use on a Direct Ship Purchase Order.
- Forward to Direct Ship Delivery Ticket – Select Purchase Order Notes, Purchase Order Comments, or None to be included on the Direct Ship Delivery Ticket.
- PO Pickup/Delivery Locations – Locations may be entered here with GLN identifiers per location. These locations are available for selection when entering Purchase Orders. The selected location is included when POs are electronically transferred.
- Display PO Product/Location Warning – Select this option to notify when a Product on a Purchase Order does not match the global location.
- Require Date Requested on PO – Select a Vendor Classification to require Purchase Orders be stopped if they do not have the Requested Date populated on the PO. Additionally, Vendors set up as Electronic Vendors will have a label displayed when adding a Purchase Order.
Purchase Receipt
- Put Location as prefix on PR – The Location ID is appended as a prefix for the Control number only if the Auto-number Document option is checked for Purchase Receipt Counters.
Note: Default Location information is appended based on the Location logged into when adding the Purchase Receipt. - PR Transfer Out uses Location Information – With this option selected, when an inventory transfer out is entered, the location information prints on the Transfer and HazMat documents.
- Require PO on PR – With this selected, a Purchase Receipt is not allowed to be saved unless a Purchase Order is referenced.
- Restrict Edit of P.O. Price at Purchase Receipt – The estimated cost is prevented from being changed on a Purchase Receipt that was generated from a Purchase Order.
- Restrict Over Receiving Prepaid PO – Selecting this disallows more product to be received than is entered on the Purchase Order.
- Restrict PR returns on PP PO – With this selected, a Purchase Order number cannot be chosen when entering a return Purchase Receipt.
- Print EPA # on PR line items – Items with an EPA number on the product file may optionally have that EPA number printed below the product description on the Purchase Receipt.
- PO Price Level – When using the option at the Purchase Receipt to make a Purchase Order, the price level selected defaults into the Purchase Order created.
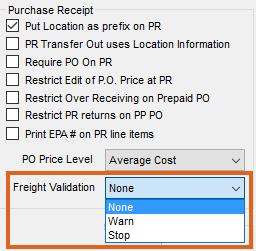
- Freight Validation - Choose from None, Warn, or Stop. Selecting Warn displays a message when the calculation of the Per Unit Freight Amount does not agree with the amount of freight on the line items of the Purchase Receipt. Selecting Stop displays a warning message and disallows saving.

Inter-Company Transfer
- Comp. Cost By – The cost to use on Purchase Invoices associated with Inter-Company Transfers.
- Def. Vendor – This is the default Inter-Company Transfer vendor. It is recommended to have a specific vendor used for all Inter-Company Transfer transactions. This makes the reconciliation of those transactions much easier.
- Stand-alone Region – Select a region if the locations are only allowed to transfer products to other locations in the same region.
- Stand-Alone Vendor – Select a vendor to be used on Inter-Company Transfers between locations in the stand-alone region.
- Don't include Add-ons in BT/DT Ship From ICT - When selected, product add-ons are excluded when a Blend Ticket or Delivery Ticket creates an Inter-Company Transfer for the selected Ship From location.
- Use Purchase Add-on Charge for Freight – To have freight per line item on the Purchase Invoice, select an add-on charge to be used when applying freight.
Purchase Invoice
- Stop PI from over-using PO Prepay – With this option selected, the Purchase Invoice is not able to overuse Prepay from the referenced Purchase Order.
- Choose PO on From Receipt Tab – When entering Purchase Invoices, a Purchase Order number may be selected on the From Receipt tab. By selecting the PO number, the quantity received and invoiced is updated on the Purchase Order.
- Read PI From FTP – When using B2B, selecting this option imports files via FTP for Purchase Invoices.
- Enable SSL – This option is available when Read PI From FTP is selected.
- Use Passive – This option is available when Read PI From FTP is selected.
- Format 2 – This option is available when Read PI From FTP is selected.
- PI Import Vendor - For the Omni import, select the vendor to be used.
- PI Omni Prod Attributes - For the Omni import, select the Product Attributes.
Style 1 PO Printout Bill To
- Include Bill To information on Style 1 PO printout – Select this option to include information entered below (Name, Email, Address, City, State, Zip) on the Purchase Order.
A/R

Aging Configuration
- Aging Configuration – Select to age By Invoice Date or By Invoice Due Date, and edit the number of days and the labels. Additionally, the Aging Periods may be customized.
Note: It is recommended to write down or take a screenshot of the current aging configuration before making any changes.
- Calculate Discount/Due Dates by Fiscal Month – With this option selected, the discount/due dates for customer Invoices calculate based on fiscal month instead of the calendar month when the Invoice was saved. Payment Terms using the Months Ahead option for setting the discount or due date are the only Payment Terms affected by this preference.
Statement Defaults
- Statement Terms – The terms message that prints on the statements may be customized by entering the information here.
- Print Customer Location on Statements – With this option selected, the Customer’s location prints in the upper right portion of the statement document.
- Print Location Heading on Statements – With this option selected, the Location selected at the time the Statements are generated prints as the primary heading in the upper left portion of the documents. This should only be used if the heading information is not preprinted on custom statement forms.
Note: If a logo has been saved at Accounting / Setup / Location Preferences on the Logo tab for any Location, this preference is automatically disabled even if AR Statements is not checked to print the logo. Additionally, it does not matter what Combo Statement style is selected. - Center – Used by multi-Location companies, this causes the location heading to be centered on the statement form allowing for a preprinted form with the corporate logo in the upper left portion of the Invoice but no heading. All the locations might use the same statement form with the company logo but have their own heading printed to the right of the standard logo.
- Print Payment Amt on Summarized Stmts – The actual amount tendered displays in addition to the credit applied (which takes discounts into consideration).
- Combo Statement – Choose the format to print for the Combo Statement: Standard, Alternate1, Alternate2, or Alternate3.
- Statement Image – Define an image to print in the upper left corner of the Alternate2 style of the Combo Statement.
- Total Amount Header – Only available with the Standard Combo Statement style, this option prints the total amount for the statement which includes the Budget Billing amount.
- Print ‘Credit Balance - Do Not Pay’ for credit balance – This option for the Standard Combo Statement works in conjunction with the Total Amount Header option above and the Print Total Balance preference on the Combo Statement Report Criteria screen. When selected, a Credit Balance – Do Not Pay notation prints on customer statements that have a credit balance, for the total amount and Total Balance in the statement header, based on the options selected.
- Budget Billing Label – For the Combo Statement, enter the label to describe the Budget Billing amount in the statement header. Up to 24 characters may be entered for this label.
Credit Management
- First Credit Warning When A/R Balance is this % of Limit – If a Credit Limit and Date Opened are set for any customers at File / Open / Customer on the Credit tab, then credit warnings start appearing when the sum of the A/R balance and unbilled deliveries reach this percent of the designated limit.
- Warn if any Balance is ### Days Past Due – This option allows the number of days an account may be past due without receiving a warning at any point of sale transaction. If a customer has open Invoices with due dates older than the system date and any of those open Invoices have an Invoice date older than the number of days specified, a warning appears when entering transactions for that customer.
- Stop Sale if any Balance is ### Days Past Due – This option does not allow a sale if the customer has open Invoices with due dates older than the system date and any of those open Invoices have an Invoice date older than the number of days specified.
- Restrict Edit of Credit Actions – This option allows Credit Actions to only be editable for the number of days specified in the Allow credit actions to be edited for area.
- Invoice Credit Check – When checking customer credit limits, this may be set to Warn Only, Stop Sale, or Stop with Password when the Invoice is saved.
- Delivery Credit Check – When checking customer credit limits, this may be set to Warn Only, Stop Sale, or Stop with Password when the Delivery Ticket is saved.
- Blend Credit Check – When checking customer credit limits, this may be set to Warn Only, Stop Sale, or Stop with Password when the Blend Ticket is saved.
- Password – When the Stop with Password option is selected for the credit checking options shown above, the password is defined in this area.
- Use Prepay Amount in Available Credit – Selecting this option includes the Customer Prepay in the calculation for available credit.
- Include Direct Ship PO’s in Credit Checking – If this option is selected and the Customer has a Direct Ship PO, the amount of that PO is included in the calculation for credit checking purposes.
Payments
- Print Location Headings on Payments – If printing payment receipts on plain white paper, selecting this prints the location heading on the payment receipt.
- Center – If printing the heading on receipts, select this option if the heading should be centered. This is useful for multiple locations that have a customized form with the common logo/name in the upper left and want to personalize with the location name in the center.
- Default Invoices as Unpaid – Selecting this option causes the Invoices to default into the grid of the customer Payment on Account screen with all Invoices unchecked.
- Default focus to payment amount on add – When adding a Payment on Account, this option allows the focus to be in the Payment Amount area instead of the Date.
- Suppress Printing of Balance Due After Payment – In the case where other locations might be affecting customer balances, it may be desirable to suppress the balance after payment.
- Default Column Layout for Booking and Invoice Roll-Thru Payment Grid – When selected, the columns on the roll-through Receive Payment(s) on Account window are not able to be chosen, resized, or moved. If the Use UAC option is selected in the grid, Pay Amount 1 is zeroed out. If the UAC is not sufficient to cover the Booking or Invoice amount and an additional payment amount is not entered, the payment cannot be saved.
- Require Reference # for Checks – If using the Check Pay Method on a Payment on Account, this option requires a check number to be entered in the Ref # field for any payments not equal to zero.
- Surcharges - Payment Only – This gives the ability to set up surcharges for the Pay Method selected and does not create an Invoice.
- Payment Receipt Label – The surcharge label can be edited here and will be what displays on the Payment Receipt.
- Pay Method – A Pay Method must be selected from the drop-down if the Surcharges - Payment Only option is checked.
- Disable Surcharge Changes – When enabled, this restricts the ability to change the surcharge amount on all payment forms from what is calculated.
Note: This applies to Payments on Account(s), Bookings, Budget Billing Invoices, and A/R Invoices.
- Do Not Mark Reversing Invoices as Paid – When an Invoice is reversed, the original Invoice is left on the Customer account and an exact opposite Invoice is created to reverse the original. If this option is selected, the original Invoice and the reversing Invoice remain on the Customer’s account as unpaid Invoices. If this option is not selected, both the original and reversing Invoices are marked as Paid when the reversal is saved.
- Invoice Field Coordinates Check – A point of sale warning that can Warn Only, Stop Sale, or Stop with Password if a point of sale transaction is entered without selecting a field and contains a product that is marked as Needs Field Coordinates on the Seed / Lots tab of the product file.
- Password – If the Stop with Password option is selected for the Invoice Field Coordinates Check, the password in this area overrides the stop.
- List Price Accuracy – Select the number of decimal places to be used for the selling prices to customers.
- Tax Exemption Expiration – Select Allow, Warn Only, or Stop Sale when a customer’s tax exemption certificate is expired. This checking happens when adding an Invoice or a Quick Ticket.
Bookings
- Print Location Heading on Bookings – With this selected, the location chosen when entering the Booking prints at the top of the document.
- Allow use of like products on bookings from other departments – Used by multi-site locations, this option allows one location to Invoice product booked at another location. With this set, the product defaults into the Invoice screen marked as Booked or Paid as if it were booked at the location where the products are invoiced. For this to work, identical Product ID codes in corresponding departments must exist. Those corresponding departments must also be linked with a common Category setting.
- Disallow Voiding a Paid Booking – If selected, this option forces the void or reverse of the payment for the paid Booking prior to voiding the Booking.
- Import unpaid sales order terms – Terms set on the Sales Order may optionally be transferred to the Booking terms when a Sales Order is imported to create a Booking. The Ship To address and Cust PO # on a Sales Order is imported into a Booking.
- Only allow import of unprocessed approved sales orders – When importing Sales Orders from the Planning module, this option only allows unprocessed Approved Sales Orders to be selected.
- Exclude zero quantity items on booking documents – With this option selected, any product on the Booking with a zero quantity will not print on the Booking document.
- Disallow edit of a signed booking – Select this option to prevent Bookings from being edited after the contract has been signed.
- Seller Signature Only From Logged In User – Check this option so the signature of the user logged in will be added to the contract without the option to select another signature from the list.
- Terms Default – Indicate the payment terms to default on the Booking screen.
- Expiration Date – Choose the expiration date to default to None, the System Date, Previous Entry, or Terms.
- Start Date – Choose the start date to default to None, the System Date, or Previous Entry.
- Design Booking Contracts – If a Booking Contract is to be printed with the Booking, the contract verbiage is defined in this area.
- Default the Post Finance Charge ‘Invoices Due on or Before’ to last used day of month – This allows the Invoices Due on or Before date at the Finance Charges window to default to the last used day of the month when using the Save Set functionality. When this option is selected and a Save Set is used on the Finance Charges window, the Invoices Due/Dated on or Before date defaults based on the selected Save Set. Agvance uses the system date to determine the month and fills in the day of the month prior to the system date. For example, if a Save Set is created with an Invoices Due/Dated on or Before date of 09/15/2025, and the system date is 12/01/2025, the Include in Calculation date would default as 11/15/2025, which is the 15th of the month previous to December 1st. Similarly, when using that same Save Set, if the system date is 11/30/2025, the Include in Calculation date would default as 11/15/2025, which is the 15th of the month previous to November 30th.
Setup:
A Save Set/Load Set must be used in conjunction with this option and the Save Set Ranges for the Invoices Due on or before must be Use Default. When the Save Set is established, the date in the Include in Calculation area of the Finance Charges window is used to establish the day of the month. The Invoice Due/Dated on or before date is established by using the day of the month from the Save Set, and then finds the first occurrence of that specified day of the prior to the system date. - Do not display expired quotes on transactions – When selected, only quotes that are not expired as of the date of the transaction are available to be selected.
- Only one ticket allowed when a return DT is imported – This option enforces the use of a single return type Delivery Ticket on a given Invoice to allow for reporting of these returns. This ensures returns are completely by themselves as a single ticket.
Customizable Contracts
Several areas of the agribusiness industry require custom contracts that are signed when the customer books product. These contracts may be set up and then printed when the customer Booking is printed. They print one contract per product.
How to Set Up Custom Contracts
At Setup / Preferences, choose the A/R tab. In the Bookings area, select Design Booking Contracts. Choose Add and complete the Format Name, Heading Section, Data Printing Options, and Footer Section with the information required for the specific contract.
Note: Checking the Seller Signature and Buyer Signature Data Elements will print those signature lines in the footer of the contract.

How to Print Custom Contracts
Add the customer Booking as described in the previous sections. When the Booking is saved, the Print Booking Documents screen appears. If one or more custom contracts have been saved, the Print Contract option will be available. Select the printer for the contract and format. Choosing OK prints the contract as requested.
A/P

- Print Due Date on Batch A/P Checks – Selecting this option prints the due date on Accounts Payable checks.
- Print Location Heading on Checks – Select this option only if the company name is not preprinted on the check form.
- Calculate Discount/Due Dates by Fiscal Month – With this option selected, the discount/due dates for vendor bills calculate based on fiscal month instead of the calendar month when the bill was saved. Payment Terms using the Months Ahead option for setting the discount or due date are the only Payment Terms affected by this preference.
- Transfer Vendor Prepay from PO Amounts – When vendor Prepay is transferred, this restricts the transfer amount to be the amount on the prepaid Purchase Orders.
- Default AP Bills Created from Transfer Vendor Prepay to On Hold Status – Using this option defaults the On Hold field on the A/P Bill created by the Transfer Vendor Prepay utility.
- Require G/L Accounts on A/P PO detail lines – Selecting this option requires a general ledger account be entered for each line in the PO Details grid.
- Vendor Cross References – This defines the labels for the cross-reference fields on the vendor Profile tab.
- Vendor Classifications – Classifications may be defined to help group vendors. An unlimited number of classifications may be established and can be used as a filtering tool in reports or at any Vendor Selection screen.
- Vendor Attributes – This is a user-defined input. Additionally, Values can be set on the Attributes by selecting Setup Values. When setting the Value on an Attribute, it will be required to pick from a specific Attribute value already in the drop-down.
- A/P Check Stub Style – Choose from Summarized, Inv Description, or G/L Detail. If the number of bills per check exceeds the maximum, Agvance displays a prompt to insert a white piece of paper into the printer so the additional advice can be printed.
- Summarized – This shows one line/Invoice. Using the Summarized style, the check stub lists up to 32 bills.

- Inv Description – This option prints more Invoice detail and lists up to 16 bills on the check stub.

- G/L Detail – This option provides GL information on the check stub.

- Summarized – This shows one line/Invoice. Using the Summarized style, the check stub lists up to 32 bills.
- A/P Check Printer – Choose the printer to be used when printing A/P checks.
- Top Margin Adjustment – The checks default to a setting of 400. This number may be changed as necessary. Changing this by 25 will move the printing approximately 1/4 inch. If printing needs moved down, increase the margin number. If printing needs moved up, decrease the number.
- Export 7 Records as EDI – This exports the list of Invoices as an EDI string. When checked, choose 3050 or 4010 from the 7 Records EDI Format drop-down. The 4010 format populates more data fields in the file, keeping the same format and line limits. This also enables the Sender ID, Recipient ID, and Payer Name fields.
- Path to Create the ACH Files Into – Specify the path where the ACH payment files are created.
- Company Entry Description Override (5 Record) – This allows the words DIRECTDEP in the ACH file to be user-definable.
- Immediate Origin Override (1 Record) – This is used to change the Orig ACH Route # that is set up at Setup / Preferences on the G/L tab.
- Do Not Create Offsetting Record – If the bank does not want the offsetting record to be included in the file, select this option.
- File Type – Standard is the most common file type which creates a CTX file for the bank. Simple was created as a secondary file type for Commerce Bank. CCD is another type of standard file for banks requiring a CCD file.
- One report per vendor for payment advice – If the ACH payment advice is being emailed directly from Agvance, this option must be selected. If the ACH payment advice is not automatically being emailed, it is optional. When selected, it causes the ACH Payment Advice to be a separate document per vendor instead of one consolidated PDF containing multiple pages for all vendors being paid.
- Have Agvance Create Text Files Instead of Printing Checks – Text files may be created instead of printing checks if this option is selected.
Note: Printing checks from text files is not supported within Agvance. Text files are for use by third party printers. - Path to Create the Text Files Into – Set the path where the text file should be saved.
- File Format – This defines the type of format used for the Check File Text option.
- Use ACH Payment Advice Format 2 – An alternate format will print on the ACH Payment Advice when this option is selected.
- Display Message – Information here can be edited to display the desired text on the ACH Payment Advice printout. Bracketed information must remain in order for this information to print on the document.
- EMail 'From' Address to use when emailing – If an alternate email address is desired for emailing and for printing on the document, enter the email address here.


G/L

- Default Retained Earnings – This G/L account must be defined before online balances can be captured. Double-click to choose from the existing list of G/L accounts. If Profit Centers are not used, this will be the account where income and expenses post when ending the fiscal year.
- Include UAC in Move Prepay Function – This allows Unapplied Cash to be included when transferring the customer Prepay to a liability account.
- GL Cash Acct Classification – If a G/L Account Classification is selected, any account with that specific classification will be available at the Bank Deposit screen.
- Print Location Heading on Checks – Select this option only if the company name is not preprinted on the check form that is used for Accounts Payable checks and Quick Checks.
- Default Quick Check Printer – Select from the list of installed printers where the Quick Checks are to be printed.
- Top Margin Adjustment – The checks default to a setting of 400. This number may be changed as necessary. Changing this by 25 will move the printing approximately 1/4 inch. If printing needs moved down, increase the margin number. If printing needs moved up, decrease the number.
- Last Memo Check # – This tracks the last memo check number used when paying bills.
- G/L Account – Double-click in this column to select the general ledger account for the standard disbursement and payroll checking accounts (they are often the same account but both lines must be filled out with a valid G/L account). Any additional checking accounts should be listed under Checking 1, Checking 2, etc.
- Last Check Used – This number is maintained by the computer as checks are written throughout the system.
- Note: The ACH information should be entered on the first occurrence in the checking accounts grid. It will then be copied to any subsequent lines within the grid.
- Last ACH# – This tracks the last ACH number used when paying bills.
- Dest ACH Route# – This is destination ACH routing number used in the ACH file.
- Originator ID – For the AFT ACH File Type, enter the originator ID here.
- Destination Data Centre – For the AFT ACH File Type, enter destination data centre.
- Originator Name – For the AFT ACH File Type, enter the originator name.
- Institutional ID Number for Returns – For the AFT ACH File Type, enter the institutional ID number.
- Account Number for Returns – For the AFT ACH File Type, enter the account number.
- Customer Short Name – For the AFT ACH File Type, enter the customer name to be included in the file. This information is also used with Format 2 for the A/P Check File Format.
- Branch Transit# – For the AFT ACH File Type, enter the 5-digit Branch Transit number for BMO. This information is also used with Format 2 for the A/P Check File Format.
- Bank Account# – For the AFT ACH File Type, enter the 7-digit bank account number for BMO. This information is also used with Format 2 for the A/P Check File Format
- Dest Bank Name – This is the destination bank name for the ACH file.
- Orig ACH Route# – This is the originating ACH Routing number for the ACH file.
- Orig Bank Name – Enter the originating bank name for the ACH file.
- Company ID – The Company ID, as required by the bank for ACH, is entered here. If using Positive Pay Format 7, and an ACH File Type other than AFT, enter the Customer Short Name.
- Company ACH Route# – Enter the Company ACH routing number, as required for the ACH file. If using Positive Pay Format 7, and an ACH File Type other than AFT, enter the 5-digit Branch Transit #.
- Company Bank Acct# – Enter the company bank account number for the ACH file. If using Positive Pay Format 7, and an ACH File Type other than AFT, enter the 7-digit Bank Account #.
- G/L Account Classifications – Used to group G/L accounts, Classifications may be used to easily filter on some of the G/L reports and at any general ledger Account Selection screen. The number of classifications that may be established is unlimited.
- G/L Account Attributes – Attributes may be used to cross reference to other systems. Additionally, Values can be set on the Attributes by selecting Setup Values. When setting the Value on an Attribute, it will be required to pick from a specific Attribute value already in the drop-down.
- Save Checking Account Info – Selecting this saves the routing numbers and bank information in the grid.
- ACH File Type – Select Standard, Royal Bank of Canada, AFT, CIBC (Canadian Imperial Bank of Canada), BOM/RBC Express (Bank of Montreal & Royal Bank of Canada), or AFT CPA-005 for the file type to be created for A/R and A/P ACH payments.
- A/R ACH Setup – Banking information to be included in the ACH file must be completed in this area prior to creating an ACH file.
- ACH Destination ABA Routing # – Enter the Federal Reserve Bank’s routing number that the processing bank reports.
- ACH Destination Name – Federal Reserve Bank’s name that the processing bank reports is entered here.
- Originating Bank ABA Routing # – Enter the routing number of the processing bank.
- Originating Bank Name – Enter the name of the bank processing the file.
- Company ID# (FEIN#) – Enter the company’s Federal Employer Identification Number (FEIN).
- Company Bank ABA Routing # – This is the routing number of the bank where the net wages are withdrawn.
- Company Bank Acct # – The bank account number where the net wages are withdrawn is entered here.
- ODFI ABA Routing # – Enter the trace number from the bank if it is different from the Originating Bank ABA Routing Number. This should only be used at the processing bank’s request.
- Pay From Company Savings Account – This notes on the ACH file that the net wages are withdrawn from a company savings account.
- Do Not Create Offsetting Record – Some banks do not want the offsetting record included in the ACH file. This should only be used at the processing bank’s request.
Payroll
The payroll preferences are vital to the successful running of payroll. Pay and Deduction categories must be defined and can also be cross referenced with corresponding default general ledger posting accounts. When adding new employees, these settings will be the default G/L posting accounts but may be edited on the employee file to individualize the posting.
In addition, Deduction categories exempt from any of the standard government taxes must be noted as such.

- Pay – This will list all the separate Pay Categories to be used. Double-click in the Default G/L Account column to set the standard G/L posting accounts. The posting of any Pay Category can be individualized by editing the employee at File / Open / Employee on the Pay tab. Changing any posting account here after the employees are entered will necessitate editing each affected employee to reset the corresponding posting account. If a Pay Category should be deleted, select the Delete option for that line item and choose Save. Agvance confirms there has been no activity with that category. If there has been activity in the current data, the delete is not allowed. Only one Pay Category and one Voluntary Deduction may be deleted at a time.
- Voluntary Deductions – This lists all the deductions except government tax deductions. Any deduction that is exempt from government taxes should have a checkmark in the appropriate column. Double-click in the Default G/L Acct field to set the standard G/L posting accounts. The posting of any Deduction Category may be individualized by editing at the Employee's Deductions tab. Changing any posting account here after the employees are entered will necessitate editing each affected employee to reset the corresponding posting account. If a Deduction Category should be deleted, select the Delete option for that line item and choose Save. Agvance confirms there has been no activity on that category. If there has been activity in the current data, the delete is not allowed. Only one Pay Category and one Voluntary Deduction may be deleted at a time.
Important: The tax shelter status should not be changed during the payroll year. If an existing deduction’s exempt status changes, add a new deduction with the appropriate exempt status marked, leaving the old deduction “as is.” Changing a status mid-payroll year can have serious W-2 consequences. - Employee Classifications – Used to group employees, classifications can be set as needed. Examples of common employee classifications are: Full Time, Part Time, Eligible for Benefits, 401(k) Participant, etc. Many payroll reports can be filtered by Employee Classifications.
- Employee Attributes – Attributes can be used to cross reference employee files to other systems. Additionally, Values can be set on the Attributes by selecting Setup Values. When setting the Value on an Attribute, it will be required to pick from a specific Attribute value already in the drop-down.
- Print SSN on Checks – This option allows the last four digits of the employee social security number to be printed on the paycheck stub.
- Batch Print – With this option selected, paychecks won’t print as they are processed. To batch print after the paychecks are processed, go to Payroll / Batch Print Checks to print a range of checks. With this option deselected, each check prints as it is processed.
- Suppress Printing Rate on Pay Check – Select to print the pay rate on the paycheck stub.
- Print Location Heading on Checks – Check this option only if the company name is not preprinted on the check form.
- Print Attendance on Checks – If the Attendance module is used to track available time off, the balances of the various categories may optionally print on the stub of the paycheck. Select the categories to be printed.
- Payroll Check Printer – Indicate the printer where payroll checks will print.
- Top Margin Adjustment – The checks default to a setting of 400. This number may be changed as necessary. Changing this by 25 will move the printing approximately 1/4 inch. If printing needs moved down, increase the margin number. If printing needs moved up, decrease the number.
- ACH Check Printer – Specify the printer where ACH checks will print. This should be a tray that contains white paper.
- Use Job Activity – The optional Job Activity function allows the Pay Categories to be further broken down. Often this tracking is instigated from Worker's Compensation reporting when there are several employees whose job tasks span multiple worker's comp categories. Job Activity may also be used to disburse wages to multiple general ledger accounts. To add a Job Activity to the grid, select Add Row.
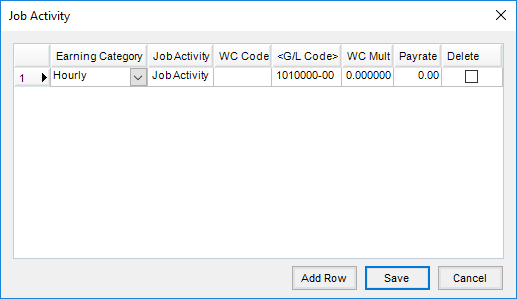
- Earning Category – Choose from the Pay Categories defined on the Preferences / Payroll screen. This is for subtotaling on the check stub and employee reports.
- Job Activity – Key in a description of the Job Activity using up to 10 characters. This description displays for time cards and processing hourly pay but does not print on the paycheck stub.
- WC Code – The Workers Comp code for each Job Activity task may be entered. This code is user-defined but could be the code supplied by the worker’s comp insurance provider.
- G/L Code – General ledger posting is controlled by the account entered here. There is no employee-level override when Job Activity is used.
- WC Mult – The worker’s comp multiplier given by the provider may be entered for each activity.
- Pay Rate – The pay rate may optionally be entered for this activity. There is no employee-level override for this rate. If no pay rate is entered for the Job Activity, the rate defaults from the employee file for the appropriate Earning Category when payroll is processed .
- Delete – To delete a row from the Job Activity grid, select this option and choose Save. Checking occurs to verify the Job Activity has not been used in the current data. If it has been used, the delete is not allowed.

