The Passport Interface is C-store management software from Gilbarco Veeder-Root. Its primary purpose is convenience store management, with or without fuel. It is not considered a fleet fueling system. Agvance interfaces with Passport to create Invoices from a Passport XML file that is automatically created when a Passport shift is closed. Passport is a PCI compliant solution with which Gilbarco intends to replace their old G-Site software. It is also intended to be a successor to Gasboy CFN Site III.
The Agvance Passport Interface is found at Accounting / Transfers / Import / Gilbarco Passport Invoices. Each menu option is explained below to assist in the setup and use of the Gilbarco Passport Interface.
Passport version 22 and above will no longer have access to C or D for map drives.
Setup
Import
Go to the Import menu to display the Passport Import window.

- Location – Select the Location where Invoices should post.
- Look up Customer using – Select the method for Agvance to use to find the customers.
- Attribute – Looks at the customer attributes for the customer Passport Account Number to determine which Agvance customer to use.
- Local Account setup – Looks at the Manage Local Accounts area for the customer Passport Account ID to determine which Agvance customer to use. Indicate the Site ID from the drop-down.
- Customer/Alt. Customer
- Attribute – When using the Attribute method, at least one Attribute must be set up to hold the Passport Account ID. If accepting both card-based (using the local account card) and face-based (not using the local account card) company credit, there must be two Attributes because face-based payments include an extra digit after the Account Number. Account IDs should have no leading zeros.
Note: Customer Attributes may be set up by selecting Customer Attributes at Hub / Setup / Company Preferences on the Customer tab. After the Attribute is established, the customer’s Passport Account ID may be entered for the Attribute by selecting Attributes on the Customer Profile found when adding or editing a customer at Accounting / File / Open / Customer. The Attribute information is maintained in Agvance and cannot be sent to the Passport system. - Local Account Setup – When using the Local Account Setup method, the Passport Account ID may be set up for each site at Local Accounts / Manage Local Accounts. Setting up customers in this area allows information to be sent in a file to the Passport system. It also allows customer information to be easily maintained and resent to the Passport system as needed. If accepting both card-based and face-based company credit, the customer must be set up for each. The appropriate F for face-based and C for card-based must be selected on the corresponding line for each account. When using the Local Account Setup, the appropriate Passport Site ID must be selected. These IDs are set up under Local Accounts / Setup Site Defaults.
Note: It is recommended to add 900 to the face-based Account Number as leading characters on the customer’s Passport Account ID or to place 99 at the end of the Account ID.
- Attribute – When using the Attribute method, at least one Attribute must be set up to hold the Passport Account ID. If accepting both card-based (using the local account card) and face-based (not using the local account card) company credit, there must be two Attributes because face-based payments include an extra digit after the Account Number. Account IDs should have no leading zeros.
- Product – Product Attributes may be set up for product cross referencing for the POS/Fuel code and Merchandise code. Optional attributes are Alt. POS/Fuel code, Motor Fuel Schedule, Tax/Fee Type, and Account ID. Attributes are normally used when cross referencing to more general products (other than fuel) instead of product-specific. Set up Product Attributes using the Product Attributes button at Hub / Setup / Company Preferences on the Product tab. After the Attribute is established, the product’s Passport Site ID may be entered in the Attribute Value column using the Attributes button on the Product Profile found at Accounting / File / Open / Product.
- The Passport Interface is designed to allow individuals to determine how specifically to track sales. Agvance products representing an entire department should have only the Merchandise code attribute entered. Agvance products representing a specific item, such as fuel, should have only the POS/Fuel code attribute entered. When a sale is imported, Agvance first looks up the POS/Fuel code from the file and if not found will look up the Merchandise code.
Note: No product should have both a POS/Fuel code and Merchandise code entered. - If tracking individual specific products is desired, the Bar Code ID (Product UPC) set on the product file may be used instead of Attributes. Place the POS/Fuel code for fuel products in the Bar Code ID field. When tracking by Bar Code ID, the Merchandise code needs to be set on the Inventory Department under a Cross Reference.
- The Passport Interface is designed to allow individuals to determine how specifically to track sales. Agvance products representing an entire department should have only the Merchandise code attribute entered. Agvance products representing a specific item, such as fuel, should have only the POS/Fuel code attribute entered. When a sale is imported, Agvance first looks up the POS/Fuel code from the file and if not found will look up the Merchandise code.
- POS/Fuel code – A POS/Fuel code represents an individual product. Most companies only track their C-store sales in Agvance at the Merchandise code level, with one Agvance product representing a Merchandise code (ex. Beverages, Grocery, Deli, etc.). Some Passport sale transactions only specify the Merchandise code. The exception is fuel, which is tracked at the individual product level. In Passport, fuel products have two IDs - a Grade ID stored on the pump itself and a Network ID stored on the Passport server. This Network ID is a unique identifier for fuel nationwide for tax purposes, and it displays on the customer's credit card statement. For example, Wintermaster fuel is Grade 01 at the pump, and its Network ID is 014. Therefore, the POS/Fuel code Attribute value is 014. The Gilbarco tech provides the Network ID.
- Alt. POS/Fuel code – An Alt. POS/Fuel code must be entered for fuel. When the station's Passport network is functional, the pump looks up the fuel's Network ID from the Passport server (through its connection to the register) and saves it with the sale event as the Product code. If the connection between the pump and register is lost, the pump is unable look up the Network code. Instead, the Grade ID is saved with the transaction. Therefore, the Alt. POS/Fuel code Attribute value is Grade 01 using the example above. In some cases, fuel Grade IDs may be set up ahead of time, but if there are connection issues, they can be set up later. A Fuel Grades Report may be printed from the Passport system. Consult the Gilbarco tech for instructions on generating this report.
- Merchandise code – A Merchandise code in Passport is a grouping of products similar to an Agvance Inventory Department. If transactions are tracked by Merchandise code, the Passport Merchandise code should be set in the designated Attribute.
- Motor Fuel Schedule and Tax/Fee Type – These attributes hold the Motor Fuel Schedule to which the product belongs and the Tax/Fee Type. They are only required if reporting motor fuel tax on sales. The Tax/Fee Type is case sensitive. The Motor Fuel Schedule and Tax/Fee Type should match the schedules set up at Motor Fuel / Setup / General Info.
- Account ID – Passport has transaction types called Paid In and Paid Out. This is for money taken out of the drawer, such as to pay the person who brings the newspapers or put into the drawer for things like ATM rent. These transactions have only a dollar amount and an Account Number. Some only use the Paid In for money paid against a customer’s account and do not use the Paid Out at all. Instead, they set up Merchandise codes for the different types of Paid Ins and Paid Outs and handle them like a regular sale. If doing true Paid In and Paid Out Passport transactions, the Account Number may be cross referenced with an Agvance product using the Account ID Attribute.
- Patronage ID – For cash Patronage transactions where the sale needs to be assigned to a specific customer (not the generic cash customer), select Local Account ID or the appropriate customer Attribute for Agvance to find the customer to assign the sale.
- File to import – Browse to the location of the Passport file to be imported and select it.
- Dummy Customer – Choose the customer for all sales not associated with a local account.
- Drive-Off Product – Choose the product to offset the fuel line item on the Invoice when a drive-off occurs.
- Tax Tolerance – Enter the dollar amount of the acceptable difference between the sales tax amount in the Passport file and the sales tax amount calculated in Agvance based on the sales tax rules. Any difference equal or less than the Tax Tolerance amount is pushed to the first sales taxable line item on the Invoice created.
Note: Differences in sales tax may happen due to how Passport calculates sales tax versus how Agvance calculates it. In Agvance, sales tax is calculated on each line item on an Invoice transaction that is eligible for sales tax. This allows more flexibility to accommodate the variety of sales tax rules that apply. These amounts are added together to determine the total sales tax for that transaction. Passport calculates sales tax on the overall taxable dollars on a transaction. - Invoice Date – Choose the option to use for the Invoice Date on the Invoices created. Choose the Event Start Date, Business Date, or select a specific date to use.
Note: The Event Start Date and Business Date are held in the Passport file.
If using the Agvance Motor Fuel module for state reporting, it is recommended to enter the Origin City and State and Destination City and State. This information is populated on the Invoices for reporting purposes. Questions on these items should be directed to the agency to which motor fuel is reported.
- Origin City/State – Enter the appropriate city and state for motor fuel reporting. This may or may not be the same as the Destination City and State.
- Destination City/State – Enter the appropriate city and state for motor fuel reporting. This may or may not be the same as the Origin City and State.
- Mode of transportation – Select the appropriate mode of transportation.
- Default Net Gallons to the Invoice quantity – If selected, the quantity on the Invoice is set to the net gallons.
- Default Gross gallons to the invoice quantity – If selected, the quantity on the Invoice is set to the gross gallons.
- Default Carrier and FEIN – Optionally select to default a carrier and FEIN (set up in the Motor Fuel module), and then choose the carrier/FEIN from the drop-down. This carrier defaults into the Motor Fuel details on the Invoices in Agvance.
- Default Salesperson uses hierarchy – This import honors the multi-department default Salesperson setup when importing these Invoices into Agvance. It will use the Grower if one exists and the department-level Salespeople for the Invoice by the first Product. This does not use Ship To information as that does not exist on the Invoices created. The Default Salesperson uses hierarchy option must be checked to use the multiple Salesperson rules.
Each Tender Code and Tender Subcode combination expected to be used is entered in the grid and associated with an Agvance product. The product should be set up in a sales posting override Inventory Department with the Sales Account pointed to the General Ledger Account to which the Tender type should post. Enter the Tender Code and Tender Subcode with the same capitalization and spacing as in the Passport system.
If unsure of the Tender Codes to use, check with the Gilbarco technician. A Tender Code Report is available to print from the Passport system. The Gilbarco tech can demonstrate how to generate this report.
When the Exclude column is selected on the line item in the grid, that Tender Code is omitted from the import file.
Import
- Invoice Due Date – A date other than the current system date must be selected.
- Terms Code – Select a Terms Code from the drop-down list to have a specific payment term saved with the Invoices created. The selected code must be set up with a Payment Schedule to set the Due Date on the Invoices created. Terms Codes are set up at Hub / Setup / Payment Terms.
- Review Customers – If selected, a Review Customers window displays, allowing each transaction to be reviewed and different customers to be selected as needed for any transaction in the Passport file. The Passport Transaction Number, Transaction Total, Agvance Customer ID, and Agvance Customer Name display to assist with determining if the customer needs changed. If a different customer is selected, the Invoice created includes the newly selected customer. This is helpful if the wrong customer was selected when entering the sale in Passport.
- Apply Bookings – If selected, applicable Bookings are consumed as the Invoices are created on import. If any Booking conflict exists resulting in a View status on the line item, the Invoice is displayed for necessary Booking selections to be made.
- Save – The Passport Import window settings are saved for the selected Location.
- Import – Select Import to start the import. The Passport Import Pre Import report displays as a preview. This report displays totals by Products and Tender Codes and includes Sales Tax dollars in the Local Account Sales recap The report may be printed from the Preview window.
Note: If any errors are found during the import process, the Agvance Passport Import Errors report is printed for review, and no import occurs at that point. Errors may include things such as invalid POS/Fuel codes or Merchandise codes or invalid Account IDs. The option is available to choose whether or not to continue with the import.

After the import is complete, the Passport Import Post Import report displays for review and/or printing. The last pages of this report include totals by Product and Tender Codes as well as a recap of the Local Account Sales. Sales Tax dollars are included in the total and grand total Sales for each Customer. The Transaction ID on the report is the control number on the resulting Agvance Invoice.

Posting Notes
- Cash Sales – Cash sales create an Invoice to the Dummy Customer selected. The Invoice will include one line item for each Passport sale line item. Agvance searches for the POS/Fuel code in the designated cross reference set on the Passport Import window for each line item. If no match is found, it searches the Merchandise codes in the designated cross reference selected on the Passport Import window. The designated cross reference may be a Product Attribute or the Product Bar Code ID (Product UPC). Sales tax is calculated and added to the Invoice in the Sales Tax area. Tender and Change display as separate offsetting line items. The total due on the Invoice will be $0.00.
- Local Account Sales – Local Account Sales create an Invoice to the Agvance customer with whom the account is cross referenced. The Invoice contains product line items and sales tax in the Sales Tax area of the Invoice but no tender line items because no payment was taken. Local Account Sales are charges to the customer’s account.
- Paid Ins – Paid In transactions are typically payments against a customer’s local account but could also be any other money taken into the drawer not associated with a sale, such as a rent payment from a bank that has an ATM in the store. Paid In transactions have tender line items. A Paid In against a customer’s local account is a credit Invoice to that customer. Paid In transactions not associated with a local account will be $0.00 Invoices to the Dummy Customer and contain line items for the Agvance product cross referenced with the Passport Paid In Account ID and a line item for the tender.
- Paid Outs – Paid Out type transactions are any payment of money out of the drawer not associated with a sale, such as paying the person who brings the newspapers. Paid Out Invoices have tender line items and a line item for the Agvance product cross referenced with the Passport Paid Out Account ID.
Note: Paid Outs are typically handled as sales for generic Passport merchant codes instead of as a true Passport Paid Out transaction. - Drive Off – An Invoice is created in Agvance to the Dummy Customer designated on the Passport Import window for Drive Off transactions. The fuel product pumped is included on the Invoice for the actual quantity and dollars. The Drive Off Product designated on the Passport Import window is also included in the same Invoice with offsetting amounts, so the Invoice total nets to zero. Normal Agvance posting rules for the save of an Invoice are followed.
- Setup – Navigate to Setup / Product Defaults. This setup is optional and is only necessary if product information will be sent from Agvance to Passport. These defaults are used when exporting products from Agvance if specific information has not been set up at Accounting / File / Open / Products on the Interfaces tab.
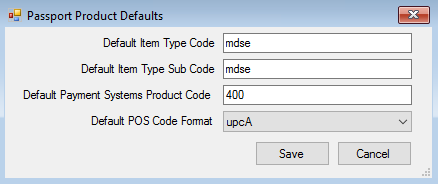 Enter the appropriate code for the Default Item Type Code, Default Item Type Sub Code, and Default Payment Systems Product Code. These codes are obtained from the Passport system. Select the appropriate Default POS Code Format from the drop-down.
 Enter the appropriate code for the Default Item Type Code, Default Item Type Sub Code, and Default Payment Systems Product Code. These codes are obtained from the Passport system. Select the appropriate Default POS Code Format from the drop-down.
Information entered in the Passport area on the Interfaces tab of the Product file takes priority over the information on the Passport Product Defaults window.

- POS Code Format – Select the applicable format. This is usually set to upcA, but it is not required.
- Item Type Code – This may be used for specific types of items such as carwash or fees.
- Item Type Sub Code – This may be used for specific types of items, such as carwash or fees.
- Payment Systems Product Code – Enter the appropriate code.
- Sales Restrict Code – This controls the warnings in Passport for the 18 and under and 21 and under sales. Each Product requiring a warning must have a four-digit code entered, which should be obtained from the Passport tech.
- Selling Units – Enter a unit of measure if the Passport unit of measure is different than the Agvance billing unit of measure.
- Tax Strategy ID – This controls the Sales Taxable checkbox when a department in Passport is set to a different taxable setting than what the product should be. If needed, a Non-Taxable Code or Taxable Code should be entered.
- Non-Taxable Code – This code is usually 99, but other codes may be entered if required by Passport.
- Taxable Code – This code is usually 101, but other codes may be entered if required by Passport.
- Example: If the product is going to a department marked as Taxable in Passport, but the specific product is a non-taxable product, enter the Tax Strategy ID. The Non-Taxable Code is 99. This sets the product to Non-Taxable in Passport, even though it is in a taxable department. If the opposite is true, and the product is taxable and is going into a non-taxable department, set the Tax Strategy ID to 101.
- Max Extended Amount – This is the maximum extended dollar amount that can be charged for this item.
- Price Required – If set to Yes, the cashier is required to enter a price for this item.
- Food Stampable – This determines if food stamps may be accepted for this item.
- Discountable – This determines if the item is eligible for discounts.
- Quantity Allowed – This determines if the cashier is allowed to enter a Quantity.
- Quantity Required – This determines if the Quantity is required.
Export Products
The Export Products menu option in Passport creates a file of products in Agvance. Only products from the departments that are selected are included in the export file.

- Location – Select the Agvance Location to determine the Inventory Departments that load in the grid.
- Merchandise Code – Choose the appropriate department cross reference code.
- Price Level to Export Select the Price to be exported.
- Cost to Export – Select a cost to be exported if desired.
- Product ID Source – Choose the Bar Code ID (from the Product file) or any of the available Product Attributes in the drop-down to identify the products in the export file.
- Export Grid – Choose the departments to be exported by selecting the Export checkbox. Multiple departments may be selected.
- Export Path – Select the icon on the right to browse to the file path where the file should be saved.
- Export Active Products Only – Select this option if only active products should be included in the export file.
Local Accounts
Setup Site Defaults
The information entered in this area for a Passport Site ID defaults for all customers in the Manage Local Accounts area but may be overwritten as needed. Obtain the card format from the card provider to help determine these site defaults.
Note: Local Account file exports must have an xml extension and be saved in Passport Drive:\ETInBox. The file will be renamed Local Account Maintenance.xml and moved to the pending file by Passport. The file will be imported immediately, which can affect till performance, so it should be done during slow periods. Failure to send the file can result in account credit holds and failure to update customer balances.

- Passport Site ID – This is a user defined ID that determines the site if multiple sites are being used. This should match the Site ID set in Passport.
- Site Description – This is a user defined description. It can be a more descriptive name for the Passport Site ID.
- Print Current Balance on Cust Receipt – This determines if the customer’s current balance is printed on the receipt generated through Passport.
Note: This balance will not necessarily match the customer’s Accounts Receivable balance in Agvance at any given time as not all transactions in Passport may have been imported into Agvance, and not all transactions in Agvance are in Passport.
The information for the following items must be obtained from the local card provider.
- Floor Limit – This is the minimum transaction amount allowed.
- Card Track – Enter the value assigned by Passport.
- Issuer Number Position – Enter the value assigned by Passport.
- Card Issuer Number – This issuer number is specific to the company.
- Card Number Position – This is the number of the position where the card number starts in the Card Track data.
- Card Number Range Start – Local accounts may be assigned a range of cards. This is the starting number for that range. Consult the local card provider for this starting number if unknown. Agvance prepends the Local Account ID to the beginning of this starting number.
- Card Number Range End – Local accounts may be assigned a range of cards. This is the ending number for that range. Consult the local card provider for this ending number if unknown. Agvance prepends the Local Account ID to the beginning of this ending number.
- Exp Date Position – Enter the expiration date position.
- Exp Date Format – Enter the correct format for the expiration date (i.e., MMYY).
- Validate Exp Date – Enter True or False.
- For Fuel Only – Enter True if only fuel sales are authorized for this site. Otherwise, enter False.
- Fuel Only Position – Enter the value determined by Passport.
- Fuel Only code – Enter the value determined by Passport.
- Allow Fuel Discounts – Enter True or False to determine if discounts are allowed.
- Crind Auth Amount – This is the maximum dollar amount for a sale that can happen at the pump. This is normally determined by the company.
- Hold Limit – This is the default credit limit for a customer. If there is a credit limit set on the Credit tab of the customer file and a Date Opened is present, that credit limit amount is used instead of this default for the customer.
- Warning Limit – When a customer’s balance reaches the limit set, a warning is triggered when transactions are entered. If the Credit Limit and Date Opened are set in the customer file, the warning limit is calculated based on the preference in the Credit Management area of the A/R tab at Accounting / Setup / Preferences.
Manage Local Accounts
Manage and Export Local Accounts
As discussed in the Import section, customer accounts may be cross referenced with Passport using Customer Attributes or Local Accounts. If Local Accounts are used, customer accounts are entered and maintained in this area.

Most of the columns in the grid are populated from the information in the customer’s file in Agvance Accounting or from the information set on the Setup Site Defaults window. The Site ID, Local Account ID, Account Type, Legacy Account ID, and information in other selected columns may be manually changed.
- Filters – Setting the filters determines what information loads into the grid when Apply is selected.
- Passport Site ID – Select the Site ID to display customers from only one site.
- Agvance ID – There are three options from which to choose.
- All Records – This loads the grid with all customers regardless if they have been cross referenced with an Agvance Customer ID.
- Records With No Agvance ID – This loads the grid with only customers who may have been imported from another system but have not yet been referenced to a specific Agvance Customer ID.
- Records With an Agvance ID – This displays only customers who have an Agvance Customer ID referenced.
- Legacy Account ID – This field can be utilized to populate a different card number from a local account number.
Example: Customer ID 009885 - Passport will ignore the leading zeros in the Local Account field so 9885 will be sent, but the Local Card Account is 0098850000, so 009885 will need entered in the Legacy Account ID field. - Include Period in Name – If selected, a period is added before the last name when exporting face-based accounts for customers. This does not change the format of card-based accounts in the file.
Note: Adding the period to face-based accounts in the file helps locate these accounts more easily when working in the Passport system. - Add Row – This adds a new row in the grid to set up a new local account for a customer.
- Tag All/Un-Tag All – This checks or unchecks the Export column for all rows in the grid to determine the customers to include in the export file. Rows may also be manually checked or unchecked.
- Save – The information in the grid is saved.
- Export File – For the first export file created, manually enter the path and file name to create the file. The Browse button may be used to browse to this path. For subsequent exports, this path and file name are remembered.
- Print Store Copy of Receipt – A store copy of receipts can be printed in the Passport system. If this is unchecked, it prevents receipts from printing. In most cases this should be checked when an export is created.
- Export – The export file is created in the designated export file path. The Passport Version in the export file created may need to be manually edited so it matches the version of Passport being used.
Note: Currently, Passport is unable to accept the information exported from Agvance.
Import Local Accounts
In some cases, an xml file of customer information can be generated by a company’s previous software if Passport was already being used. This file may be imported from the Import Local Accounts tab.

- Import File – Browse to the location of the customer xml file to select it.
- Passport Site ID – Select the Site ID to be associated with the customers being imported.
- Import – The selected customer file is imported.
After the file is successfully imported, these customers display on the Manage and Export Local Accounts tab for the selected site. These customers may then be associated with an Agvance customer on that tab.
Passport Notes
Installation
Passport is typically installed on a separate network for PCI Compliance purposes, so the computer pulling the Passport files may need two NICs. The setup of the Passport network and its interaction with the Agvance network must be handled by the Gilbarco tech working with the customer’s hardware tech. The location where the techs have determined to save the files must be accessible from the Agvance machine importing the files.
If an xml version must be specified in the Passport setup, version 3.4 is recommended.
Export File
The export files are sent to a shared folder on the Passport server. For the Agvance interface, the Combined PJR export should be used. This combines all transactions into a single file. An example of a valid file name is CPJR24062016123456.xml. The file name always begins with CPJR, followed by the day, month, and year and then six more characters unique to that file. This file is in xml format.
Note: The default PJR export creates one file per transaction. This file begins with PJR and cannot be imported into Agvance.
Passport only saves files from the past seven days. To keep an archived copy, the files should be copied to another location before being deleted.
Customer Setup
Agvance has the option to create an export file of customer data; however, the import of the file into the Passport system is not supported by Gilbarco. If the import into Passport fails, the Gilbarco tech may not be able to troubleshoot the issue, and customer setup may have to be completed manually in the Passport system.
When importing a customer file into Passport, a message displays stating all data will be overwritten. Per Kristin Mc Neill from Westmor Industries, it will not delete all the existing accounts. It will either add new customers if they do not already exist or overwrite the information on existing customers, based on their Local Account ID.
