Agvance offers the ability to add detailed seed-specific information to Products, as well as set up custom Lot Number data.
Prior to utilizing the Lot Number tools available in Agvance, it is recommended that the desired level of Lot Number tracking is determined and if necessary, Lot Number Validation is enabled.
- Information regarding the various levels of lot number tracking offered by Agvance can be be found here.
- Information regarding Lot Number Validation can be found here.
Seed / Lots Tab
The Seed/Lots tab found in the Product master file at File Folder / Products is a dedicated tab for seed management, designed to store individual Product's seed specific data and aid in Product selection.
The Seed/Lots tab consists of two sections. In the top half, seed information such as the Variety, Trait, Seed Size, and Crop Code are stored. Information in this section can be manually entered or, in some cases imported using Agvance Data Link.
The bottom half of the Seed/Lots tab contains an editable Lot Number grid that provides information such as Lot Number, Quantity, Inactive status, and Expire Date. Additional lot information, called Lot Attributes, can be created and added as a column to the grid.

Lot Attributes
Add custom columns to the Lot Number grid, found on the Seed/Lots tab of the Product master file. Optionally, Lot Attribute Values can be created and assigned to the Lot Attribute.

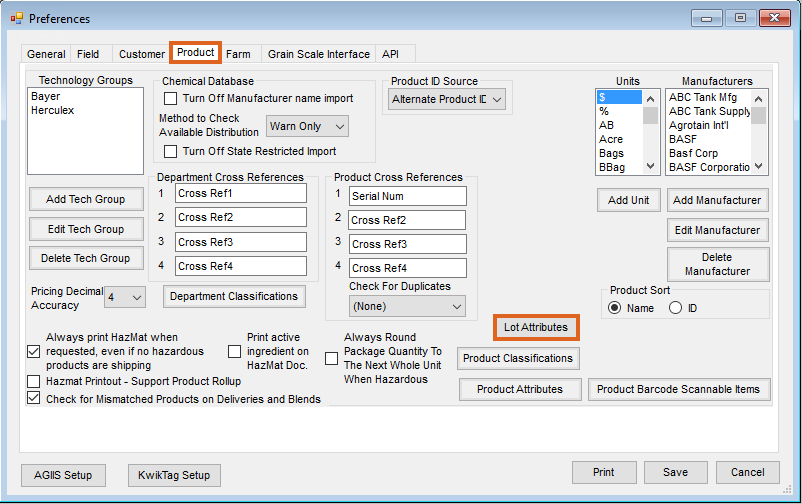
- In the Hub, navigate to Setup / Company Preferences. Select the Product tab and choose Lot Attributes.
- The Select a Product Lot Attribute window displays, choose Add.

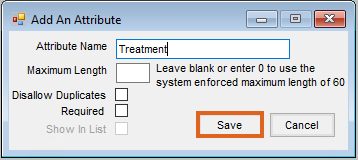
- On the Add an Attribute window, enter an Attribute Name. Select Save.
- The Attribute is displayed on the Select a Product Lot Attribute window. Choose Cancel to close the window or optionally, select Setup Values to create an Attribute Value for the Lot Attribute.
Note: Attribute Values can also be manually added to individual Products in the Seed/Lots tab of the Product master file.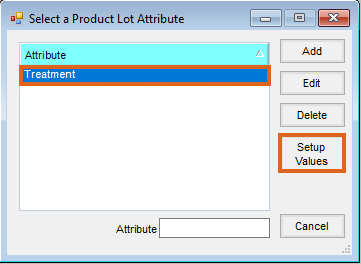
- The Attribute Value List window displays. Choose Add.
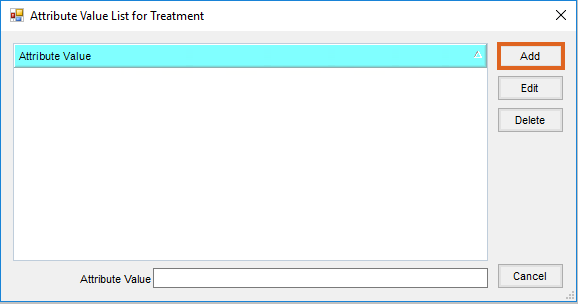
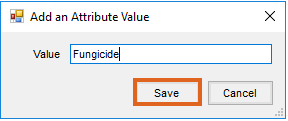
- On the Add an Attribute Value window, enter a Value and select Save.
- Select X on the Add an Attribute Value, Attribute Value List, and Select a Product Lot Attribute windows. Choose Save to update the Company Preferences.
- To view the newly created Lot Attribute and Attribute Value, navigate to File Folder / Products, highlight the desired Product, and select Edit.
- Choose the Seed / Lots tab. The Lot Attribute is displayed as a column in the Lot Number grid and the Attribute Value is available to select from the drop-down.
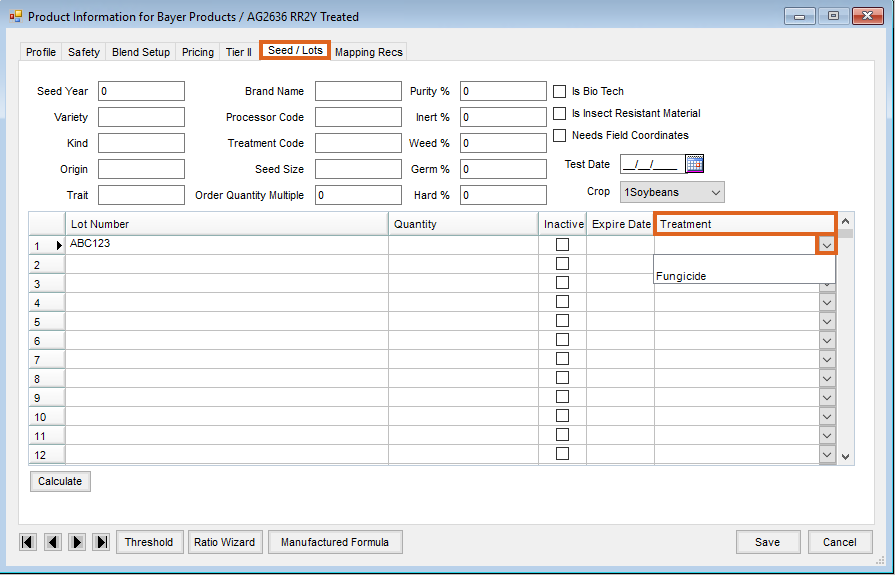
- Enter Lot Number information and select Save.


Product Selection Window
Once established, Lot Attributes and Attribute Values can be viewed on Product Selection windows that include the Lot # column in the shopping cart area.
- Within the Select Products window, choose the desired Product to add to the shopping cart.
- In the shopping cart, right-click on the Product line in the Lot # column. The Product Information by Lot Number window displays.

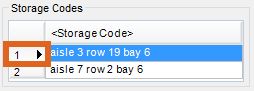
Storage Codes
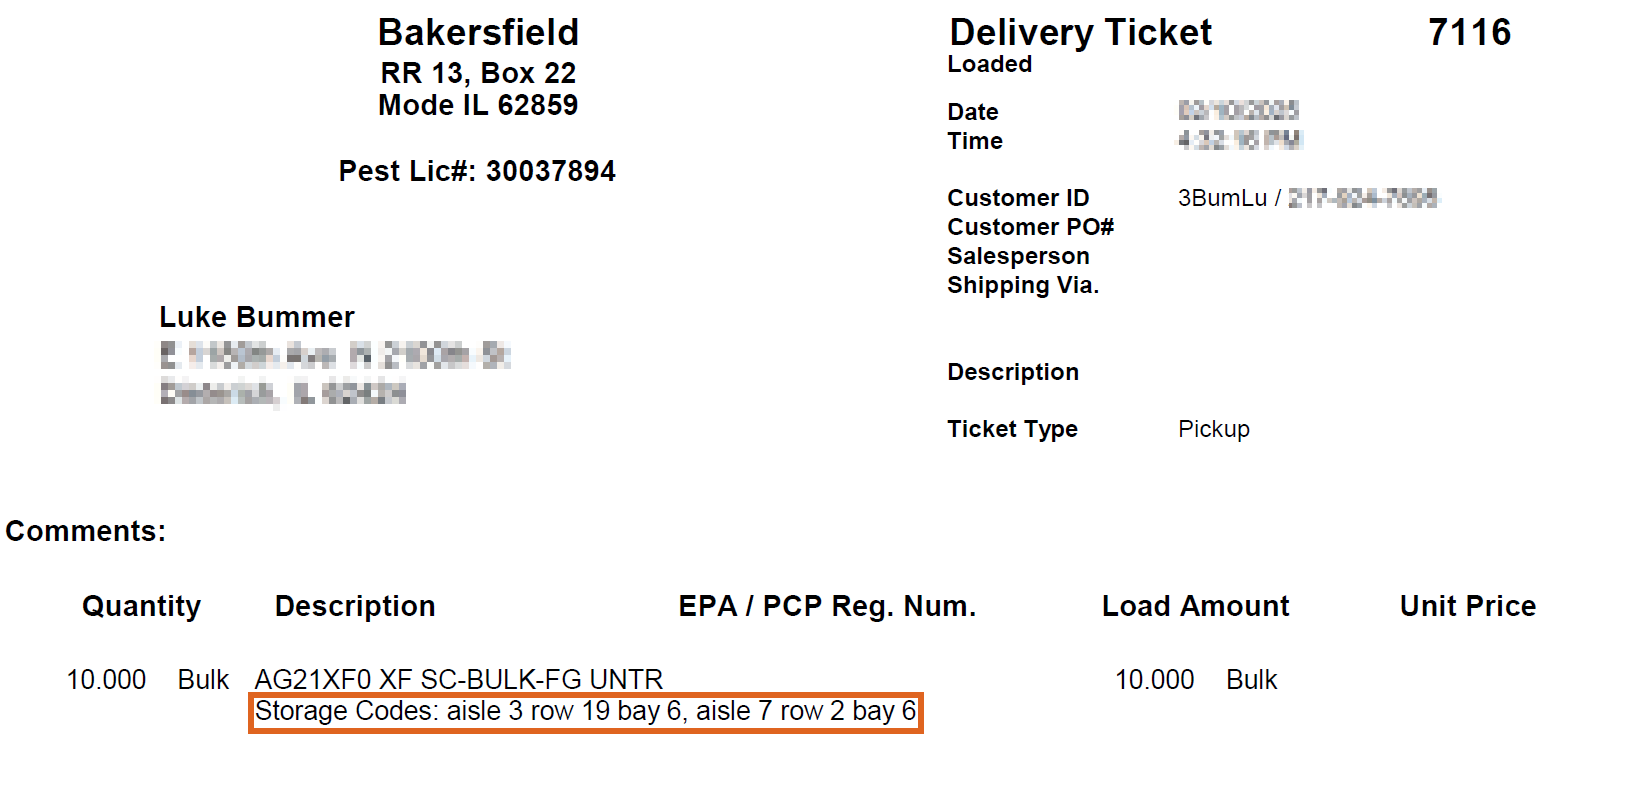
Storage Codes are used to identify the specific location of Products in a warehouse. The Storage Codes apply to Products individually and are not tracked per lot number. Additionally, Storage Codes do not track inventory.
- Navigate to File Folder / Products, select the desired Product, and choose Edit.
- On the Profile tab, double-click the Storage Code header to create a new line. Select in the new line and enter the storage location. Choose Save.
Note: Storage Codes can be up to 30 characters long and an unlimited number of codes can be added to a Product.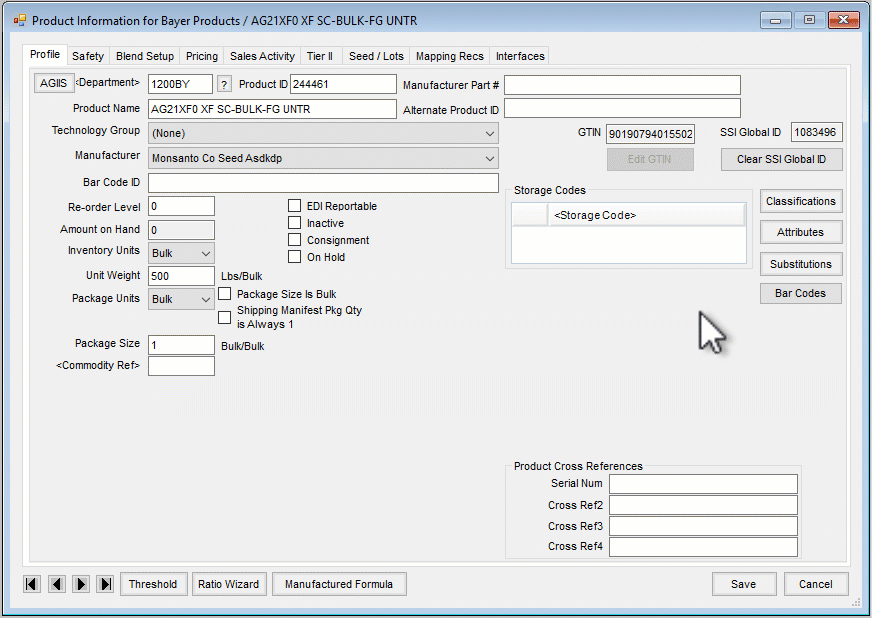
- Once established, Storage Codes are printed on transaction documents under the Product name.


Delete a Storage Code
- Navigate to File Folder / Products, select the desired Product, and choose Edit.
- In the Storage Code grid, select the row number to highlight the Storage Code and press Delete on the keyboard. Select Save.