It is recommended to display the List View and Map View using dual monitors as they work in conjunction with one another. Use the Filters menu or Search field to narrow down jobs and the Viewing menu to switch between Blend and Delivery Tickets.
Search Bar
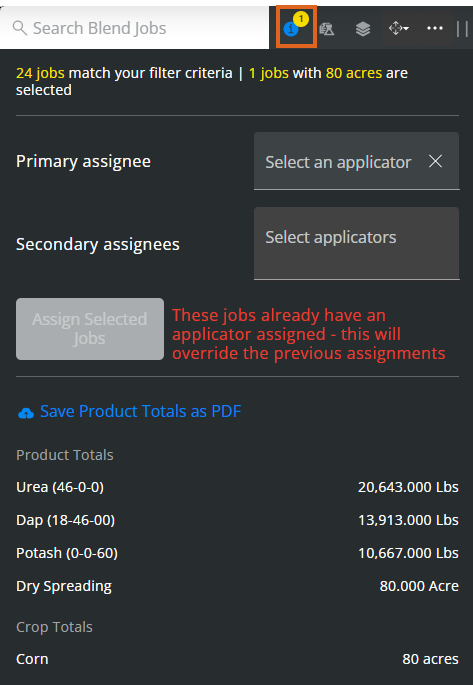
- More Information – This displays information for all selected jobs including Product Totals, Work Type Totals, and Crop Totals (if applicable). Primary and Secondary assignees can be indicated here for Blend Tickets. When assigning Secondary or Tender Drivers to multiple selected jobs, if all selected jobs already have the same Primary Applicator assigned, that Primary Applicator will automatically default in the assignment field. Select Save Product Totals as PDF to download totals as a PDF file.
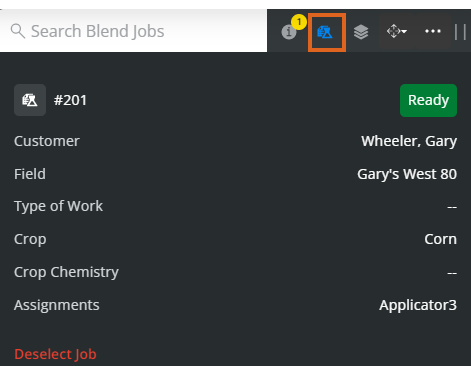
- Selected Job Information – View information related to the selected job(s).
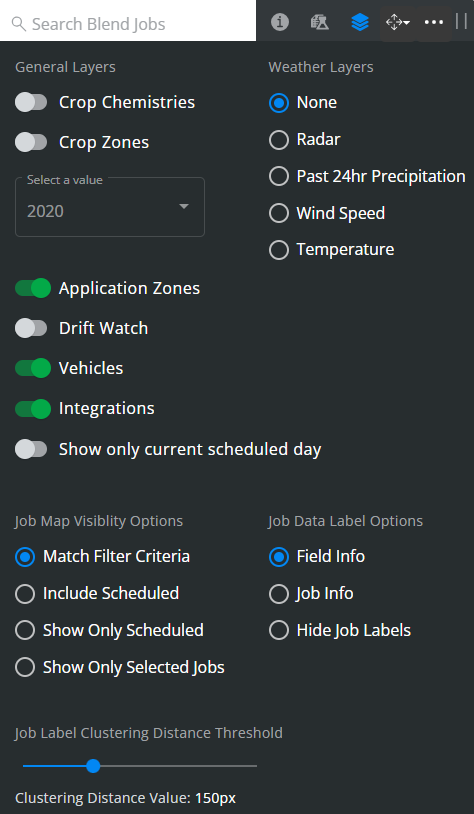
- Show Layers Panel – This area provides display options for General Layers, Global Layers, Job Map Visibility Options, Weather Layers, and Job Data Label Options. Use the Job Label Clustering Distance Threshold to determine the number of labels appearing on the map. Turning on the Integrations toggle shows Integration Devices turned on under Personalize on the General tab.
 When the Radar option is selected, a legend displays at the bottom of the map to give more information on the data displayed.
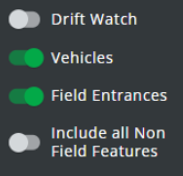
 Note: Turning on the Field Entrances toggle gives the option to Include all Non Field Features below.
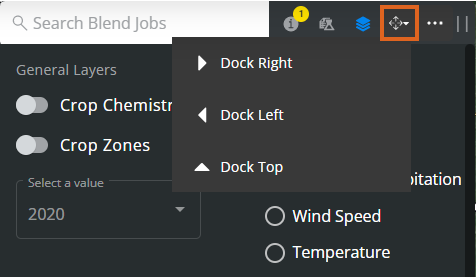
- Dock Search Bar – Dock the search bar to the right, left, or top of the screen.
- More Options Icon – Choose the Ellipsis to Deselect All, Set Jobs To (Ready, On Hold, or Completed), Export Documents, Generate Automated Blender File(s), Set Sell/Ship From, Manage Custom Tags, Send Files, Set Ship Via(s), or Set Product Set(s).
Note: When choosing the Sell From, Ship From, Product Set, and/or Ship Via, beginning to type filters the options available in the drop-down.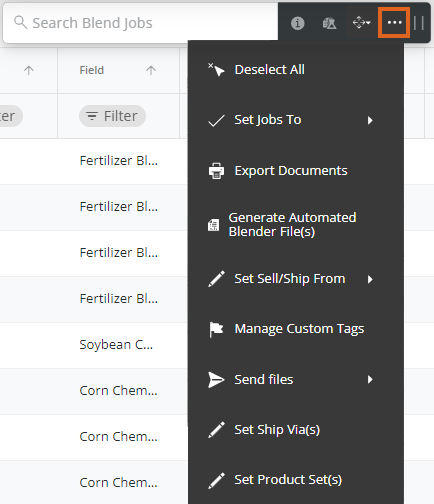
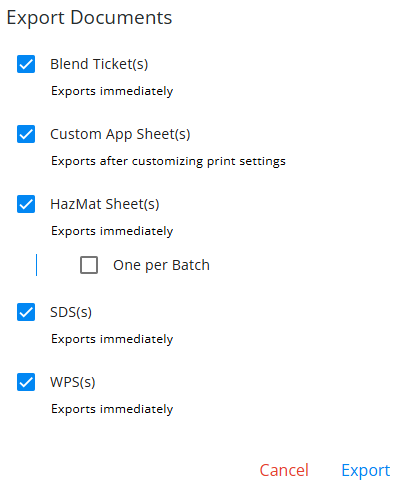
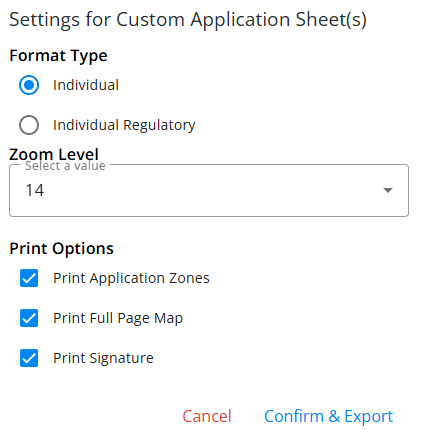
- Export Documents – With a job or jobs selected, choose Export Documents to export Blend Ticket(s), Custom App Sheet(s), HazMat Sheet(s), SDS(s), and/or WPS(s) as a PDF. If exporting Custom App Sheets, additional print setting options display to confirm before exporting. Jobs will display in the order they are selected.
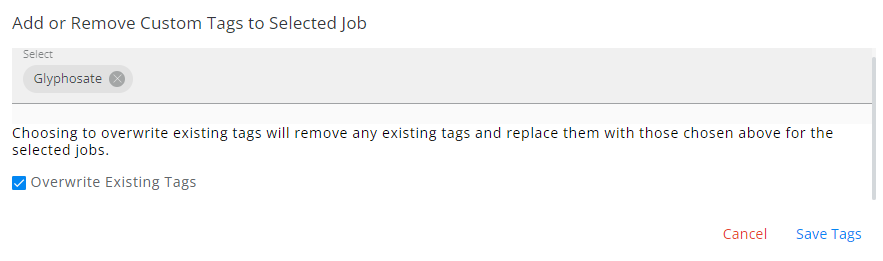
Note: An established Agrian link is required to export SDS and WPS documents. - Manage Custom Tags – Multiple jobs can have Custom Tags applied all at once by selecting the checkboxes for the appropriate jobs then selecting Manage Custom Tags from the Ellipsis in the search bar. Select a Custom Tag from the drop-down (scroll through the drop-down or start typing to search for Custom Tags already created in Company Settings). Checking the Overwrite Existing Tags option removes any existing tags and replaces with those chosen in the area above.
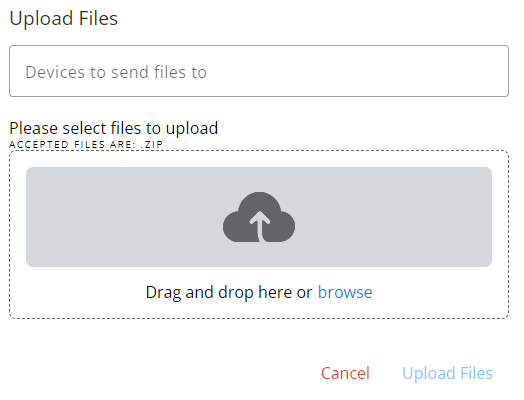
- Send Files – Choose to send VRT files to Slingshot or MyJohnDeere accounts from Agvance SKY Dispatch. Indicate the Device to send files to from the drop-down then drag and drop or select browse to locate the appropriate zip file.
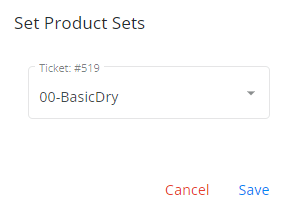
- Set Product Set(s) – The Set Product Sets window displays to choose the Product Set from a drop-down for the job(s) selected.
- Export Documents – With a job or jobs selected, choose Export Documents to export Blend Ticket(s), Custom App Sheet(s), HazMat Sheet(s), SDS(s), and/or WPS(s) as a PDF. If exporting Custom App Sheets, additional print setting options display to confirm before exporting. Jobs will display in the order they are selected.


 When the Radar option is selected, a legend displays at the bottom of the map to give more information on the data displayed.
 Note: Turning on the Field Entrances toggle gives the option to Include all Non Field Features below.


Map
The Map window displays real time updates of Applicator locations and job clusters. This information can be viewed in either Map or Satellite view.
The full Field boundary on the map can be displayed along with the Application Zone from Agvance SKY Mapping to help direct the Applicator to the Application Zone.

Turn on Application Zones on the Layers tab of the Search bar to enable this view.

Field boundary colors can be customized on the General tab in Company Settings.
Jobs can be selected either by selecting the job on the List View window or by using the mouse scroll wheel to zoom in on a field boundary. Selecting the field or Customer/Field label selects that job.
Selecting an area on the map and holding or right-clicking gives the ability to see current weather conditions for that precise location.

A message displays on the map informing the number of Blend Jobs with no geo-coded Fields.

Turn on the Vehicles option to view the progress of specific jobs. Applicator icons display to show location. After 6 hours of being inactive, the icon is removed. Breadcrumbs will display on the map.

Global Layers from Agvance SKY Mapping display on the map.

