To capture and add Buyer Signatures, access to Agvance SKY is required. For information on adding Seller Signatures, please see the following article - Using Seller Signatures with a Purchase Contract.
Setup
Each Agvance User authorized to electronically sign Grain Contracts must have a SKY Account. Signatures must first be set up in Agvance SKY.
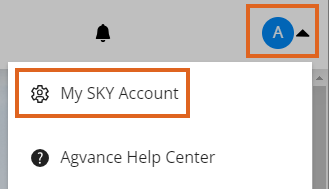
- On the Home page of Agvance SKY, select the User drop-down and choose My SKY Account.
- Select Add Signature.
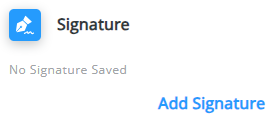
- Using a mouse or finger, sign by the X staying between the dotted lines.

- Use Undo or Clear All to erase. When satisfied with the signature, select Save.


In Agvance Grain, identify which Contracts to use with the buyer signature. To do this, go to the Purchases tab at Grain / Setup / Preferences. Select Electronic Signatures. The column headers list each Contract type.
- Use the checkboxes to indicate Contracts that will use the signature. After a box is checked, right-click and copy and paste to select all applicable Locations.
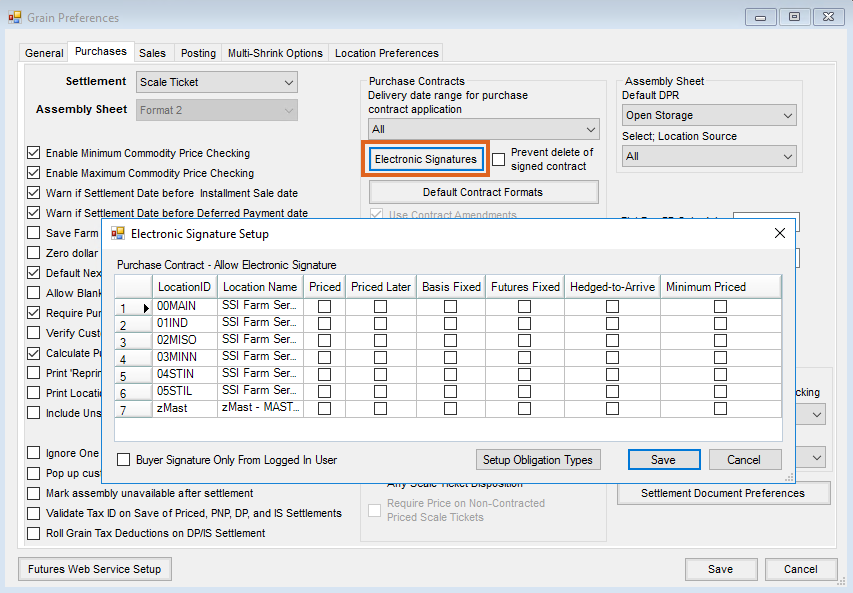
- To automatically apply the signature of the user logged into Agvance to the Contract, select the checkbox for Buyer Signature Only From Logged In User.
- To identify which Contracts to use with the buyer signatures for Obligations, choose Setup Obligation Format then check the appropriate boxes.
Note: The Buyer Signature Only From Logged In User checkbox on the Electronic Signature Setup window for Purchase Contracts is also used for Obligations.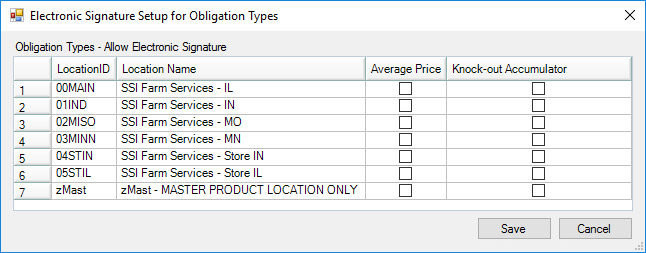
- Select Save.


If a Customer Agreement is not required to be on file for signing electronically, proceed to setting up the Default Contract formats discussed below. If requiring a Customer Agreement to be on file, go to Hub / Setup / Company Preferences. Select the Require Customer Agreement for Electronic Signatures checkbox and Save. This step must be performed for each Location that will be allowed to sign Contracts electronically.

Note: If this box is selected, the Apply User Signature to Contract window will not display when adding a Contract for Customers without a signed agreement and Classification.

Go to the Customer tab at Hub / Setup / Company Preferences. Select Customer Classifications and add a new Classification for Customers who have signed the agreement. Once the Classification has been added, double-click in the Require Customer E-Signature Agreement field and select the appropriate Classification. If a Classification already exists, simply add it to the field.

Note: If a Classification already exists, Customers must be assigned to the Classification at File / Open / Customer. Edit the Customer and select Classification. Double-click the Classification heading to select the appropriate Classification. Customers can also be added to the Classification by choosing Customer Classifications at Hub / Setup / Company Preferences on the Customer tab and editing the appropriate Classification.
Purchase Contracts
To ensure the Default Contract formats are set up, navigate to the Purchases tab at Grain / Setup / Preferences.
- Select Default Contract Formats.
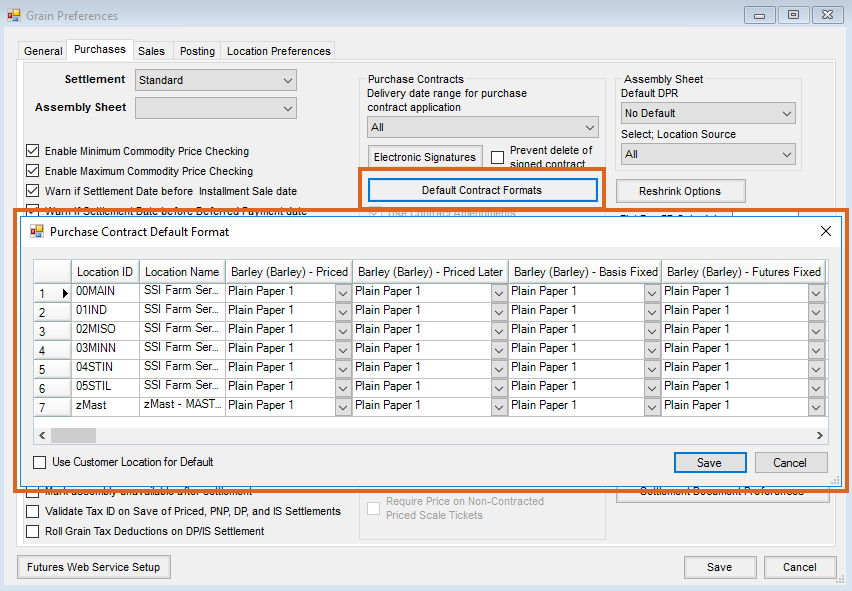
- Select the default contract format for each Location/Commodity/Contract Type.
- Select Save.

The Buyer’s Signature must now be applied to the Purchase Contract.
- Add a Purchase Contract at Grain / Operations / Purchase Contract.
- Complete the contract information.
- Check the option to Assign Buyer Signature and Print Contract on Save.
Note: When splitting a contract, the buyer signature is applied to all contracts being created.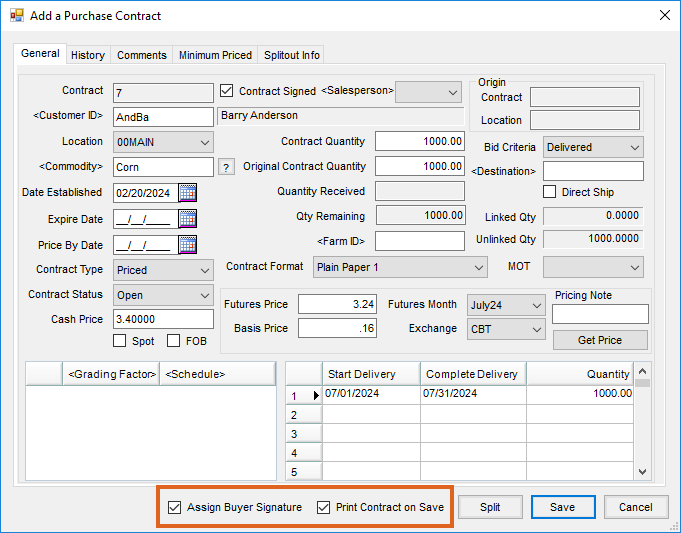
- Select Save.
- Choose the User’s signature to print on the Purchase Contract.
Note: If the Require Customer Agreement for Electronic Signatures option is selected at Hub / Setup / Company Preferences, the Apply User Signature to Contract window will not display when adding a Purchase Contract for Customers without a signed agreement and Classification. This window will also not display if the Buyer Signature Only From Logged In User option is selected on the Purchases tab at Grain / Setup / Preferences.

Obligations
The Default Obligation Format is set up on the Purchases tab at Grain / Setup / Preferences.
- Select Default Contract Formats.
- Choose Obligation Formats.
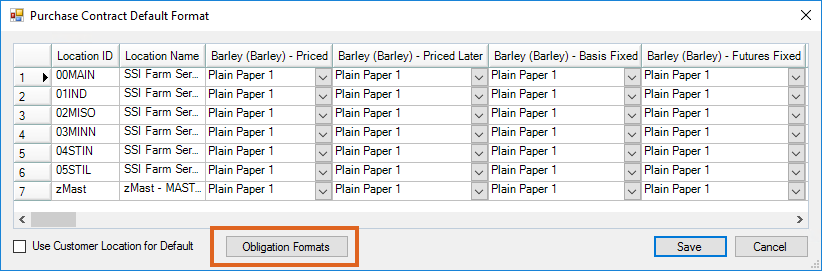
- Select the Custom Format that should be the default for each Location/Commodity/Obligation Type.
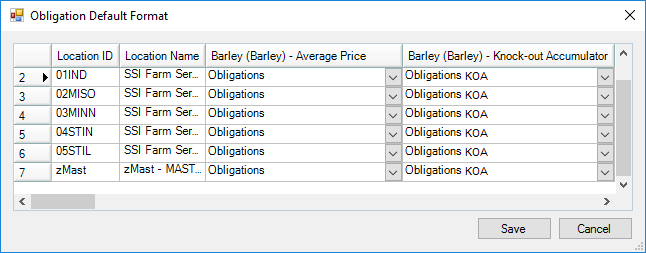 Note: Only formats for that Obligation Type will be in the list.

 Note: Only formats for that Obligation Type will be in the list.
The Buyer’s Signature must now be applied to the Purchase Contract.
- Add an Obligation at Grain / Operations / Obligation.
- Complete the Obligation information.
- Check the option to Assign Buyer Signature and Print Obligation on Save.
- Select Save.
- Choose the User’s signature to print on the Obligation.
If the Require Customer Agreement for Electronic Signatures option is selected at Hub / Setup / Company Preferences, the Apply User Signature to Contract window will not display when adding an Obligation for Customers without a signed agreement and Classification. This window will also not display if the Buyer Signature Only From Logged In User option is selected on the Purchases tab at Grain / Setup / Preferences.
