Grain Obligations are non-priced specialty contracts with a future obligation of delivery. These are only available in STLM.
Setup
In order to use Grain Obligations, the Use Contract Amendments option must be turned on at Grain / Setup / Preferences on the Purchases tab. Once this is turned on and saved, it may be necessary to close Grain then reopen.
Obligation Type
At Grain / Setup / Obligation Type, Obligations can be set up that are offered to Customers. Examples include Knock-out Accumulator, Average Price, Min/Max, etc.
This window displays a list of all Obligation Types filtered by the Active status.

Selecting Add displays the Add an Obligation Type window to enter the Obligation Type Name. This is a required field and can be up to 50 characters. The Include on TPR option allows the Obligation Type to be included in the calculation of Obligation quantity remaining on the Combined DPR/TPR, Trading Position, and Grain Dashboard. The Obligation quantity is information-only and will not be included in the calculation of the overall position.
Selecting Edit gives the ability to change the Obligation Type Name, the Include on TPR option, and the option to mark the Obligation Type as Inactive.
Custom Contracts
To see how to set up Custom Contracts for Obligations, see the Obligations tab here.
Default Obligation Amendment Format
The Default Obligation Amendment Format can be indicated at Grain / Setup / Preferences on the Location Preferences tab.

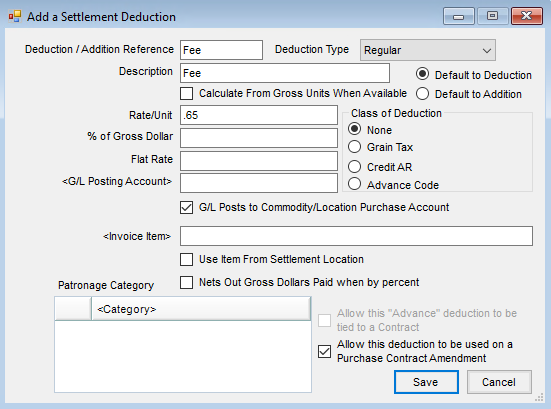
Settlement Deduction to Use on Amendment
- Navigate to Grain / Setup / Settlement Deductions.
- The Rate/Unit will default on the Amendment's Value or Rate.
- The Allow this deduction to be used on a Purchase Contract Amendment must be checked to show in the selection list on the Obligation.

Add Obligation
Navigate to Grain / Operations / Obligations and choose Add.
General Tab
- Enter the Obligation #. This is a numeric field. To have this auto-number, go to Grain / Setup / Document Counters and check Auto-number Document for Obligations.
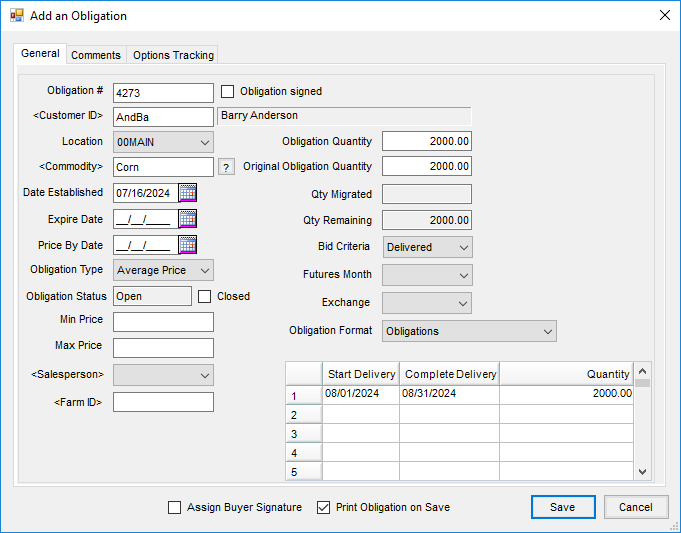
- Double-click in the Customer ID field to choose the appropriate Customer.
- Select the Location from the drop-down. The logged in Location is the default but can be changed. Ensure the Location of the Obligation is selected.
- Double-click in the Commodity field to choose the Commodity for the Obligation.
- The Date Established defaults to today's date but can be changed to reflect when the Obligation originated.
- Enter the date the Obligation will expire in the Expire Date field.
- For the Price By Date, enter the date the Obligation needs to be priced by or migrated to a Purchase Contract.
- Choose the Obligation Type from the drop-down. Options available here are those set up at Grain / Setup / Obligation Types. More details can be seen on the Setup tab of this article.
- The Obligation Status defaults to Open and is disabled. If the Obligation is to be closed, check the Closed checkbox.
- Enter the Min and Max Prices.
- Enter the Salesperson/originator for the Obligation.
- The Farm ID associated with the Grower on the Obligation can be entered.
- If the Obligation has been signed, check Obligation Signed.
- Enter the units for the Obligation in the Obligation Quantity field. The Original Obligation Quantity defaults with what is entered in the Obligation Quantity field and cannot be edited.
- The Qty Remaining is calculated by taking the sum of the Migrated Quantity for the Obligation and subtracting it from the Obligation Quantity. This field cannot be edited.
- Options available under Bid Criteria are established at Grain / Setup / Bid Criteria. Only those with a Contract Type of Purchase or Both are available.
- Options under Futures Month are set up at Grain / Setup / Futures Month/Pricing. If the Location/Commodity/Bid Criteria/Exchange are populated on the Obligation, these will be considered when filtering the list. If any are blank at the Futures Month/Pricing window, they will be included in the list.
- Exchange options are set up at Grain / Setup / Exchange.
- Obligation Format options are set up at Grain / Setup / Preferences on the General tab. For more information, see the Obligations tab on the Grain Custom Contracts article. This selection is required.
Note: Only formats for the Obligation Type selected will be available here. - Delivery date ranges can be entered for the Obligation and the associated Quantity.
- If applicable, check Assign Buyer Signature. More on Buyer Signatures can be found here.

Comments Tab
- Enter any relevant comments on the Comments tab.
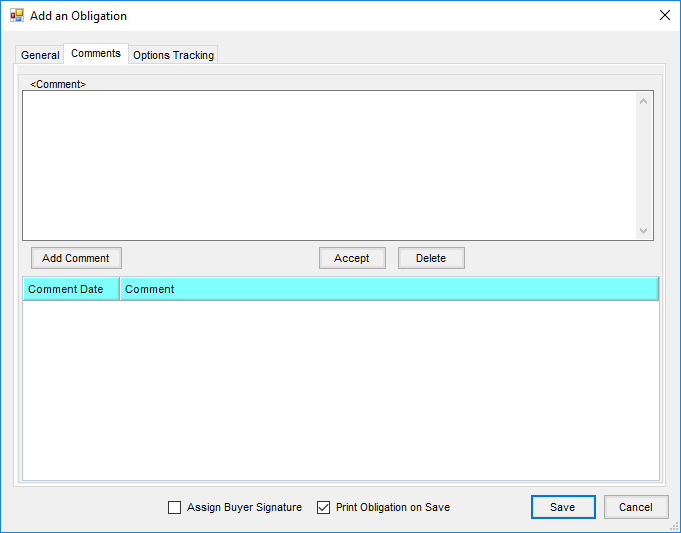
- A Saved Comment can be selected if it has not expired. These are set up at Grain / Setup / Saved Comments.

Options Tracking Tab
Information entered on this tab will not be used in other places in Agvance.
![]()
Select Add Roll and fill out information in the row that pertains to the option being tracked.
Edit Obligations
Navigate to Grain / Operations / Obligations, highlight the desired Obligation, and choose Edit. Most items on the Obligation will require an Amendment to make a change.
General Tab
The Obligation Signed option can be edited without an Amendment. This will be disabled, though, if the Obligation has already been electronically signed.

Amendments Tab

- Date – This will default to today's date but can be changed.
- Amendment Signed – This can be checked if the Amendment has been signed but will be disabled if it has been electronically signed.
- Type – If Settlement Deduction is selected, choose a Deduction to be applied to the Amendment. Select General when a Settlement Deduction is not to be applied to the Amendment.
- Settlement Deduction – This is enabled when Type is set to Settlement Deduction. It will be required to select a Deduction/Addition to save the Amendment.
- Units Source – These units will be saved with the Amendment detail line to calculate any Deductions/Premiums.
- Remaining Units – Units on the Obligation that have not been migrated to a Purchase Contract.
- Change in Units – When there is a change to the Obligation Quantity, this is the difference between the current Obligation Quantity and the new.
- Manual – Override Units will become available to enter the units.
- Value or Rate – When a Settlement Deduction is selected, the rate on the Deduction will default. The default value from the Settlement Deduction can be edited. A value only needs entered when a Settlement Deduction is selected.
- Value to Change – Select the item to be edited from the drop-down.
- Description – This is required to save the Amendment.
- Comment – This is required if the Require reason for changes is checked on the General tab at Grain / Setup / Preferences.
Once the Amendment is added, go to the General tab to make the edits.
Migrations Tab
This tab shows the Purchase Contract and the migrated Quantity.

Comments Tab
On the Comments tab, Comments can be edited, added, or deleted.

- Edit – Select the Comment and make the needed changes then choose Accept.
- Add – Select Add, enter a Comment or select a Saved Comment, then choose Accept.
- Delete – Select the Comment then choose Delete.
Options Tracking Tab
Select Add Roll and fill out the information that pertains to the option being tracked. Multiple rows can be added.
![]()
Print Obligation
When adding/editing an Obligation, the Print Obligation Contract window displays upon selecting Save if Print Obligation on Save is checked. This can also be found by selecting Reprint on the Select an Obligation window.

If there is an Amendment on the Obligation, the Print Obligation Amendment option is enabled.
The Obligation Format to print is on the Obligation's General tab. The Obligation Amendment Format is set up at Grain / Setup / Preferences on the Location Preferences tab and is set up per Location.
When an Obligation is saved, it is sent to S3 using the format on the Obligation. The Obligation Amendment document is sent to S3 if there is a document format set up.
Migrate Obligation
At Grain / Operations / Obligations, select the Obligation to be migrated to a Purchase Contract (can be entire or partial) and select Migrate. An Amendment will need added to migrate.
- On the Amendment tab, the Value to Change defaults to Migrate Obligation and cannot be changed.

- Select the Type of Amendment - Settlement Deduction or General.
- Choose Add Amendment.
- On the Add a Purchase Contract window, the Customer ID and Commodity cannot be edited.
- The Date Established defaults to today's date but can be modified.
- Common data elements from the Obligation will default but can be changed.
- Fill out the rest of the Purchase Contract.

- The Contract Quantity defaults to the quantity available to migrate from the Obligation (Obligation Quantity - sum of quantity already migrated). This quantity can be changed.
- When finished, select Save.
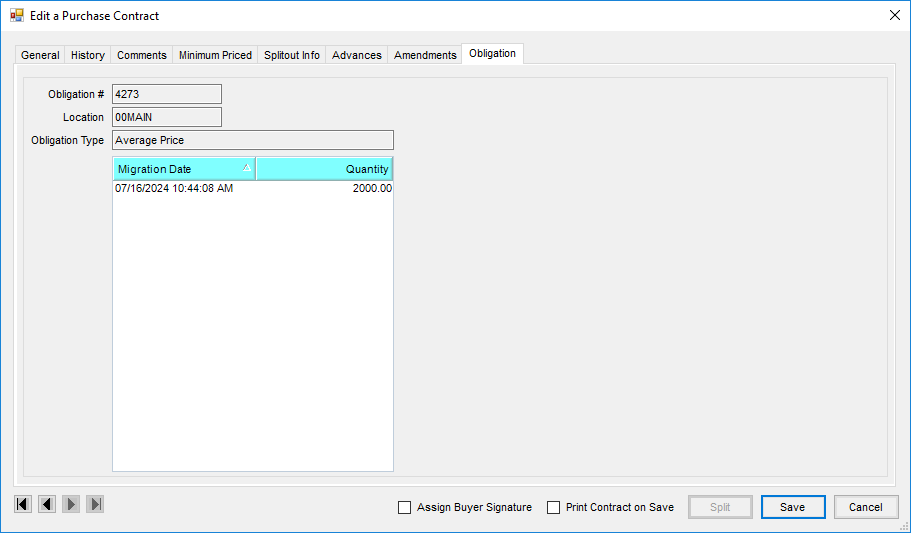
- Edit the Purchase Contract and go to the Obligation tab. This shows the Obligation #, Location, and Obligation Type from which the Purchase Contract was created. The history of the Obligation migration is also shown and the unmigrating of the Purchase Contract back to the Obligation. Examples of unmigrating can be found on the Unmigrate Units on Purchase Contract Back to Obligation tab of this article.


Unmigrate Units on Purchase Contract Back to Obligation
The steps below can be used in the following scenarios to unmigrate units on a Purchase contract back to the Obligation.
- Scenario 1 – Purchase Contract Created from Obligation Migration
- Scenario 2 – Purchase Contract Created from Obligation Migration and During Migration, More Units were Added to the Purchase Contract
- Scenario 3 – Purchase Contract Created from Obligation Migrated and Purchase Contract has Units Delivered
- At Grain / Operations/ Purchase Contracts, select the Purchase Contract that was migrated from an Obligation and choose Edit.
- Go to the Amendments tab. An Amendment will need added to unmigrate.
- The Amendment Date will default to today's date but can be changed.
- For the Value to Change, choose Unmigrate Obligation.
Note: Unmigrate Obligation will only be available if the Purchase Contract originated from an Obligation.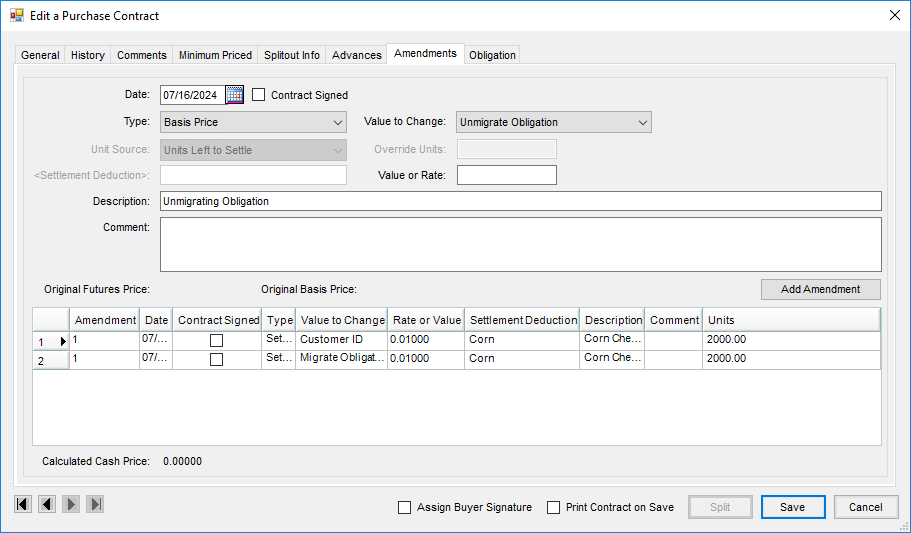
- If a fee needs to be added for unmigrating, choose Settlement Deduction as the Type then select the Settlement Deduction for the fee being used. Otherwise, choose Futures Price or Basis Price.
- The Unit Source will default with Change in Units. This would be the units being unmigrated. These units will be used on the Amendment created on the Obligation for the unmigrated units.
- Enter a Description (this is required).
- A Comment is required if the Require reason for changes is checked on the General tab at Grain / Setup / Preferences.
- Select Add Amendment.
- On the General tab, enter the quantity to be moved back to the Obligation in the Unmigrate Qty field.
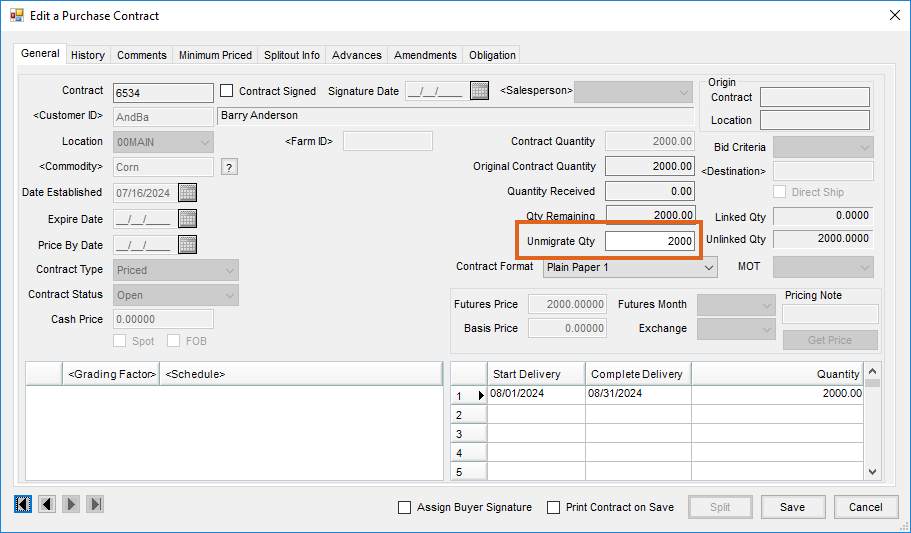 Note: More units than what was originally migrated from the Obligation cannot be unmigrated. A message will display when trying to save if the quantity entered is more than what was originally migrated.
 - Select Save.

 Note: More units than what was originally migrated from the Obligation cannot be unmigrated. A message will display when trying to save if the quantity entered is more than what was originally migrated.
The Purchase Contract quantity is reduced. If there were Amendments:
- The Purchase Contract Amendment added for the unmigrate does not have units (even for a Settlement Deduction Type) and any Amendments added during the migration process quantity is reduced by the amount unmigrated.
- Obligation Amendments that were originally migrated have the Units Migrated reduced by the amount being unmigrated. If there was a Settlement Deduction on the Purchase Contract Amendment during the unmigrate, it is added to the Obligation with the units.
