Agvance supports the T-LBK460-BSB-R Topaz Signature Pad. Follow the instructions below to install this signature pad.
Setup
- Leave signature pad unplugged while installing sigplus driver from https://www.sigpluspro.com/sigplus-bsb.html.

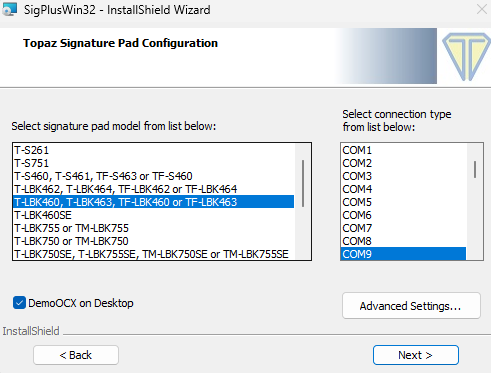
- Install the T-LBK460-BSB-R or T-LBK462-BSB-R Model and select the appropriate COM port on the right. The port selected here must be chosen in Step 5.
- Plug in the signature pad.
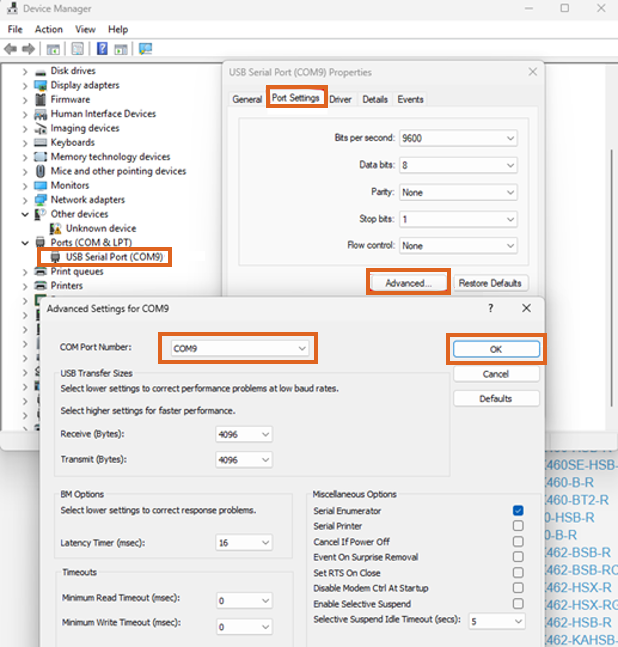
- In Device Manager, locate the signature pad under Ports.
- Change the Static COM port to the port selected in Step 2.
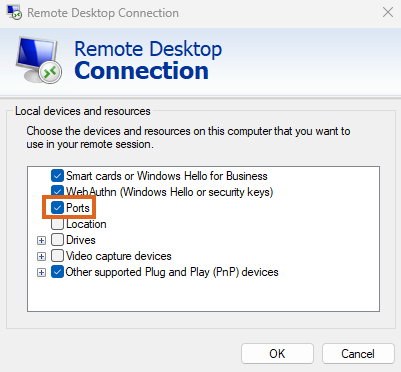
- Confirm port redirection is turned on in the RDP icon Be sure to save the icon after enabling ports.

- Connect to the hosted server.
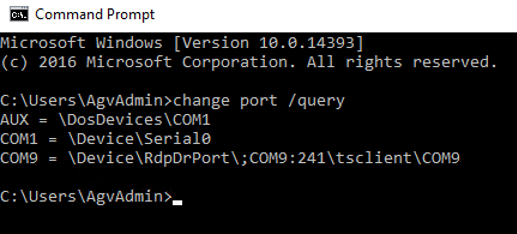
- Once connected, confirm the COM port is redirecting and showing as the port selected in Steps 2 and 5 with the query change port /query.
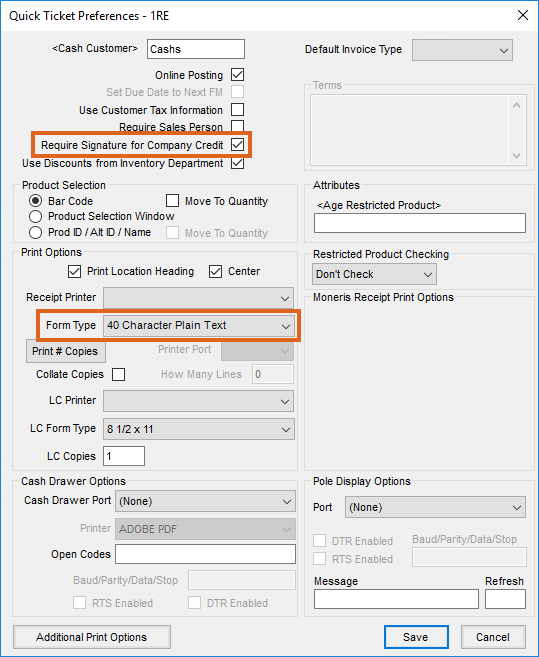
- Navigate to Accounting / A/R / Manage Quick Tickets / Options, and set Form Type to 40 Character Plain Text. To require a signature for company credit, select the Require Signature for Company Credit option.
- Test this setup by entering a Quick Ticket.


Installing On a Terminal Server
- Log into the server using an RDC as Administrator or an equivalent account. Download and save the SigPlus.exe file by going here.
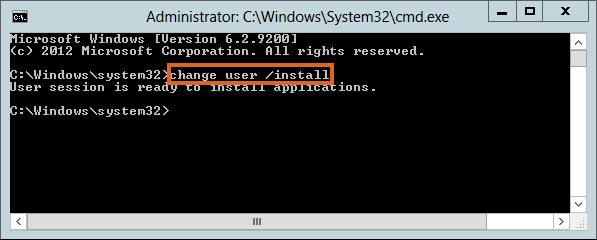
- From an elevated CMD line, type change user /install to enter Install mode.
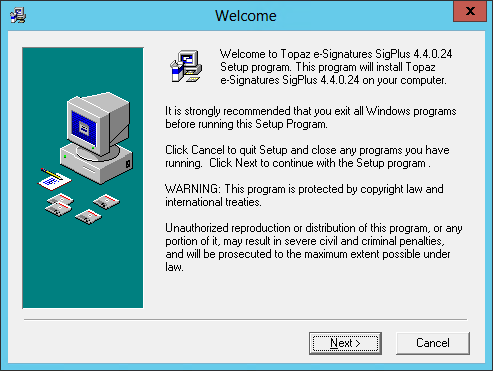
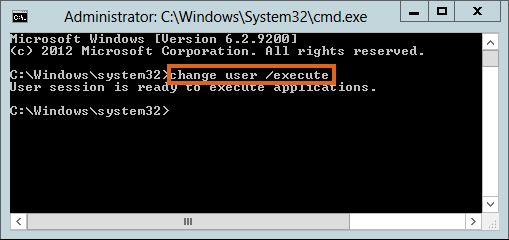
- Install SigPlus.exe. Choose the tablet model during install and the COM1 connection type. After installing, from CMD line, type Change user /execute or restart server to go back into Execute mode before using the application (instructions below are for the supported model).
- Choose Next on the installation window.
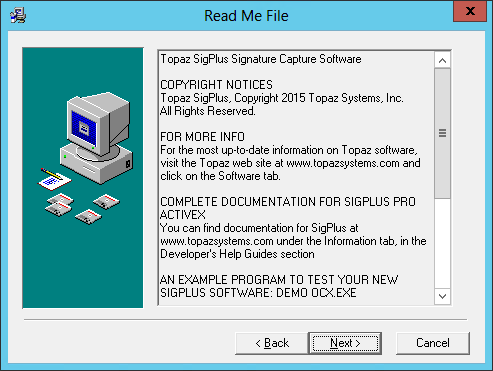
- Choose Next.
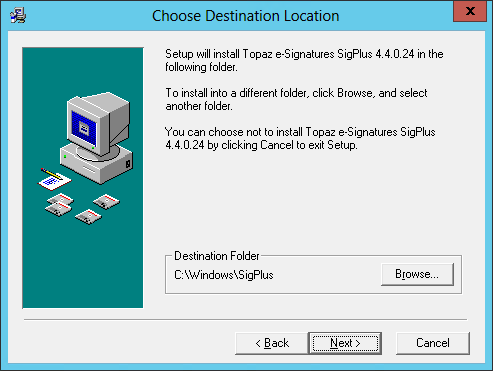
- Verify the Destination Folder is C:\Windows\SigPlus, and then choose Next.
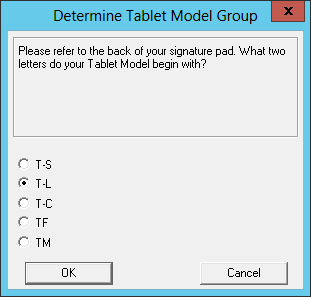
- Select T-L as the Tablet Model Group, and choose OK.
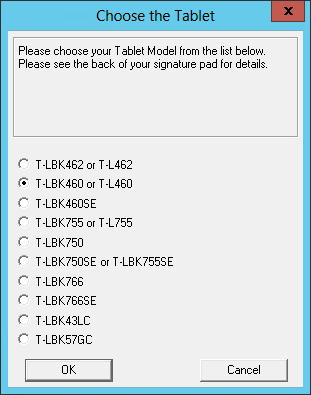
- Choose T-LBK460 or T-L460 as the tablet, and select OK.
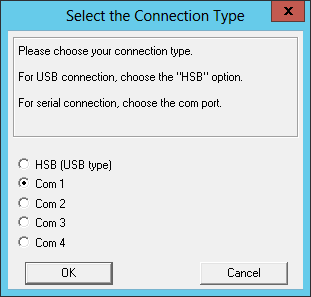
- Choose the Com 1 Connection Type. Select OK.
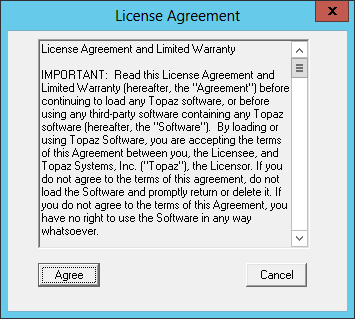
- Read the License Agreement, and select Agree.
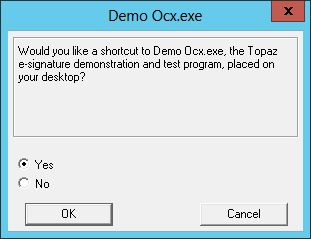
- Choose Yes to add a shortcut to the desktop, and select OK.
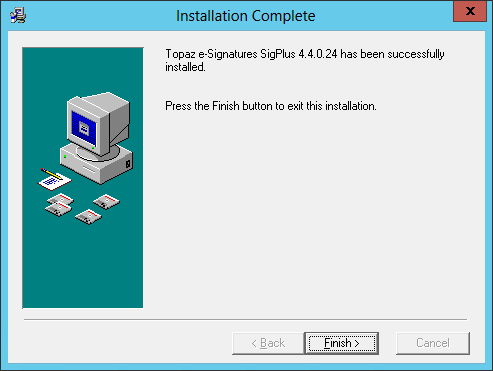
- Select Finish to complete the installation.
- After the installation completes, open an elevated CMD line and type Change user /execute.
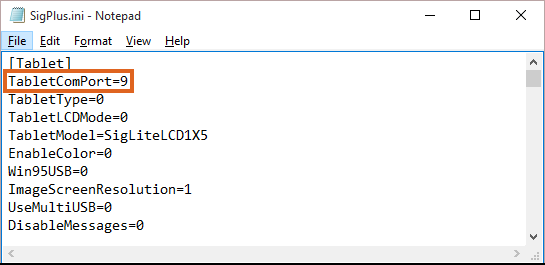
- On the terminal server, open the SigPlus.ini file located at C:\Windows\SigPlus.ini. The TabletComPort= value needs to match the COM port the signature pad is using on the workstation.
- Verify the RDC icon on the workstation is set to forward serial port traffic by editing the icon, navigate to Local Resources / More, and then select the Ports option.
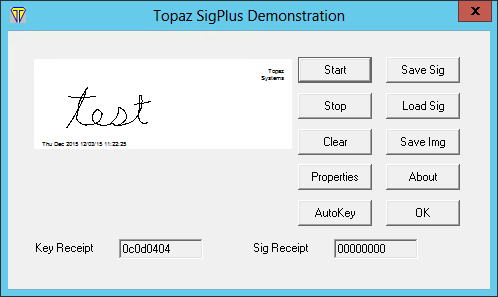
- Test the Signature pad outside of Agvance by double-clicking the DemoOCX icon on the desktop of the workstation or server.

- Select Start on the Topaz SigPlus Demonstration window, and start signing the signature pad. If it is configured correctly, the signature will display on the window. If it is not working, double check the com port and the SigPlus.ini files.


Agvance Settings for the Signature Pad
The following settings need to be changed for the signature capture window to work in Agvance.
Quick Tickets
Navigate to Accounting / A/R / Manage Quick Tickets / Options, and set Form Type to 40 Character Plain Text. To require a signature for company credit, select the Require Signature for Company Credit option.

Payments
At Accounting / Setup / A/R / Pay Methods, select the pay method for each location that will require a signature.

Bookings
Navigate to the A/R tab at Setup / Preferences and select the Design Booking Contracts to format Booking Contracts. Data Printing Options need both Seller and Buyer Signature options selected for the signature lines to display on the contract. See Booking Contract Signatures.

Invoices
To print signatures on Invoices, check the Allow signature on save of invoice box found on the Invoice tab at Setup / Location Preferences. The Capture Signature button is then available on the Print Invoice Documents window.
For further information, see Allow Signature on Save of Invoice.

