Map a folder from a local machine to a terminal server through RDP.
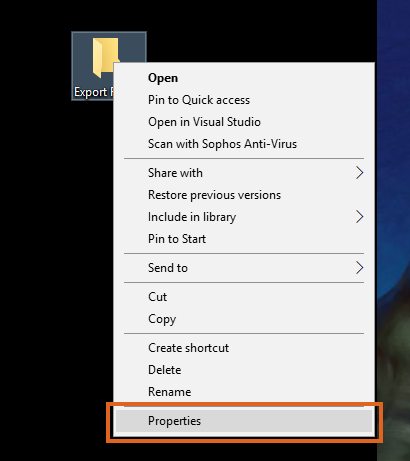
- Create a folder, right-click the folder, and select Properties.
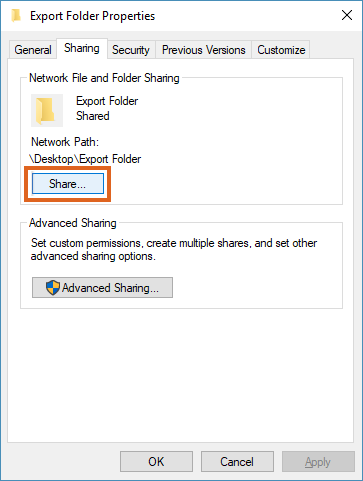
- On the Export Folder Properties window, select the Sharing tab, then choose Share.
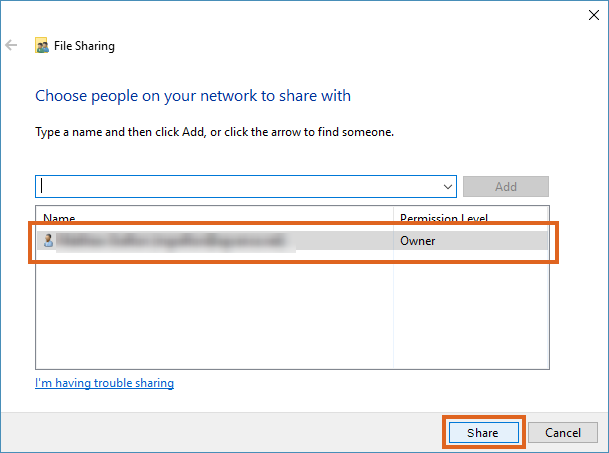
- The File Sharing window displays. Select the desired name(s) and choose the Share button.
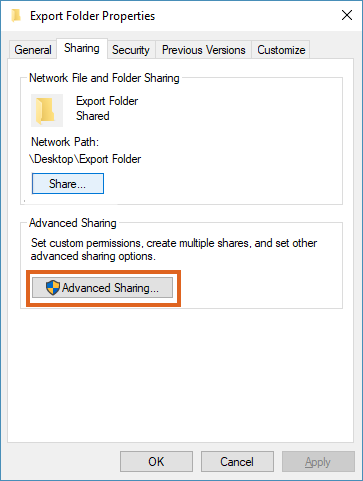
- On the Export Folder Properties window, select Advanced Sharing.
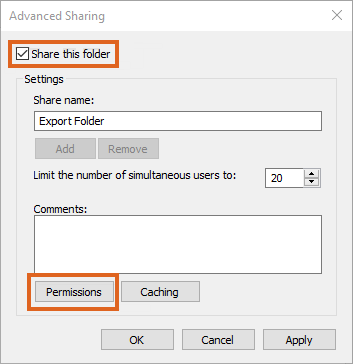
- Check the Share this folder option, then choose Permissions.
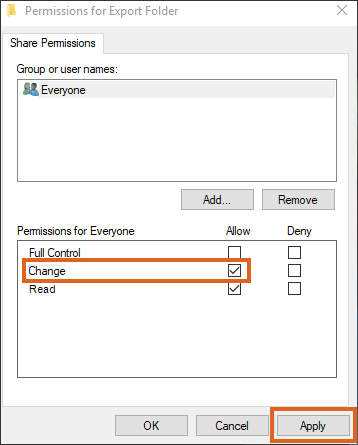
- On the Permissions for Export Folder window in the Permissions for Everyone section, check the Allow option for Change. Select Apply. Close the Permission for Export Folder and Export Folder Properties windows.
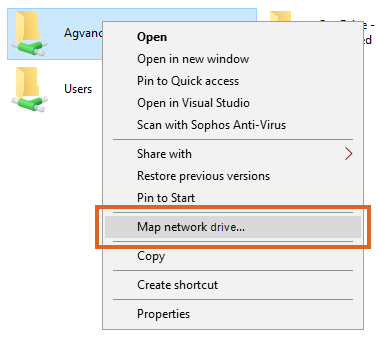
- Open File Explorer and type \\localhost into the address bar. Right-click the Shared folder and select Map network drive.
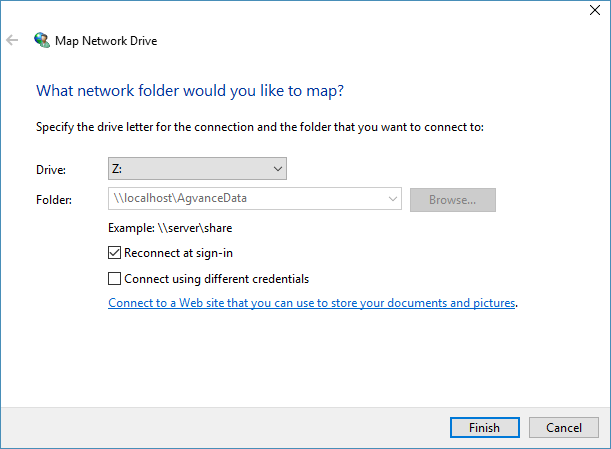
- On the Map Network Drive window, specify the Drive letter for the connection and the Folder. Check the Reconnect at sign-in option. Select Finish.
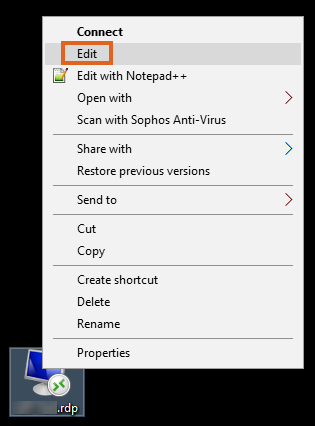
- Right-click the RDP shortcut icon on the computer desktop and select Edit.
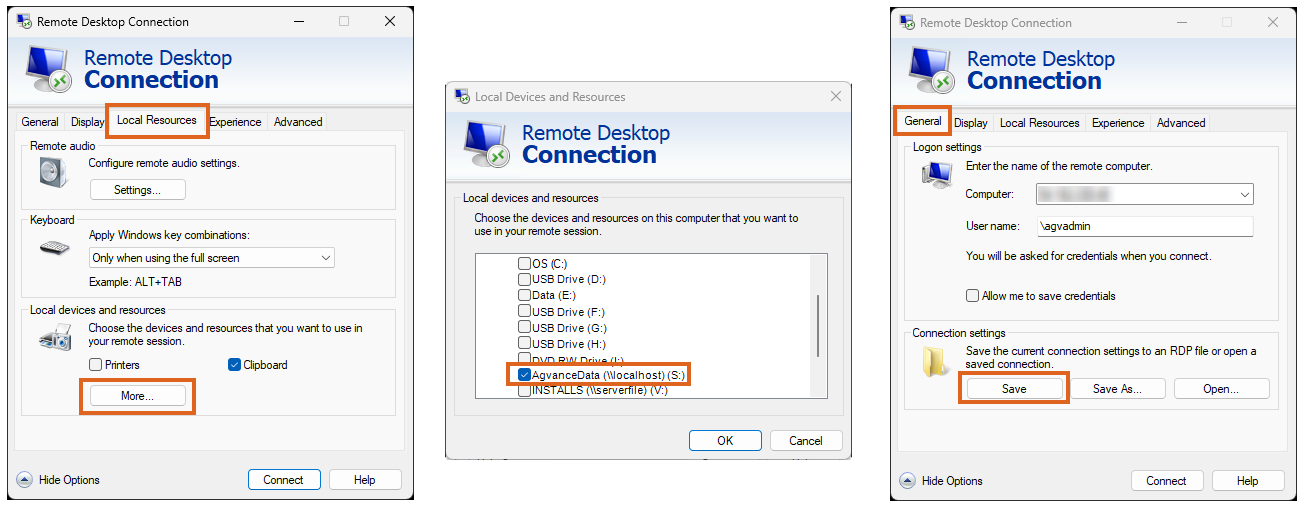
- On the Remote Desktop Connection window, select the Local Resources tab and choose More. Expand the Local devices and resources section, check the mapped drive, and select OK. On the General tab, select Save.
- Log onto the Hosted Server and open the File Explorer.
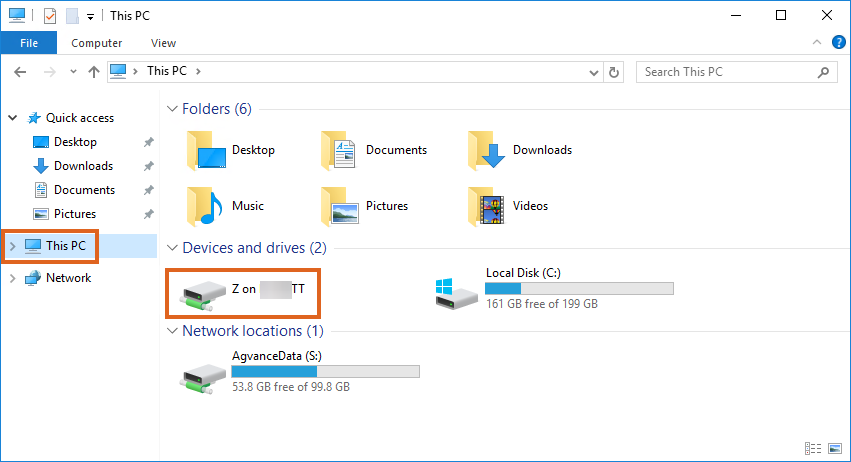
- The Shared folder displays as [Drive Letter] on [Machine Name]. Save or export files to local machines through this drive.