To set up an ACH Vendor, in the Accounting module, navigate to File / Open / Vendors. Edit the Vendor needing set up as an ACH Vendor. Go to the 1099 / Payment Info tab. Select ACH Payment as the Method of Payment.
Setup
In the Pay to ACH Account Information area:
- Enter the ACH Routing #. This is the routing number for the Vendor's bank.
- Enter the Bank Account #. This is the account into which the money will be deposited.
- Enter the Account Type for the account into which the payment is going to be deposited.
- Select CCD, CTX, or PPD as the ACH Type.

On the A/P tab at Accounting / Setup / Preferences in the Vendor ACH File Options area, enter the following:
- The path where the ACH file should be saved. This is not a secure or encrypted file. The path that is set up should be to a secure location.
- Select the Export 7 records as EDI option if the list of invoices being paid is required to be an EDI string.
- The ACH file will use the words DIRECT DEP. Optionally change this by entering verbiage in the Company Entry Description Override (5 record) textbox. The words typed into the box will replace DIRECT DEP in the ACH file.
- The Immediate Origin Override (1 Record) can be used if the Orig ACH Route# needs to be different than what is set up on the G/L tab at Setup / Preferences. This will be set up in the next step.
- The File Type must be set to Vendor Batch if the PPD format ACH Type is selected on the Vendor's 1099/Payment Info tab in the Pay to ACH Account Information section.

Navigate to the G/L tab on the Preferences window and enter the company's checking account information for the disbursement account or accounts that will be used to process the Vendor payments.

Enter the following information:
- Dest ACH Route# – The Federal Reserve Bank's routing number that the processing bank reports.
- Dest Bank Name – The Federal Reserve Bank's name that the processing bank reports.
- Orig ACH Route# – The originating ACH routing number.
- Company ID – The company ID required by the bank.
- Company ACH Route# – The company ACH routing number.
- Company Bank Acct# – The company bank account number from which the money will be removed.
Select Save Checking Acct Info to save the checking information.
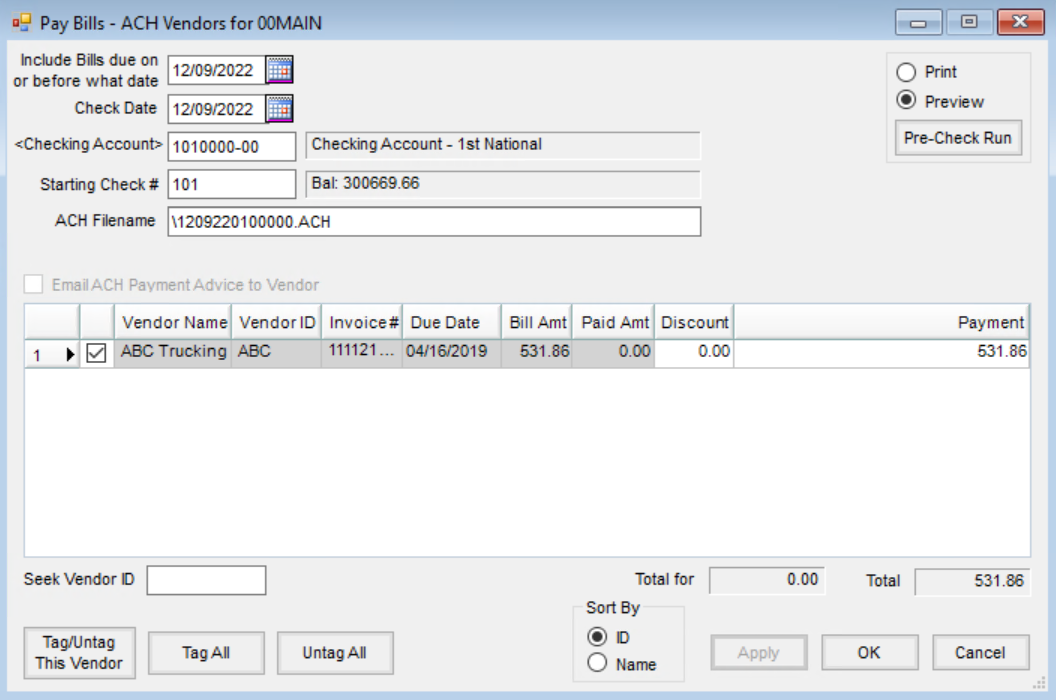
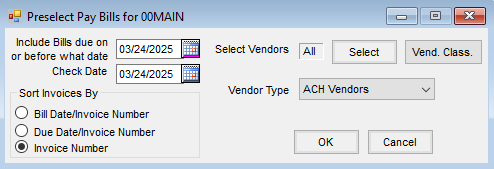
On the A/P / Pay Bills / Preselect Pay Bills window, select ACH Vendors as the Vendor Type. Select OK, and on the Pay Bills window, only the ACH Vendors and the bills open for those Vendors that meet the criteria specified display. The ACH Filename will then default in on the Pay Bills window. The path comes from the Setup / Preferences / A/P window. The file name is the date in the mm/dd/yy format with an incrementing number. This name can be edited. After selecting OK, the option is available to print an ACH Vendor File Summary and an ACH Payment Advice.
Automatically Email Vendor
Optionally, the ACH advice can be emailed directly to the Vendor. To email directly, some additional setup is required.
Set up the Mail Host information at Hub / Setup / Company Preferences on the General tab. The email Address here will be the From email address.

An Email Address for the User paying the bills must be established on the Profile tab of the Hub / Setup / Users / Edit a User window. The Email Address here will display as the Reply To email address on the ACH advice email.

Establish the Vendor’s email address(es) at Accounting / File / Open / Vendor on the 1099/Payment Info tab. Double-click the <Email Address> heading to add rows and enter a single or multiple addresses.
The One report per vendor for payment advice preference must be selected at Accounting / Setup / Preferences on the A/P tab.

When paying bills, the ACH Payment Advice will automatically be emailed to the Vendors.
Paying ACH Vendor Bills
An ACH file may be created from the A/P / Pay Bills screen to pay Vendors electronically through the bank. Prior to creating an ACH file, the preferences must be set at Accounting / Setup / Preferences on the A/P and G/L tabs to determine the location where the file will be stored and the routing and account numbers necessary for the file. The vendor must also be set to an ACH Payment Type and have the routing and account numbers set on the Vendor file to be able to process an ACH file.
Optionally, the ACH advice can be emailed directly to the Vendor. To email directly, some additional setup is required. The mail host must be set at Hub / Setup / Company Preferences on the General tab, and the user logged in when paying the bills must have an email address set up at Hub / Setup / Users.
The email being sent to the vendor will be from the user's email address unless the Use ACH Payment Advice Format 2 is checked and an email is filled out at Accounting / Setup / Preferences on the A/P tab.

The Vendor’s email address must be entered at Accounting / File / Open / Vendor on the 1099/Payment Info tab. Also, the One report per vendor for payment advice preference must be selected at Accounting / Setup / Preferences on the A/P tab.
- Going to A/P / Pay Bills causes the Preselect screen to appear. Enter the date criteria for the bills to display on the screen to follow. Filter the Bills to display by selecting Vendors or the ACH Vendors type. Choose OK to continue to the Pay Bills window.
- Select or deselect any of the displayed bills to be included in this pay session by selecting in the left-most column corresponding to the bill. Bills noted with checkmarks will be included in the check run.

- To indicate the partial payment of a Bill, select in the Payment column of the row corresponding to the Bill and enter the amount of the payment (overriding the unpaid amount).
- Verify that the correct Check Date and Checking Account have been entered. The Starting Check # and the ACH File Name will default.
- If the ACH advice is to be emailed directly to the Vendors, mark the Email ACH Payment Advice to Vendor checkbox.
- Choose OK to create the ACH file.
- A pop-up screen appears with posting options. The checks can be posted to the current month, the next month, or not at all.
- The most common posting option is This Month which affects the G/L and vendor accounts immediately. The bills are also updated to a Paid status. An ACH Vendor File Summary report displays on the screen and may be printed. After closing the ACH Vendor File Summary report, the ACH Payment Advice previews and can be printed if necessary.
- Occasionally, at the beginning of the month, the fiscal month may not yet be closed but checks still need to go out. In this case, the Next Month posting option could be used. The bills are marked Paid, but the posting to the G/L and vendor accounts does not occur until after the current month is closed. An ACH Vendor File Summary report displays on the screen and can be printed. After closing the ACH Vendor File Summary report, the ACH Payment Advice previews and may be printed if necessary.
- The last option, No Posting, is used if the wrong selection criteria were entered. No ACH file is generated if this option is selected.
- The ACH Vendor File Summary report previews showing what payments were included in the file. This report may be printed or saved as a PDF.
- The ACH Payment Advice for each Vendor then displays. This can be faxed or emailed to the Vendor to show that the payment has been processed and the Invoices included in the payment. If the setup has been done to email the Vendors directly, this displays the report sent to the Vendor. After closing the report, a notification appears when the emails have been sent.

ACH Payment Advice
An option on the A/P tab at Accounting / Setup / Preferences customizes the ACH Payment Advice displaying company information and a message to the Vendor when making ACH payments.
ACH Payment Advice Standard Format (Automatic by Default)
The format of the ACH Payment Advice document accompanying ACH Payments includes the following information in the header of the payment advice by default:
- Bills Included on or before
- Check Date
- Account Number / Type of Account / Bank Name
ACH Payment Advice Format 2 (must select the option)
Selecting the ACH Payment Advice Format 2 option on the A/P tab at Accounting / Setup / Preferences customizes the ACH Payment Advice document sent to Vendors when making ACH payments.
If the EMail From Address to use when emailing is entered, this will display as the From address on the email that is sent even if the Use ACH Payment Advice Format 2 option is NOT checked. The Advice will be the Standard format but it will show from this email - not the Agvance User’s email.

Changes to the ACH Payment Advice when selecting ACH Payment Advice Format 2 include:
- The Location name, Location address, Location phone, and company email address display at the top of the payment advice. The Location on each payment advice is determined by the Location to which the Vendor is assigned. (The company location information will replace the previous default heading of: Bills Included on or before, Check Date and Account Number, Type of Account, and Bank Name.)
- The verbiage in the Display Message field reads: The amount of $[CheckAmount} USD has been paid via an electronic payment to your Bank Account # ending with {BankAcctNumber}. Please allow three (3) banking business days for the funds to be available in your bank account. This verbiage can be edited, but any bracketed information must remain to populate correctly on the ACH Payment Advice document.
- Enter the company email address in the Email “From” Address to use when emailing field. Use of these fields prevents the User’s direct email from displaying.
- Net Check and the check number are replaced by Net Payment on the ACH Payment Advice Format 2.
- The name of the employee processing the payment is removed from the footer of the ACH Payment Advice.
- Page numbering starts at 1 for each ACH Payment Advice.
- A blank line will display if an account number does not exist.
An example of an ACH Payment Advice using the Use ACH Payment Advice Format 2 option:

