When opening Outbound in Agvance SKY Grain, a grid displays to show Sales Contracts. For more information on how this grid works, see Using Grids in Agvance SKY.
Note: Sales Contracts are only available for those with the permission enabled in Agvance SKY Admin.
Contracts listed can be filtered by selecting the Filters icon and specifying criteria.
Use the Search bar to find specific contracts. Under the Ellipsis of the Search bar, there are options to Reprint Contracts or Delete Contracts. These are available when contracts have been checked in the far left column. This gives the ability to reprint or delete multiple Contracts at the same time rather than individually. Reprinting multiple Contracts at the same time opens each in a new tab to either download or send to a printer.
Options to Edit, Print, Migrate, or Delete a Sales Contract are available in the far right columns of the grid.

Select + Add Sales Contract in the bottom right to add a Sales Contract.
Sales Contract
General Information

- The Contract ID automatically populates if autonumbering is enabled in Grain. See here for more on that setup. If autonumbering is not enabled, enter the Contract ID.
- Select the Customer ID from the drop-down. Start typing in this field to narrow down the list of Customers.
- Indicate the Commodity. Start typing here to narrow down the list.
- The Location and Buyer's Reference fields are optional. The Buyer's Reference can be used to match the processor Contract number.
- The Date Established defaults as today's date but can be changed.
- Optionally enter the Expire Date for this Contract.
- Choose the Contract Format from the drop-down and optionally choose to Print contract on Save.
Contract Details

- Choose the Contract Type from the drop-down.
- Enter the Contract Quantity.
- The Shipping Destination is optional.
- Choose the MOT from the drop-down. If Require MOT On Sales Contract is checked for the Contract Type selected in Agvance Windows at Grain / Setup / Preferences on the Location Preferences tab, the MOT will be required to save.
- The Original Contract Quantity, Unsettled Shipments, Quantity Settled, and Quantity Remaining are calculated and cannot be edited.
- Indicate if this Contract is Open, Closed, or New Crop.
Pricing

- Set pricing options whether FOB, Delivered, Futures, and/or Basis.
- FOB – In-transit/valuations
- Delivered – Contract price
- Select the Futures Month and Exchange.
- A brief Pricing Note can optionally be entered.
Deliveries

- Enter the Start Date and Complete Date for delivery.
- Enter the Quantity for that date range.
- Choose + Add Another Delivery to add another Delivery line if applicable.
- To remove additional Delivery lines, select the Delete icon.
Grade Factors & Schedules

- Optionally choose Add Grade Factor to open a list of Grade Factors available.
- Check the appropriate items in the grid then select Assign Grade Factor.
- Choose Add Schedule then indicate the Schedule Type from the drop-down.
Comments

- Optionally enter notes in the Add A Comment field.
- Choose Select Saved to add one or multiple Saved Comments to the Contract.
- Choosing + Add provides another Add A Comment field for additional notes. Choosing Clear removes the text from the Add A Comment field.
- Choose the Edit icon to make changes to comments or the Delete icon to remove the Comment from the Contract.
- When finished, select Save Contract & Close to save and return to the Sales Contract list. Save & Start New saves the Contract and clears the form to enter a new Sales Contract.
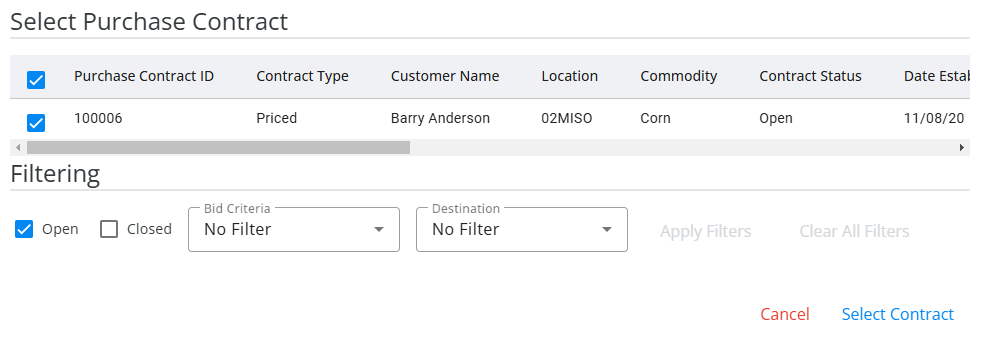
Note: The Link to Purchase tab can be used to link a Purchase Contract.
Link to Purchase
General Information
The Location, Customer ID, Commodity, and Sales Contract Quantity are displayed.

Linked Purchase Contract
- If applicable, choose Select A Purchase Contract To Link.

- Choose a Purchase Contract from the window that displays. The Total Linked and Total Unlinked calculate automatically.