When entering a credit card payment, only enter a true reference number in the Ref # field. Do not enter any credit card information.
Be sure to review then clear any/all error messages (if any exist) before submitting a payment.
Overview
Posted Payments
This page lists the Pymt #, Pay Date, Amount, Discount, Total Credit, Type and the User responsible for entering the payment. Payments made in prior years can be also be viewed here. Line items listed in red reflect a voided Payment.
Payments may be taken by selecting the + Add Payment icon on the Payments page in Agvance SKY Customer. This must first be set up in Agvance SKY Admin by turning on the Enter Payments toggle under Customer in the Features section per user. Online Payments must first be set up in Agvance SKY Admin under SKY Payments.
Search for Payments by Pymt #, Pay Date, Type, and User.
Selecting the Expand button displays the Pay Method, Reference, Pay Amount, Convenience Fee, and the Total. It also shows the Invoice(s) the Payment was applied to along with an overview of the amount applied. Choose the Ellipsis to View PDF, Download PDF, Void Payment, or Reverse Payment.
Choosing Export downloads a CSV of the payments listed.

If the Require a reason when payment is voided or reversed is selected in Agvance Windows at Accounting / Setup / Location Preferences on the A/R tab, a window will display to enter a reason upon selecting Void Payment or Reverse Payment. A reason must be entered here in order to void or reverse the Payment.

Scheduled Payments
The Scheduled Payments tab show a Grower's Payments scheduled in Grower360. Payments will be displayed in this list until they are processed. Upon successful processing, the Payment will display on the Posted Payments tab. If the Payment should fail for any reason, the Payment is not displayed on either tab and a notification is sent to both Grower and the company that the Payment was not successful.
Only single, non-recurring Payments are displayed on the Scheduled Payments tab. Recurring Payments are not included here.
Scheduled Payments can also be reviewed on the Online Payments Scheduled dashboard in Agvance SKY Analytics.

Add a Regular Payment
Payments may be taken by selecting the + Add Payment icon on the Payments page in Agvance SKY Customer. This must first be set up in Agvance SKY Admin by turning on the Enter Payments toggle under Customer in the Features section per user. Online Payments must first be set up in Agvance SKY Admin under SKY Payments.
- Select the + Add Payment icon in the lower right corner of the Payments page. The Add Payment window opens along with a collapsible bar displaying the customer’s Regular Balance, Prepay Balance, UAC Available, and Budget Balance.
- The Payment Date defaults as today’s date but can be edited to reflect the actual date the payment is received. Select in the Payment Location field to choose the appropriate location.
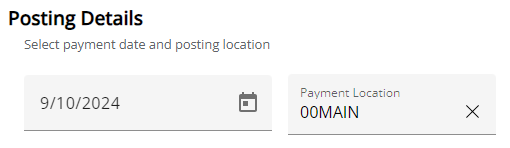
- Select the Payment Location drop-down menu to choose the appropriate Location.
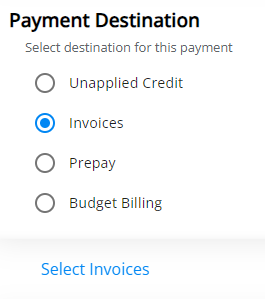
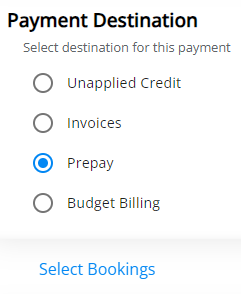
- In the Payment Destination section, choose Unapplied Credit to add to the Unapplied Cash balance or the Invoices option to apply the payment to specified Invoices. Choose Prepay to make a payment on Bookings. Use the Budget Billing option to make payments on Memo Invoices.
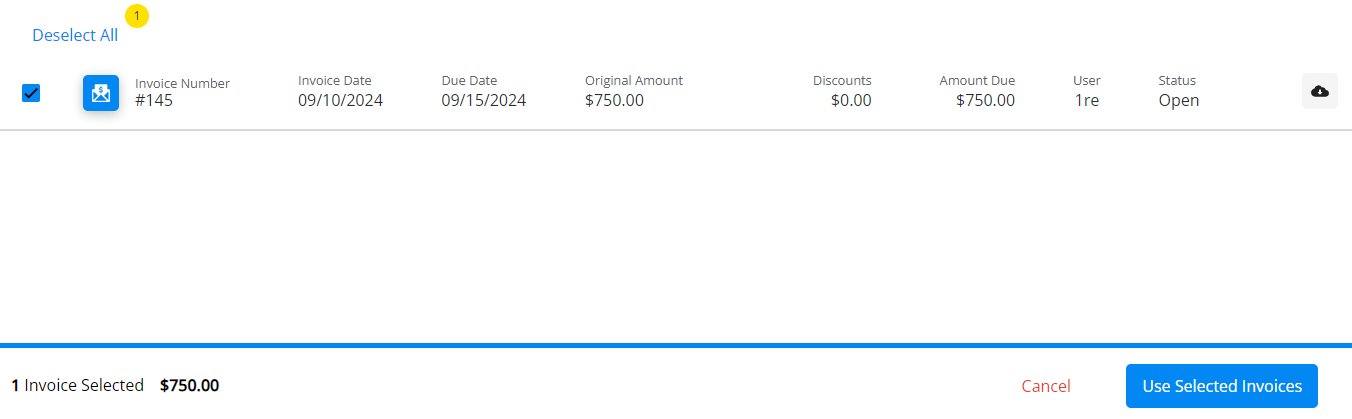
- With Select Invoices chosen as the Payment Destination, choose Select Invoices. Check the Invoices to pay and choose Use Selected Invoices. Select Credit Invoices to use as part or all of the payment.
- Select up to three Payment Methods, enter a Reference Number, and indicate the Amount of the payment. Select the Use Unapplied Credit option to use for all or part of the payment. Do not enter any credit card information in the Ref. # field.
Note: When Heartland payments are set up and that Pay Method is selected, a credit card form displays to collect the payment from the Customer. Do not enter any credit card information in the Ref. # field.
- If selected Invoices are not completely paid by the payment amount, the last Invoice selected will be partially paid.
- If the payment amount more than covers the selected Invoices, the remaining dollars will go to the Unapplied Cash balance.
- Choosing Auto Apply to Invoices will clear selected Invoices and apply the payment to all Invoices, oldest to newest.
- Choose Adjustment as the Pay Method if paying with Credit Invoice(s).
Note: If the Credit Invoice does not completely cover the total, the last Invoice selected will be partially paid unless another Pay Method is added. If the Credit Invoice covers more than the total, the remaining dollars will be sent to UAC.
- Optionally enter any Payment Notes.
- Discounts available on an Invoice will be considered when posting a payment. Once finished filling out each section of the payment, selecting Post Payment will update the Payments screen.


Add a Prepay Payment
Payments may be taken by selecting the + Add Payment icon on the Payments page in Agvance SKY Customer. This must first be set up in Agvance SKY Admin by turning on the Enter Payments toggle under Customer in the Features section per user. Online Payments must first be set up in Agvance SKY Admin under SKY Payments.
- Select the + Add Payment icon in the lower right corner of the Payments page. The Add Payment window opens along with a collapsible bar displaying the Customer’s Regular Balance, Prepay Balance, UAC Available, and Budget Balance.
- The Payment Date defaults to the current date but may be changed.
- Select the Payment Location drop-down menu to choose the appropriate Location.
- In the Payment Destination section, choose Prepay and then choose Select Bookings.
- Select Bookings to pay by choosing the checkbox next to the Booking number OR choose the Expand button to pay specific line items on a single Booking.
 Note: When paying specific line items on a Booking, no other Bookings can be selected for payment. Additionally, partially consumed line items are not available for Prepay.
 - Once all Bookings have been chosen, choose Use Selected Bookings.
- Under Payment Method, choose up to three different methods of payment. Do not enter any credit card information in the Ref. # field.
Note: When Heartland payments are set up and that Pay Method is selected, a credit card form displays to collect the payment from the Customer. Do not enter any credit card information in the Ref. # field.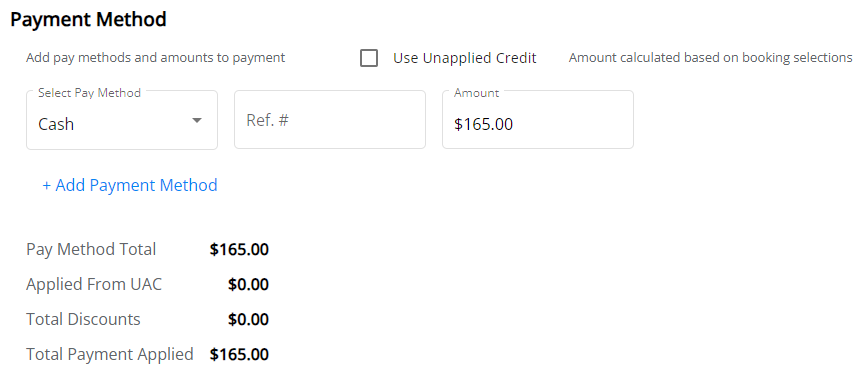 Note: The Payment total must match the total amount of the Bookings selected.
 - Optionally enter any Payment Notes and select Post Payment.

 Note: When paying specific line items on a Booking, no other Bookings can be selected for payment. Additionally, partially consumed line items are not available for Prepay.
 Note: The Payment total must match the total amount of the Bookings selected.
Add a Budget Billing Payment
Payments may be taken by selecting the + Add Payment icon on the Payments page in Agvance SKY Customer. This must first be set up in Agvance SKY Admin by turning on the Enter Payments toggle under Customer in the Features section per user. Online Payments must first be set up in Agvance SKY Admin under SKY Payments.
- Select the + Add Payment icon in the lower right corner of the Payments page. The Add Payment window opens along with a collapsible bar displaying the Customer’s Regular Balance, Prepay Balance, UAC Available, and Budget Balance.
- The Payment Date defaults to the current date but may be changed.
- Select the Payment Location drop-down menu to choose the appropriate Location.
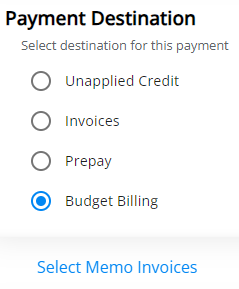
- In the Payment Destination section, choose Budget Billing and then choose Select Memo Invoices.
- Select Memo Invoices to pay by choosing the checkbox next to the Memo Invoice number.
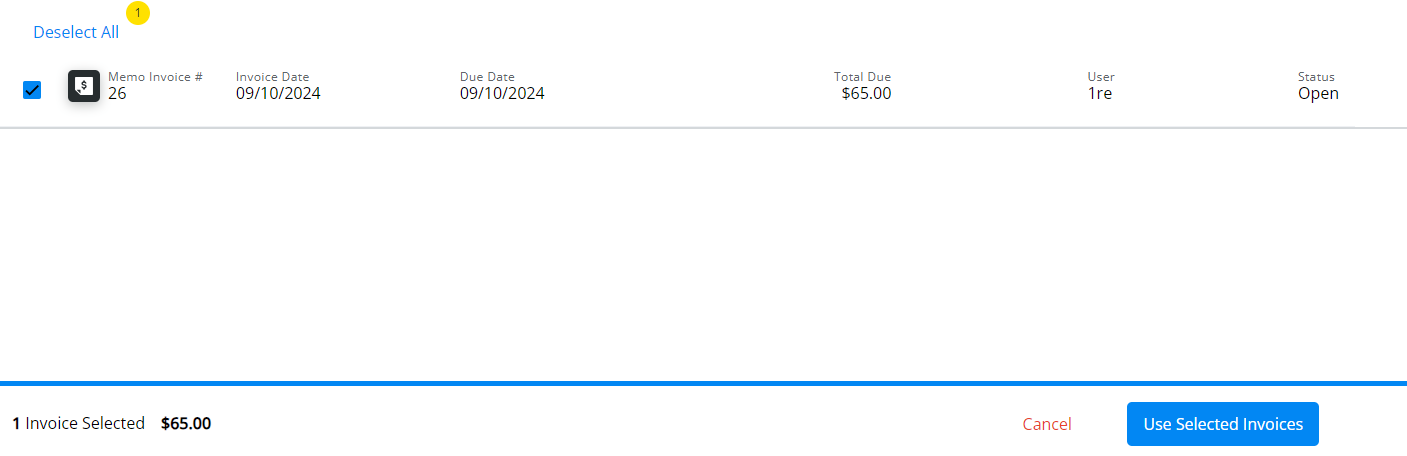
- Once all Memo Invoices have been chosen, choose Use Selected Invoices.
- Under Payment Method, choose up to three different methods of payment. Do not enter any credit card information in the Ref. # field.
Note: When Heartland payments are set up and that Pay Method is selected, a credit card form displays to collect the payment from the Customer. Do not enter any credit card information in the Ref. # field.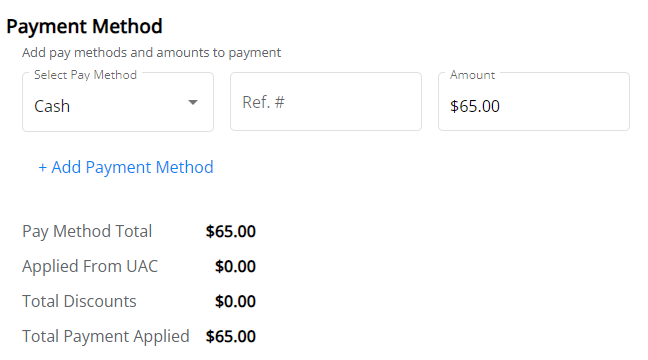 Note: The payment total must match the total amount of the Memo Invoices selected.
 - Optionally enter any Payment Notes and select Post Payment.


 Note: The payment total must match the total amount of the Memo Invoices selected.