Overview
See SKY Customer Overview for information on searching for Customers upon first opening SKY Customer.
Those with the Edit Customer Information permission enabled in SKY Admin have the ability to edit some Customer information. Areas that can be edited are indicated with a Pencil icon.
Select the Pencil icon to make changes, then choose the Checkmark to confirm the edits or the X to discard.
 |
The primary pane on the Overview page displays a quick view of a variety of account information.

- Customer Information – View the Customer Status, Customer ID, Address, and Salesperson. Select the Pencil icon to make any necessary changes, then choose the Checkmark to confirm changes or the X to discard.
Note: The status can only be changed in Windows. - Contact Information – The phone number(s) for the customer display. If using a mobile device, tap Call or Text to contact the Customer. Select the Pencil icon to make any necessary changes, then choose the Checkmark to confirm changes or the X to discard.
- Customer Map – View the geocoded address for the customer. Google Maps functionality makes the map interactive.
- Notes – Notes regarding the Customer are displayed. Select the Pencil icon to make any necessary changes, then choose the Checkmark to confirm changes or the X to discard.
- Credit Status – The Credit Status is established on the Customer Profile within Agvance.
- Balances – Total balance information is broken down by category:
- Regular – This displays open Invoice totals. Selecting the amount opens the Invoices window.
- Prepay – This displays open Booking totals. Selecting the amount will open the Bookings window.
- Unapplied Cash – This displays total unapplied cash for the account. Selecting the amount expands the line item showing the Beginning Balance, Current Month Activity, and the Current Balance.
- Budget Balance – This is the total Budget Balance for the account. Selecting the amount expands the line item showing the Beginning Balance, Plus Monthly Budget Payments, Less Invoices for Delivery, and the Current Balance.
- Budget Due – This shows total open Memo Invoices. Selecting the amount opens the Memo Invoice window.
- Unbilled Activity – This is the total dollars for Delivery or Blend Tickets not yet invoiced. Selecting the amount opens the Activity tab displaying any tickets that have not yet been invoiced.
- Past Due Invoices – Select a Due on or Before date to display past due Invoices. Choosing View Invoices opens a window listing the Invoices included in the selected criteria. Select the Due on or Before date option to filter the Amt Past Due information or to filter the Invoices listed when selecting View Invoices.
- The Selection option on the Search invoices search bar is defaulted to ON. Invoices matching criteria from the Past Due Invoices card are selected but can be deselected by removing the checkmark per line item. Select the Ellipsis to Select All or Deselect All. Choosing Pay Invoices navigates to the Add Payment screen.
- Sales by Month – This displays overall sales by month for the past 12 months. Hover over the bar graph to see the total dollar amount of sales for that month.
- Calculate Payments Due – Quickly determine a payment due for the account by setting date parameters and toggling options. The Payment Date will filter payments due by the selected date. Due on or Before dates filter by the selected date. Optionally toggle the Include UAC and Maximize Discount options on or off. The Net Due, Disc Available, UAC Applied, and Payment Due information displays based on selected criteria.
- Select Make Payment to navigate to the Add Payment screen. Invoices making up the Net Due amount on the card are automatically selected but can be changed.
Activity
A summary of the last 10 most recent activities displays on the Activity tab in Customer. Different information is available depending on the transaction type. Select the transaction number to navigate to where that specific transaction resides in Customer.

From there, more information can be viewed by selecting the Expand button or additional options are available from the Ellipsis such as View or Download PDF.
Attachments
Any documents that have been attached to the Customer Profile in Agvance display. Choose the Ellipsis icon to View Attachment or Delete Attachment.
View Attachments must be turned on in SKY Admin per user for this tab to be visible.

Select the Leaf icon to Send to Grower 360 or Remove from Grower 360. A blue leaf indicates the document is currently visible in Grower360.

The file will display in Grower360 in the Resources area.

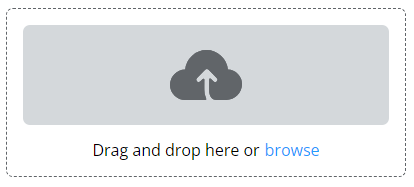
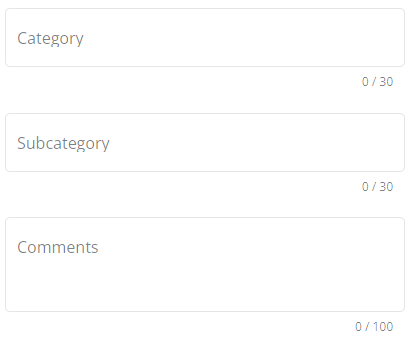
Attachments can be uploaded by selecting the + Add Attachment button in the lower right. Drag and drop a file to the upload area or select browse to find the appropriate file. The Category, Subcategory, and Comments fields are all optional. Once the file is uploaded and any additional information is added, choose Add Attachment.
Note: The only supported files to share with a Grower that will open on the native app are PDF, DOC, XLS, TXT, and CSV. Other formats will display on the desktop in addition to these listed.

Classifications
On the Classifications tab in SKY Customer, see the Classifications to which the Customer belongs.

Documents
The Documents tab in Customer provides the Grower Summary Report after it has been run in Agvance and sent to the Grower to assist Growers with any questions. Additional documents can also be added and optionally shown in Grower360.

The Leaf icon, when filled in, indicates the the document is visible to Growers.
Note: When the Leaf icon is filled in with black, this means the document is ALWAYS visible to the Grower. The only way to keep the Grower from seeing this document is to delete the file. If filled in with blue, the document can optionally be shared with the Grower. Selecting the icon gives the option to show/hide the document in Grower360. Once hidden, the icon will be an outline rather than filled in to indicate it is no longer being displayed in Grower360.

Selecting the Ellipsis gives the options to view the document in a separate tab or to remove the document from this area.

Adding Documents
Documents can be added by selecting the + icon in the bottom right.

- Drag and drop the document in the designated area or select browse to locate the appropriate document.

- Optionally enter a Category, Subcategory, and any Comments.

- Select Add Document to finish the process or Cancel to return to the Documents tab.
- Upon adding and choosing to make the document visible, it will be available in Grower360.

Statements
Invoice and Budget Statements are available on the Statements tab. Selecting the Download icon gives the option to view or download the statement as a PDF. Additionally, if using the Send statements to Grower option on the Combo and Budget Billing Statements, those will display here as well.


