When the lab data is imported into the appropriate field files, it also remains in the \AVDATA\LABDATA directory. Eventually, many transfer files accumulate and this directory becomes cumbersome to navigate. It is possible to delete the files using DOS commands or the Windows Explorer function, but this is a tedious task if not familiar or comfortable using those tools.
The alternative is the archiving feature described below. Archiving in this case means that the selected files are moved to a holding area to be considered for deletion at a later time. Archived files do not show up at the Import Soil Test Data screen but may be retrieved if needed.
Archiving Lab Data
- Go to Hub / Transfers / Import / Soil Tests. The files displayed in the window are the files currently in the \AVDATA\LABDATA.
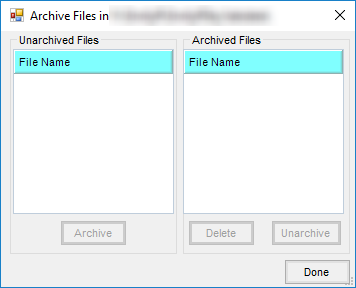
- Choose Archive/UnArchive. The unarchived files are displayed on the left, while the archived files are displayed in the box on the right. Double-clicking on any of the files in the left box moves them to the archived directory which is \AVDATA\LABDATA\SAV. Double-clicking on any of the files in the box on the right retrieves the files from the archived directory and places them back into the unarchived directory (\AVDATA\LABDATA).
 Note: An optional and preferred method of archiving lab data files is to use the Archive Selected File After Import feature available at the Import Soil Test Results screen during the import process.
 - To erase the files in the archive directory, select the desired file within the archived directory and choose Delete at the bottom of the screen.
 Note: An optional and preferred method of archiving lab data files is to use the Archive Selected File After Import feature available at the Import Soil Test Results screen during the import process.
Import Soil Test Configuration
- Select Options on the Import Soil Test Results window.
- The Soil Lab Import Format Number setting identifies the data format used for the import. It is important that this be set correctly.

- The rest of the screen options determine whether the data is received in PPA (pounds per acre) or PPM (parts per million). Use the Conversion Factor Table at the top of the screen to help set this up.

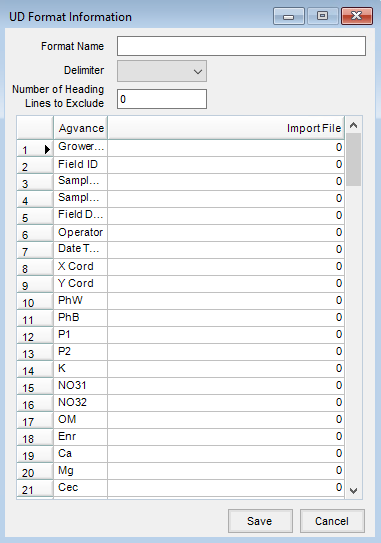
User Defined Format
- Select Options and choose Soil Lab Import Format Number 27.
- Select Save.
- On the Import Soil Test Results screen in the UD Format area, choose Add.
- The UD Format Information window appears to enter the format information. After this is completed select Save.