Agvance SKY Dispatch
- Priority Levels must be set up on the General tab under Company Settings before they are available to be added to a Blend Ticket.
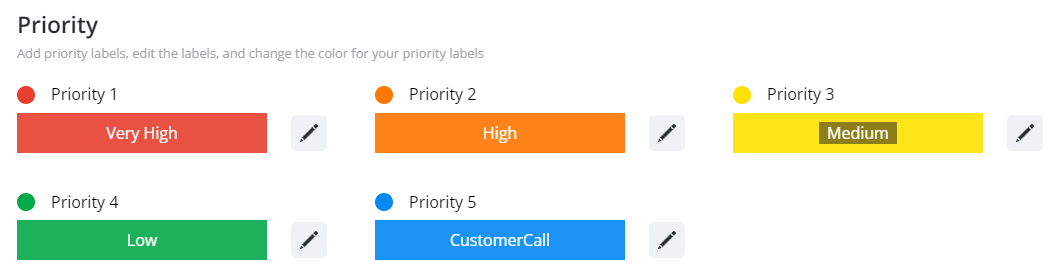
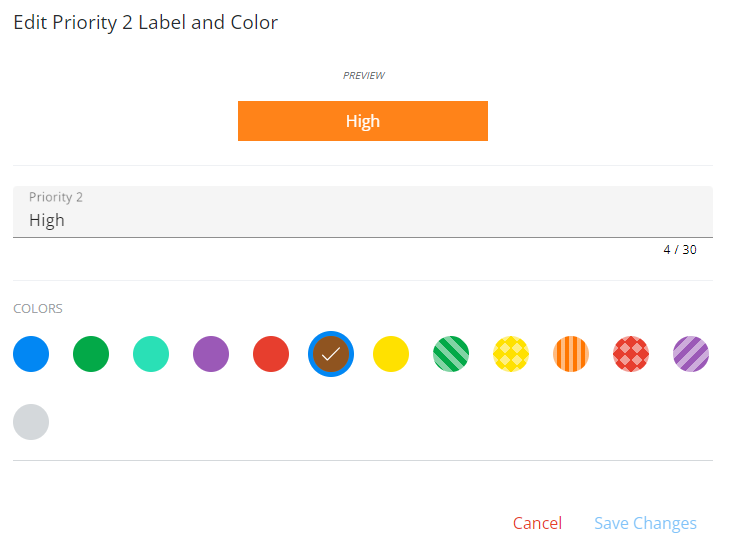
- Select a color for each Priority Level and customize the Label or use the default label names.
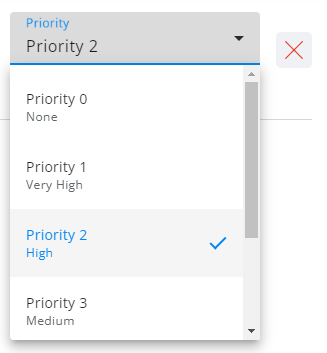
- From the Jobs area in List View, select the ticket number to add or edit the Priority. On the Blend Ticket Details screen, choose the Edit icon to edit the Priority Level. 5. Use the drop-down menu to choose a Priority Level from the company’s custom list of levels set in Company Settings.
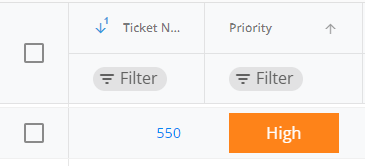
- The Priority Level shows for the Blend Ticket in the grid in Agvance SKY Dispatch.


Agvance Windows
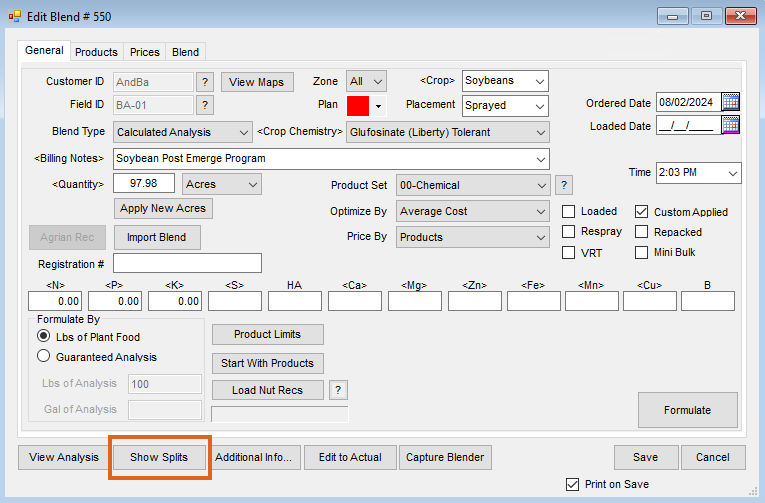
- On a new Blend Ticket, choose the Priority Level from the drop-down menu on the Blend tab.
- To edit a Blend Ticket’s priority, search for the Blend Ticket number in Agvance and choose Edit.
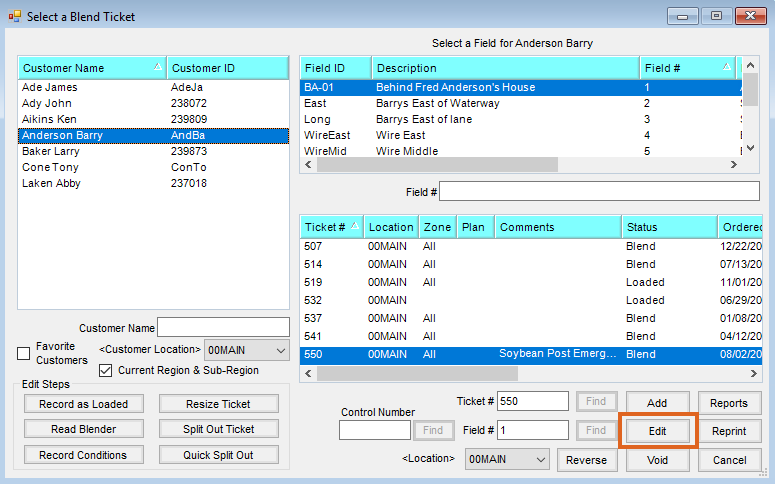
- Select Show Splits.
- From the Blend Ticket Splits screen, select the drop-down menu under the Disp Priority column.
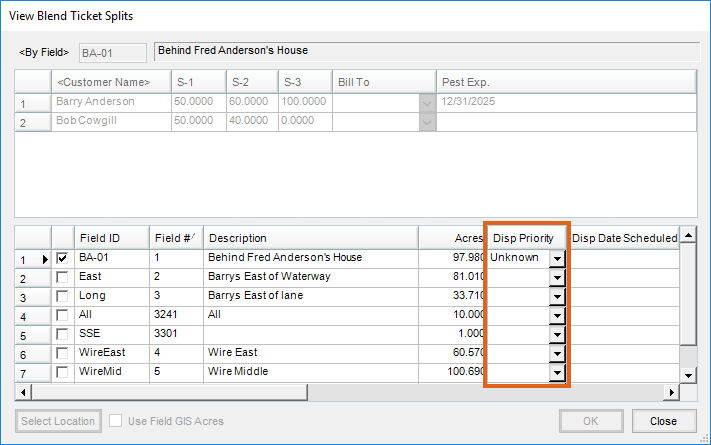
- Choose the Priority Level, select Close, and Save the edited Blend Ticket.
- The Priority Level shows for the Blend Ticket in the grid in Agvance SKY Dispatch.


Set Single/Batch Priority
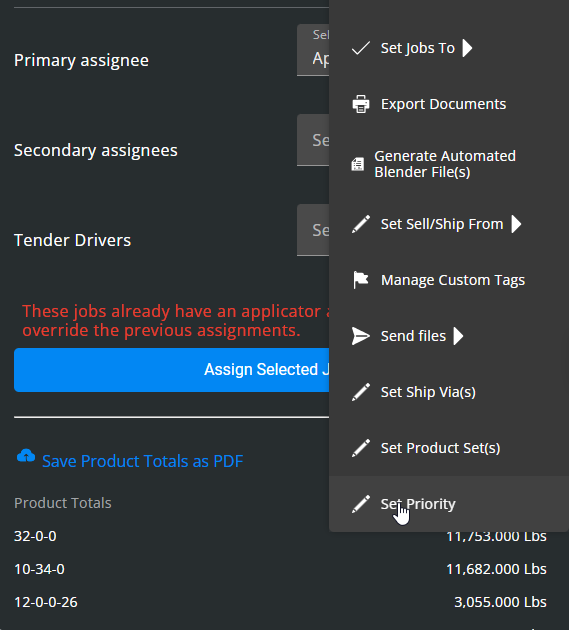
- When selecting one or multiple tickets in List View and Map View, choose the Ellipsis to display Set Priority.
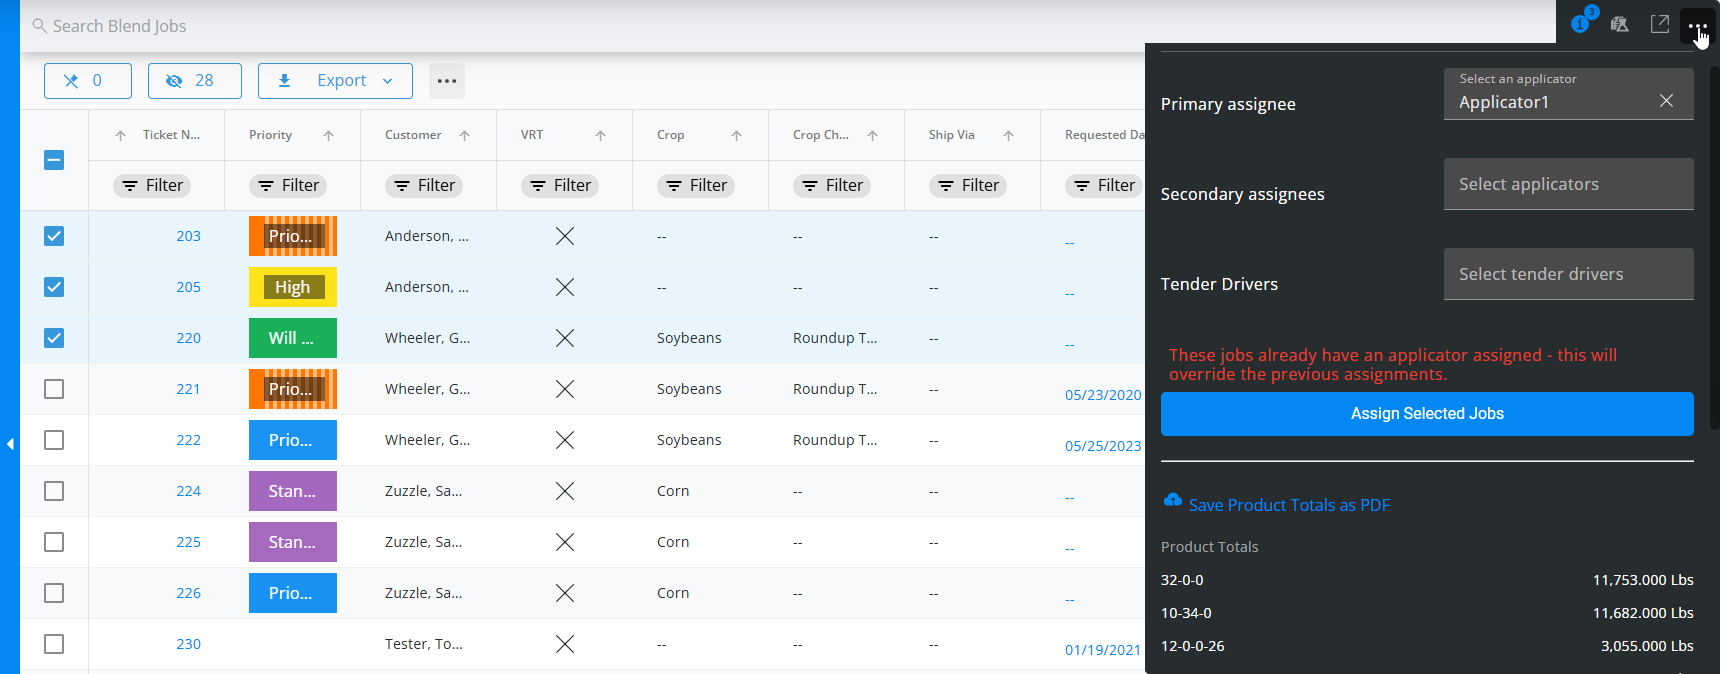
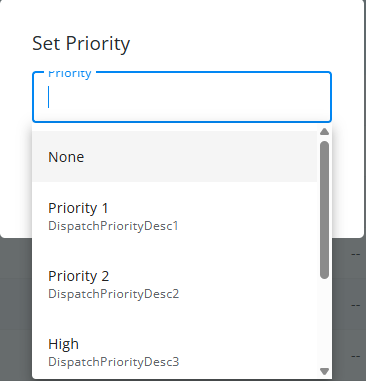
- Choose Set Priority to open a list of available Priority Levels as configured in Company Settings.
- Select the Priority Level from the list.
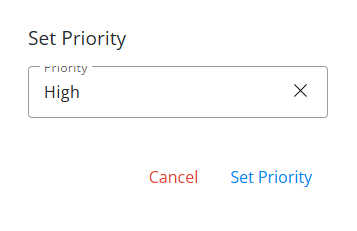
- A confirmation message appears when applying a Set Priority to single/batch tickets.
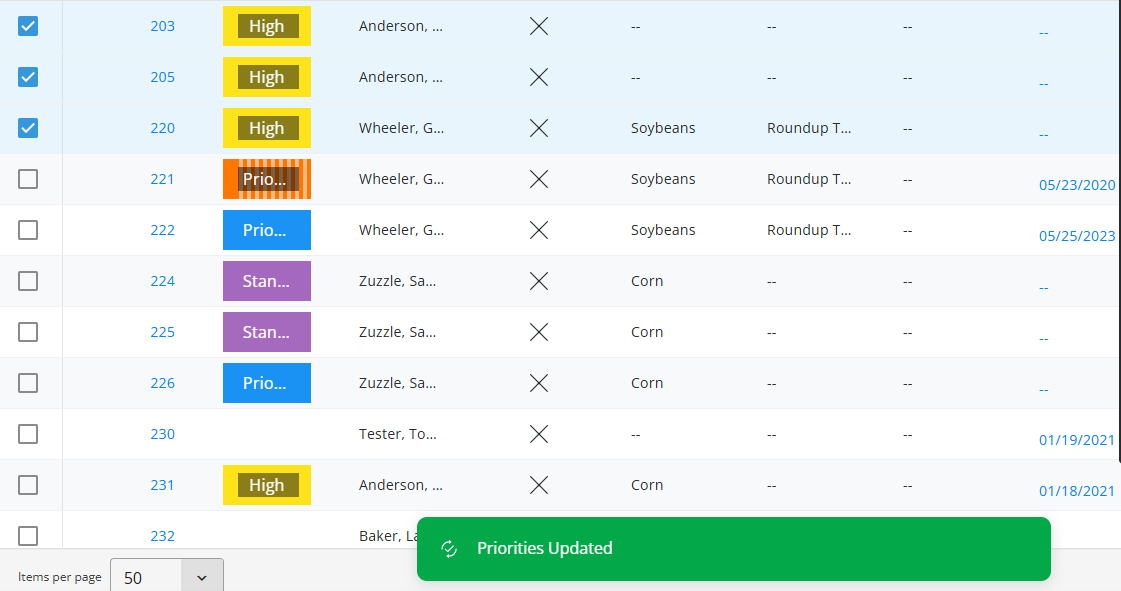
- Once confirmed, the selected Set Priority is applied and color-coded on all selected jobs in the grid and map. A confirmation message also appears to indicate priorities have been updated.
Note: Priority Levels must be set up on the General tab under Company Settings before they are available to be added to a Blend Ticket or Delivery Ticket.


