The following document explains the installation and configuration process for an Ithaca iTherm280 receipt printer.
Setup
- Download the drivers for the iTherm280.
- Unzip the folder and install the printer as a normal Windows printer.
Note: The correct driver can be found in the ITherm-304 folder. There is no ITherm280 folder. - After installing the printer, right-click the Printer Instance, and select Printer Properties. Navigate to the Device Settings tab, and select Yes on the Eject Page with FF? option. This prevents the receipt from cutting off prematurely.
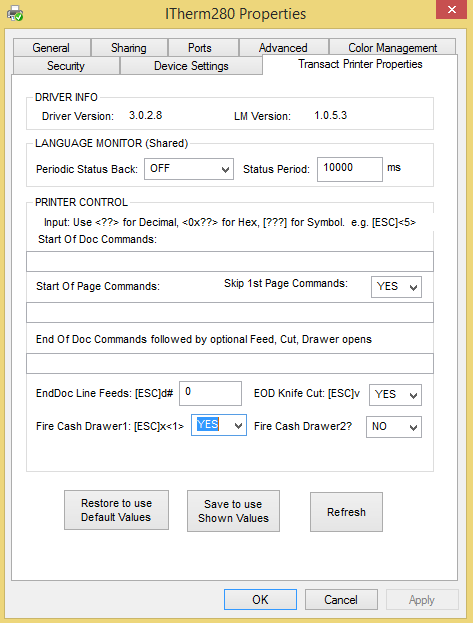
- On the Transact Printer Properties tab, select Yes in the EOD Knife Cut: [ESC}v drop-down. With this option selected, the printer cuts the receipt after printing. On this same tab, select Yes in the Fire Cash Drawer1: [ESC]x<1> drop-down.
Note: The proper cable must be used in order for the cash drawer to open. For the Ithaca printer, a CD-009A cable is required. Be sure the drawer is not locked by either having the drawer key inserted vertically or removed from the drawer altogether. - After changing these settings, select Save to use Shown Values. The print spooler service restarts.
 Note: An error may occur regarding opening lang mon Registry. If so, open the Utilities folder found in the original zipped print driver folder and run the TransactPrinterProperties.exe file as an Administrator to make any changes to these values. This should look like the following:
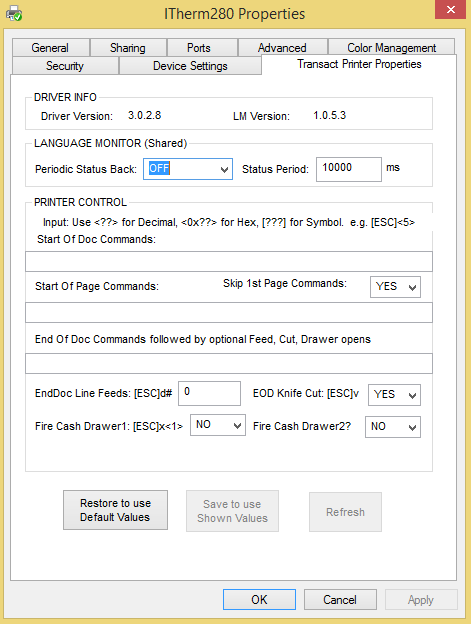
- Occasionally, this printer may run in Epson Emulation mode. If so, manually enter the Cut and Fire Cash Drawer codes, whether it be on the driver or with the utility. These codes can be found at http://transact-tech.com/.
 Note: An error may occur regarding opening lang mon Registry. If so, open the Utilities folder found in the original zipped print driver folder and run the TransactPrinterProperties.exe file as an Administrator to make any changes to these values. This should look like the following:
