General

- Login Using Windows User – This logs users into Agvance automatically based on their Windows login account. Once this option is checked, the Windows Login ID field must be filled out for users at Hub / Setup / Users on the Profile tab.
- Allow users to login from multiple machines – For companies with multiple Terminal Servers, check this option to allow users to log in from multiple machines. When a user logs on, if they were logged onto a previous session, a warning appears. If they choose to continue, they are logged off the previous session and logged into the current session.
- Use ThinPrint Printer Driver – Select this option if using ThinPrint. ThinPrint is a possible solution to increase printing speed and functionality for hosted customers.
- Mail Host – Enter the email exchange server information here to use the email option when exporting reports and when directly emailing ACH payment notifications to vendors. For more information on emailing via a bulk email service, see here.
Note: In Version 7.0.25780 and up, everywhere that sends an email through API or Agvance Windows will require the Mail Host and Address information be fully populated. The Email Address on the User setup will only be used as a Reply To address. The From will ALWAYS be the email set up here. For those using Send Grid to send CRM emails (using CRM only), it can still be set up to use agvancecrm@agvance.net as the From address. If this is not filled out, there is NO emailing inside the application. To send any of the below options, the Mail Host and Port always need set up for the items below and the User must be set up to send these. Only the full Mail Host information needs populated. Some will still require a User's email for the Reply To:- Agvance Reports (using Send Email when previewing)
- AP PO Approver Emails
- Windows Dispatch (completed job emails)
- Purchase Orders (emailing to Vendors)
- AP ACH (email notifications to Vendors)
- Emails generated from AgvAgent for PDF output
- Emails to Energy Drivers from Energy Work Order or Call-In option
- Emails from Mobile Sales through the API
- Mail Host Email – For CRM users, entering the mail host email in this area uses the company’s mail host server instead of the SSI mail host server when documents are sent through CRM. If a Mail Host Email Address and are entered, the Mail Host and Port above must also be entered.
- Default timeout for email link (# of days) – With Agvance Version 7.0.21730, enter the number of days the link sent via CRM should be valid. See here for more on sending documents via CRM.
- Map Layer Password – Enter the password to access the Land Ownership Map Layer.
- Filter Invalid Databases – This option allows only the prior year databases associated with the current database to display in the Hub drop-down menu used for switching between databases.
- Prop 65 Cancer Warning Statement – Enter a warning for products determined to cause cancer. This statement prints on the Invoice, Delivery Ticket, and HAZMAT documents when the products are delivered in California. Including [CHEM_NAMES] in the statement will print the specific chemical name on the document.
- Prop 65 Developmental Warning Statement – Enter a warning for products determined to cause birth defects or other reproductive harm. This statement prints on the Invoice, Delivery Ticket, and HAZMAT documents when the products are delivered in California. Including [CHEM_NAMES] in the statement will print the specific chemical name on the document.
- Web API Database Connection Information – This is used when working with SSI Support to activate the Mobile Sales module or to utilize CRM or Agvance Mobile Energy in multiple databases.
Field

- Field Inputs – These are expenses related to growing a crop. Field Inputs may be added to the existing inputs listed by selecting Add. These are used on the Field Budget window where costs may be entered related to various field inputs along with expected yield and cost/bu, to get a break-even analysis.
- Cross Reference – Enter the headings related to the four optional cross references available at the Field Profile window. One potential use might be ASCS numbers.
- Field Notes – Enter headings that relate to the four field note areas available from within the Field file. These note areas are typically used to record seasonal information such as seed/planting data, crop scouting results, tillage methods, etc. and are accessible by selecting Field Notes when adding or editing a Field.
- Enforce Unique Field Descriptions – Selecting this option ensures no two Fields under the same Farm have the same Field Description.
- Extended Soil Test Headings – These user-defined headings may be used to label tests that are not pre-defined in the standard list.
- Warn if applied acres doesn’t equal selected acres – Set the program to warn if the applied acres do not match either the vehicle or applicator acres entered with the Sales Order, Field Plan, Blend Ticket, Delivery Ticket, or Invoice.
- Warn if custom applied is not checked when an applicator or vehicle are selected – With this option selected, when entering a Sales Order, Field Plan, Blend Ticket, Delivery Ticket, or Invoice, a warning appears upon saving the transaction if the Custom Applied option is not selected.
- Validate applicator license on custom applied tickets – Marking this option verifies the Applicator selected on the Blend Ticket has a valid applicator license when the Custom Applied option is marked on the ticket.
- Ignore Applicator and Vehicle Location Restrictions – When turned ON and a User is restricted from a Location and that Location is tied to an Applicator or Vehicle, the User WILL be able to see the Applicators and Vehicles even though they are restricted from those Locations. When turned OFF and a User is restricted from a Location and that Location is tied to an Applicator or Vehicle, the User WILL NOT be able to see the Applicators and Vehicles while restricted from those Locations.
- Field Attributes – Choose this option to Add, Edit, or Delete a Field Attribute. Additionally, Values can be set on the Attributes by selecting Setup Values. When setting the Value on an Attribute, it will be required to pick from a specific Attribute value already in the drop-down.
- Field Classifications – Select this option to Add, Edit, or Delete a Field Classification. For more on Classifications, see Agvance Classifications Overview.
- Mapping Field Name – Indicate to view the Mapping Field Name by Description, ID, or Both. This preference changes the view in Mapping only.
- Field Classification Within 500 Ft of School – The Classification selected here will result in a warning when saving a Blend Ticket if a Field is a part of the Classification.
Customer

- Customer Classifications – Select this option to Add, Edit, or Delete a Customer Classification. Classifications allow filtering or selecting subsets of Customers. For more on Classifications, see Agvance Classifications Overview.
- Customer Attributes – Choose this option to Add, Edit, or Delete a Customer Attribute. Additionally, Values can be set on the Attributes by selecting Setup Values. When setting the Value on an Attribute, it will be required to pick from a specific Attribute value already in the drop-down.

- Add Customer Setup
- Auto ID – If this option is checked, then the Customer ID is automatically created when adding a customer.
- Zero Pad – With this option selected, the auto-generated CUSTID is left padded with zeroes to make it 6 characters long.
- Cross Reference
- 1 - 4 – Enter the headings related to the four optional cross references available at the Customer Profile window. In combination with the Check For Duplicates option, this may be used to hold information or Customer IDs used by an interfacing system which does not use the same ID format as Agvance.
- Customer ID Source (Printouts) – Choose the cross reference or Agvance ID to be printed as the Customer ID on customer transactions and reports from the drop-down .
- Customer ID Source (Selecting) – Choose a cross reference to display in addition to the Agvance ID at Customer selection screens at File / Open / Fields, File / Open / Farms, or Blending / File / Open / Blend Ticket.
- Check For Duplicates – This requires the selected cross reference be unique for all Customers in the database.
- Require Customer E-Signature Agreement – Selecting a Customer Classification here indicates Customers have agreed to use an electronic signature on documents.
- Extended Customer Edits Tracking – With this selected, the editing of certain Customer information is tracked and may be viewed on the Customer Change Log report found at Accounting Reports / Accounts Receivable / A/R Status.
- Load customer list only when requested – When checked, Customer selection lists are only loaded when requested.
- Suppress Customer/Location Warning – For multi-locations companies, selecting this option suppresses the warning when selecting a Customer from a Location other than the current location.
- Method to Check Sale of Restricted Products – Set the level of customer permit checking to be invoked. The options available are Don’t Check, Warn Only, or Disallow. This option works together with the Source of Customer Permit Checking setting. For more on this function, see Regulation of Restricted Product.
- Source of Customer Permit Checking – Federal, State, or Both are all valid options here. This setting determines the manner the customer’s permits are checked against the Products on a Point of Sale (POS) document. For more on this function, see Regulation of Restricted Product.
- Ship To Cross Reference
- 1 – 4 – Enter the headings related to the four optional cross references available at the Customer Ship To addresses. A maximum of ten characters is allowed. Once established, these cross references display when selecting Addresses on the customer file.
- PO Ship To Source – Optionally select the Ship To Cross Reference to default for the customer Ship To address when Purchase Orders are entered.
- Add Cash Customer Setup – These preferences affect the customer being added by selecting Add Cash Customer found in either the Hub or Accounting at File / Open / Customers.
- Auto ID – If this is checked, then the Customer ID is automatically created when adding a cash customer.
- Zero Pad – With this option checked, the auto-generated CUSTID is left padded with zeroes to make it 6 characters long.
- Salesperson – The salesperson selected here defaults on the Customer Profile window when selecting Add Cash Customer.
- Credit Limit – When choosing Add Cash Customer, the amount entered here defaults in as the Credit Limit Amount on the Customer Credit window.
- Credit Status – The status selected from the drop-down defaults on the Customer Credit window when selecting Add Cash Customer.
- Credit Date Opened – Choose between System Date and Blank to default in when selecting Add Cash Customer. If Blank is selected, then the credit checking tools do not apply to the customer.
- Classification – Select the appropriate Classification for cash customers if any apply.
- Default Terms – The term selected from the drop-down defaults in on the Miscellaneous tab of the customer file as the Default Terms when choosing Add Cash Customer.
- Check What Customer Address – This is used for checking for duplicate Customers. Optionally select the address line to check for multiple Customers using the same address. The options are None, Address 1, Address 2, or Address 3.
- Duplicate Customer Checking
- Elements – This allows the ability to check for duplicate Customers. Choose the data elements to be checked from the drop-down. Once an element is selected here, Duplicates is available when adding a new Customer.
- Warning – This gives the option to Warn Only or Stop the Add if a duplicate Customer is entered.
- Match Type – Choose how to check for duplicate Customers from the options Exact Match, Partial at beginning word, or Partial anywhere in word.

Product

- Technology Groups
- Add Tech Group – Use this option to add a Technology Group. Indicate a method of checking for this Technology Group. Choose a method of Allow for no checking for a valid license number, Warn Only if none is found or Restrict Sale for the transaction if the customer has no technology license. The warnings or restrictions may also be set for Bookings and Delivery Tickets. See Technology License for more details on Technology License Management.
- Edit Tech Group – Select this option to change information about the highlighted Technology Group.
- Delete Tech Group – Use this option to delete the highlighted Technology Group.
- Chemical Database
- Turn Off Manufacturer name import – When checked, refreshing the chemical database on the Product or through the Import Chemical Database Data utility does not update the Manufacturer on the Product with the manufacturer in the DOT regulatory database.
- Method to Check Available Distribution – Choose Don’t Check, Warn, or Disallow available distribution. More information can be found here.
- Turn Off State Restricted Import – When checked, the State Restricted information is not imported from the chemical database.
- Department Cross References 1 - 4 – Enter the headings related to the four optional cross reference inputs at the Inventory Department Profile window. These entries will display when editing Inventory Departments.
- Product ID Source – Choosing Alternate Product ID displays the Alternate Product ID from the product Profile tab at the Select Product window and on some reports.
- Product Cross References
- 1 - 4 – Enter the headings related to the four optional cross reference inputs at the Product Profile window. In combination with the Check for Duplicates option, this may be used to store Product IDs used for interface purposes when the interfacing system uses an ID format different from Agvance.
- Check for Duplicates – This allows duplicate checking on a single cross-reference used for interfacing with a separate tracking system.
- Units – This displays the units available for selection when adding Products. Selecting Add Unit gives the ability to add to the list of existing unit labels. Be careful not to duplicate them (avoid adding LBS or LB when Lbs exists) as there is no option for deleting unit types. Units added here are available throughout the program.
- Manufacturers – Build a custom list of Manufacturers available at the Product Profile window. If using an EDI export, input the EDI name for the manufacturer by highlighting that Manufacturer and selecting Edit Manufacturer.
- Add Manufacturer – Use this to add a Manufacturer.
- Edit Manufacturer – Highlight the Manufacturer and select this option to edit the existing Manufacturer.
- Delete Manufacturer – Select the Manufacturer and then this option to delete the existing Manufacturer.
- Product Sort – Determine whether inventory reports sort by Name or ID. Many reports allow the override of this setting.
- Pricing Decimal Accuracy – Set the decimal accuracy of the List and Pricing Level figures used throughout the system to 2, 3, or 4 places.
- Department Classifications – Classifications may be set for Inventory Departments. The Department Classifications are established in this area and may be selected on the Profile tab of the Inventory Department.
- Always Print HazMat when requested, even if no hazardous products are shipping – Typically, when requesting a HazMat to print at the point of sale document (such as Blend Ticket, Delivery Ticket, or Invoice), it prints only if there is hazardous material on board. This option causes it to print when requested regardless of the material listed on the document.
- Hazmat Printout-Support Product Rollup – With this option checked, products on HazMat printouts are rolled up under the first Product.
- Check for Mismatched Products on Deliveries and Blends – Selecting this option warns when the Location associated with any Product on the Delivery Ticket or Blend Ticket does not match the global Location upon saving the document.
- Print active ingredient on HazMat Doc – With this marked, if the Product is linked to a DOT regulatory database, the program uses the regulatory data to obtain the active ingredient. If no link to a DOT regulatory database exists, the active ingredient stored on the Safety tab of the Product file prints.
- Always Round Package Quantity To The Next Whole Unit When Hazardous – With this option checked, if a Product is not set to always be 1, it rounds up to the next whole container when the Product is marked as Potentially Hazardous on the Safety tab of the product file.
- Lot Attributes – Use this option to Add, Edit, or Delete a Product Lot Attribute. Additionally, Values can be set on the Attributes by selecting Setup Values. When setting the Value on an Attribute, it will be required to pick from a specific Attribute value already in the drop-down.
- Product Classifications – With this option, Add, Edit, or Delete a Product Classification. Classifications help categorize the Products so they can be filtered and selected by this grouping tool. The Product Classification contains a Quick Select Classification option that allows Products in this Classification to display on the Quick Select tab of the Select Products window. For more on Classifications, see Agvance Classifications Overview.
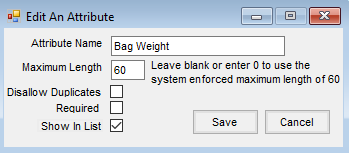
- Product Attributes – Use this to Add, Edit, or Delete a product attribute. If Show in List is NOT selected, the Product Attribute will not be shown in the Add/Edit Product window and Product Multi-Select window. The default for this option is to be unchecked. Additionally, Values can be set on the Attributes by selecting Setup Values. When setting the Value on an Attribute, it will be required to pick from a specific Attribute value already in the drop-down.
- Product Barcode Scannable Items – Set the order used to look up a scanned barcode.

Farm

- Classifications – Use this to Add, Edit, or Delete a Farm Classification. Classifications help filter or select a subset of Farms.
- Attributes – With this option, Add, Edit, or Delete a Farm Attribute. Additionally, Values can be set on the Attributes by selecting Setup Values. When setting the Value on an Attribute, it will be required to pick from a specific Attribute value already in the drop-down.
- Mapping Farm Name – Choose whether to view the Farm Description, Farm ID, or Both. This preference changes the selection in Mapping only.
- Enforce Unique Farm Descriptions – Select this option to ensure no two Farms tied to the same Customer have the same Farm Description.
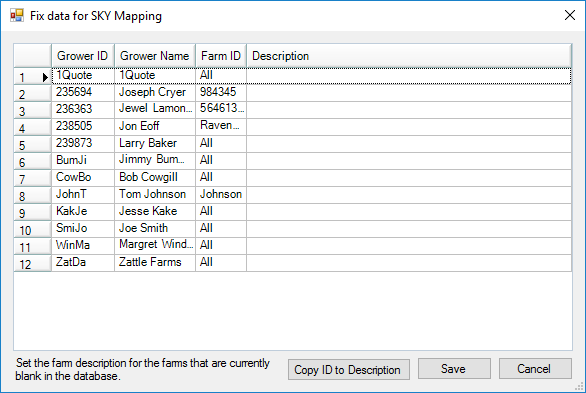
- Require Farm Descriptions – Check this option if Farm Descriptions should be required. Upon selecting and choosing Save, a window will display to enter Descriptions for all Farms missing a Description.

Grain Scale Interface

- Save Scale Interface Ticket on Import – With this option selected, when importing Scale Tickets into Grain from Grain Scale Interface or splitting out Scale Tickets from Grain Scale Interface, any changes made to the Scale Ticket during import are saved back into the Scale Interface Ticket table in the database.
- Open Storage default transfer action is Use DPR – This option causes the Open Storage default transfer action to be Use DPR.
API
Agvance API

- Send notification to SKY Dispatch – If a Database ID exists and this option is selected, a notification is sent to Agvance SKY when a Delivery Ticket is created or changed.
- Agvance User for Grower 360 Transactions – Any company using Grower360 needs to ensure a Grower360 user is populated. Selecting a user here allows for payments to be taken in Grower360 and for growers to provide electronic signatures. It is recommended that this user not be shared with an Agvance user so the company can determine when the transaction came from Grower360 by reviewing user information. The Volume Statement will not run without this user filled in.
- Require SKY login for Apps – Select this option to determine if the Agvance apps must use an Agvance SKY login.
Driftwatch

- DriftWatch API Key – For subscribers of DriftWatch, enter the API Key in this area to link the DriftWatch information to maps. The existence of this key enables additional DriftWatch options when printing the Custom App sheet in Blending or Dispatch.
- DriftWatch Columns to Include on Full Page Map – When printing DriftWatch information on a Full-Page Map, select the items to display by selecting the Include option. Choose the sequence of the items by selecting numbers in the Order column.
DataSilo
For Mapping customers using DataSilo, this setup links the programs, allowing information to be sent from Agvance to DataSilo.
Note: Customer, Farm, and Field Attributes must be established for DataSilo before this setup can be completed.

- Retailer Id – Enter the number provided by Winfield United.
- Send Cropzones – When selected, this option will include crop zone information in the upload to DataSilo.
- Test – Once the cross references and the Retailer ID are entered, selecting this option confirms accuracy of the entries.
- Link Growers / Farms / Fields – This option links information between Agvance and DataSilo. Select the Grower, Farm, and Field to be linked, then select Update.
- Upload Agvance Information – After all the information is linked, use this option to push all linked Agvance Farms, Fields, field boundaries, and crop zones or seasonal boundary information to DataSilo.
