When a new data server is purchased, all Agvance datasets must be moved to the new server. Most Agvance customers have several related datasets. The primary database is typically stored in \AVDATA on the SQL server. Additionally, there are generally several prior fiscal year datasets (FYAV2023, FYAV2022, etc.). If utilizing the Agvance Payroll module, there are also archived Payroll datasets (PYAV2023, PYAV2022). A Move Databases utility is available in Agvance’s stand-alone utility program to assist in the task of safely migrating all related to datasets to a new server.
Preparing to Use the Utility
Before moving databases, ensure all Users are out of the data.
- The first step is to get the new server ready to run Agvance before using the Move Databases utility. To do this, install Agvance and restore one dataset manually, generally choosing the current year database. The restore will automatically create the Agvance SQL user which is a required component for Agvance and for this utility to work.
Note: If moving to a new application server, it may be helpful to reference the Replacing a Terminal Server article. - Check drive mapping.
- At any machine on the network running Agvance, map a drive letter to the path where the data currently resides (Source Path). If at a machine that was already running Agvance, this drive letter will already exist.
- Map a drive letter to the path where the data is going to be moved (Destination Path).
Setup
Once the steps above are complete, it is time to move the rest of the Agvance datasets using this utility.
- The utility is accessed at Start / Programs / Agvance / Agvance Utilities. The Move Databases function is found under the Utilities drop-down menu.
Note: If help is needed logging into this utility or determining the sa SQL user password on either the source or destination SQL servers, contact a hardware tech first. SSI Support can help reset this password if needed.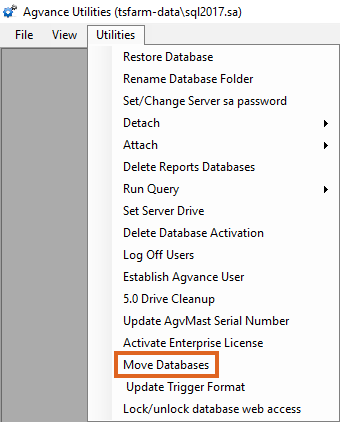
- The Move Databases window will display.
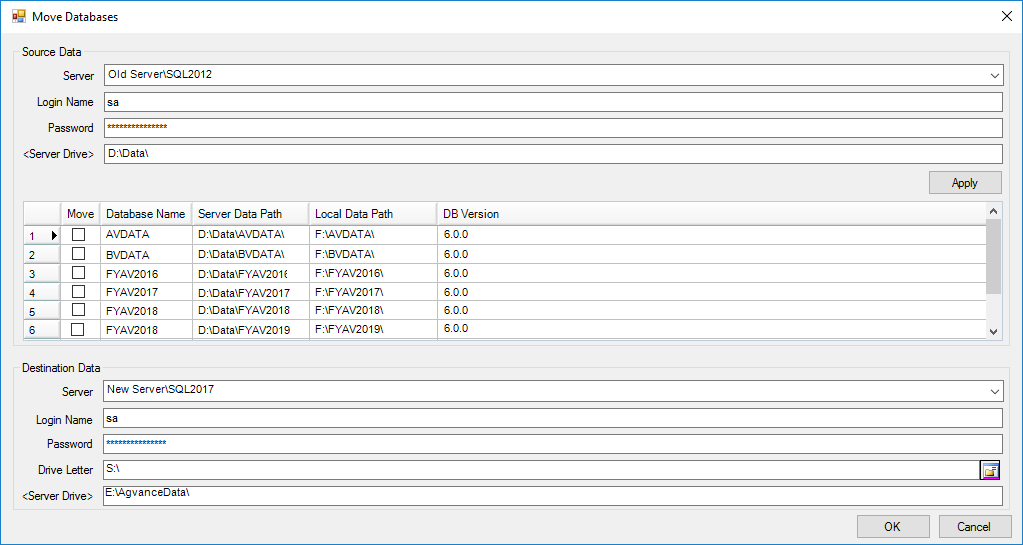
- Source Data Section
- Server – Select the source SQL instance from the drop-down.
- Login Name and Password – Enter the SQL sa Login Name along with the source data server’s corresponding Password.
- Server Drive – Double-click to choose the path to the source data. The items viewable here will be the local data drives of the old data server. Once the appropriate path is chosen, select Apply to populate the grid with the databases.
Note: The path entered for the in the Source Data section determines the subfolder path that will be added to the destination server. For example, if the Source Data is set to D:\Data\ and the data being moved resides at D:\Data\Avdata, then only the Avdata folder will be moved to the destination server. If the Source Data Server Drive is set to the root D:\, then the subfolders and the data folder \Data\ Avdata will be created and moved to the destination server. - Move – Select the rows in the Move column next to the databases needing moved.
Note: If \AVDATA has already been moved as instructed, then leave that row unchecked.
- Destination Data Section
- Server – Select the destination SQL instance from the drop down
- Login Name and Password – Enter the SQL sa Login Name along with the destination data server’s corresponding password.
- Drive Letter – Enter the destination drive letter as it was mapped to the machine running the Move Database utility.
- Server Drive – Double-click and choose the physical path from the destination server’s perspective to the drive letter entered immediately above. In the example above, E:\AgvanceData was mapped as S:\.
- Source Data Section
- Remapping Drive Letters
- It is important that all machines running Agvance are mapped to the new server using the same drive letter that used to point to the old server.
- For the machine from which the Move Database utility was run, disconnect both the Source and Destination drive mappings and map to the new server using the same drive letter that pointed to the old server.
- For each workstation and/or terminal server running Agvance, disconnect the existing Agvance network drive and remap to the new server using the same letter.


Note: Before allowing Users back into the data, log in and make sure the data looks correct. If there are issues with any of the datasets that are moved using the Move Databases utility, please call SSI Support for help.
