Add accruals or freight on Purchase Invoices, Purchase Orders, and Purchase Receipts.
Setup
- Navigate to Accounting / Setup / Inventory / Purchase Add-on Charges.
- Select Add.
- At the Add a Purchase Add-on Charge window, enter the ID. This is limited to 10 characters. Add a Description if preferred.
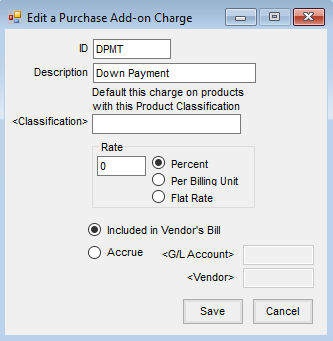
- Optionally select a Classification for the add-on charge.
Note: To default an add-on charge when certain products are selected on a transaction, add the Product(s) to a Classification and select that Classification at this window. - If the add-on charge has a Rate that should default on the transaction, enter the amount and choose Percent, Per Billing Unit, or Flat Rate.
- Select whether the add-on charge should be included in the vendor’s bill or accrued.
- When Included in the Vendor’s Bill is selected, the charge is added directly to the vendor’s bill.
- When Accrue is selected, the amount accrues to the G/L Account and the Vendor selected.
- Select Save.

Including Add-On Charges
- Add a Purchase Invoice, Purchase Order, or Purchase Receipt.
- Select the Products for the transaction.
Note: If the Products on the transaction match the products in the Classification set up for the add-on charge, the corresponding add-on charge automatically defaults. - Double-click in the Add-On column.
- On the Purchase Add-on Charges window, double-click the Charge ID column heading.
- Select the add-on charge. The columns default based on the add-on charge setup but the information can be changed if necessary.
- Select Calculate then choose Save to return to the Add a Purchase Receipt window.
- Select Save to save the transaction.
Note: If importing a Purchase Order into a Purchase Receipt, add-on charges from the Purchase Order default automatically.
Partially Prepay Vendor Rate of Percent
The Purchase Add-on Charge method may be used for handling partial Vendor Prepay.
Note: This situation is designed for those who do not intend to pay the remainder of their Vendor contracts until shipment is received. In this scenario, the Rate will be set to Percent.
Scenario
The following scenario involves fertilizer ordered on a Purchase Order at $400 per ton with a 25% down payment at the time of the order. The remaining 75% balance will be due upon invoice.
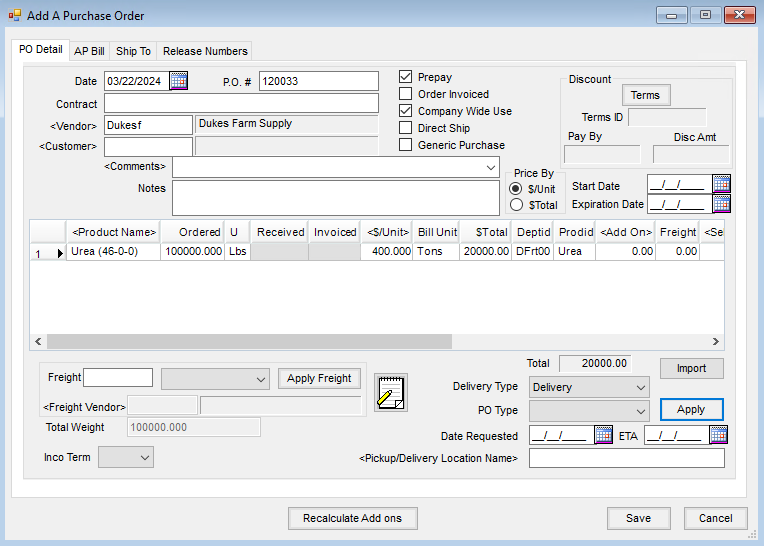
- Add a Purchase Order at Accounting / Inventory / Purchase Orders.
- Select the Prepay option on the Add A Purchase Order window.
- Select the Product and set the $/Unit to $400 per ton.
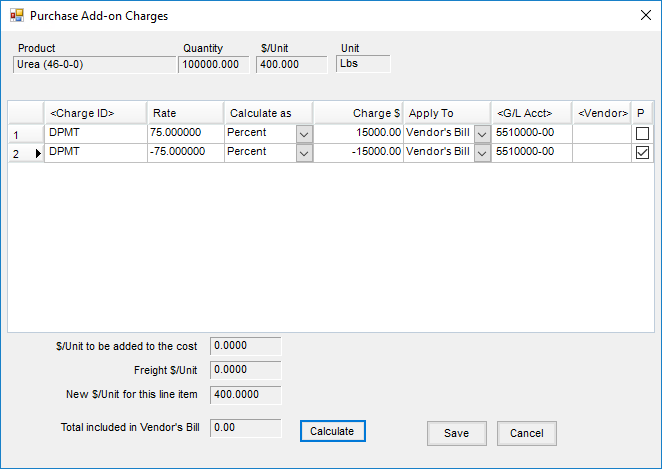
- Double-click in the Add On column to open the Purchase Add-on Charges window.
- Double-click on the Charge ID column heading and select the appropriate Purchase Add-on Charge.
- Set the Rate as the unpaid percent. In this case, 75% is entered as a positive (75) on this line. Set the Calculate As type to Percent. Do not select the P checkbox for Prepay on this line.
- To add the second line for this add-on, double-click the Charge ID column heading again and select the same purchase add-on charge.
- Set the Rate as the unpaid percent. Here, 75% is entered as a negative (-75). Set the Calculate As type to Percent. Select the P checkbox for prepay on this line.
- Select Calculate. Each add-on charge row now displays the Charge $ to apply to the Vendor’s Bill, $15,000, positive and negative respectively, which is the total amount due to the Vendor upon delivery. The Add-on charge has a negative line valued at -$15,000 which reduces the amount saving the PO will increase the balance by to $5,000. When the PO is invoiced, the line will come in as Prepaid in full. The positive $15,000 line (not prepaid) as the company will owe this amount when the invoice is saved.
- Select Save to return to the Purchase Order.
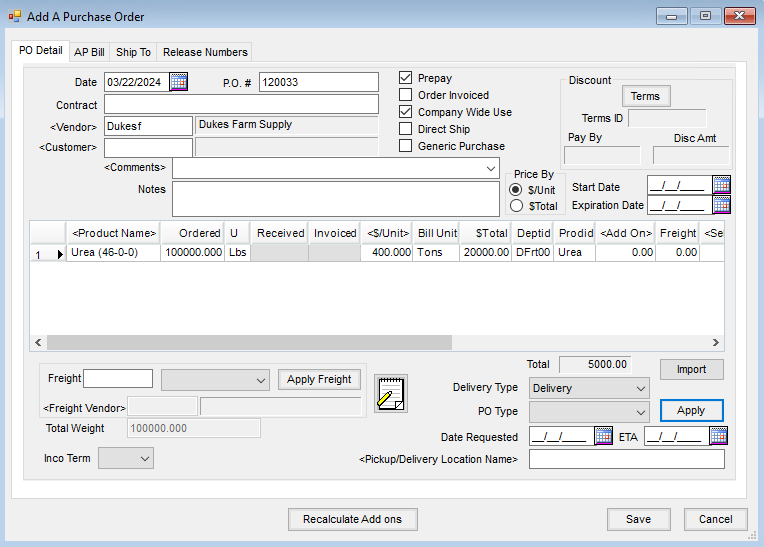
- Select Apply. The Purchase Order now displays the Product at the contracted price of $400/ton, with a $Total amount of $20,000. The total of the Purchase Order is $5,000 which is the prepaid amount.
 The Purchase Order can now be received against as normal. As Purchase Receipts are entered against the PO, the Add-On Charge follows through based on the Purchase Order set up and quantity received. The Purchase Receipt can then be imported into a Purchase Invoice. The Add-On Charges set up on the Purchase Order follow through the Purchase Receipt into the Purchase Invoice.
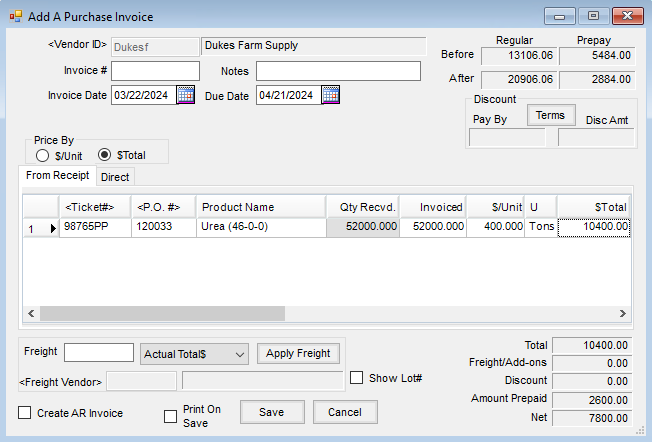
Note: If the Purchase Order is not applied to the Purchase Receipt, the Add-On Charge will not flow through but can be re-entered at the time of Purchase Invoice. - For this example, a Purchase Receipt was entered for 26 tons of fertilizer. The Purchase Invoice now shows 26 tons of product has been received and invoiced against the Purchase Order. The Purchase Order shows 25% prepaid per ton so the prepay is correctly reduced by $2,600. This leaves a balance due of $7,800 when saving the invoice. The product cost has been updated by $400/Ton.


 The Purchase Order can now be received against as normal. As Purchase Receipts are entered against the PO, the Add-On Charge follows through based on the Purchase Order set up and quantity received. The Purchase Receipt can then be imported into a Purchase Invoice. The Add-On Charges set up on the Purchase Order follow through the Purchase Receipt into the Purchase Invoice.

