Overview
The Inbound area of the app is used to add Bills of Lading as product is received at the Location. Products can be added by either using a bar code reader or by manually entering the information for a Bill of Lading or Purchase Receipt. The Product Lot Number populates in the Lot Number field if one exists for the Product when pulling an EDN into an Inbound Bill of Lading.
Selecting Inbound displays a grid listing all Vendors and open Bills of Lading. Choosing a Vendor displays only that Vendor's open Bills of Lading.

Use the Search bar to search by Vendor or BOL#. A new BOL can be added by tapping the + button in the lower right.
Create New BOL
- After tapping the + button on the Inbound screen, a window displays to select a Vendor. Scroll through the list or use the Search to search by Vendor or BOL #. Select the appropriate Vendor.
Note: When searching for EDNs from a Vendor, only Vendors set up in B2B display in the Warehouse app.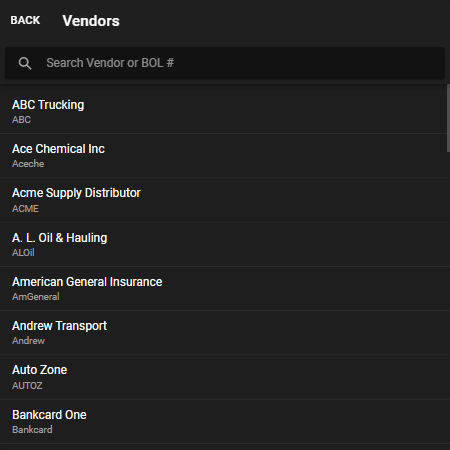
- On the New Bill of Lading screen, the Received Date defaults as today's date but can be changed. Enter the Bill of Lading number. Optionally enter any Comments, then tap Add Product.
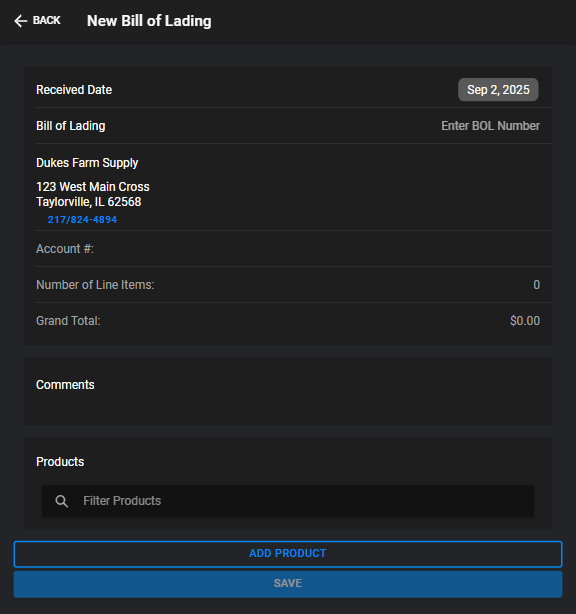
- Use the Search Products field to find Products or tap the Barcode icon and scan the item's barcode to find that Product in the list. Alternatively, choose the Favorite Products tab to choose from the list of Favorites.
Note: Products not currently existing in Agvance can be added by searching for the Product then selecting Create Pending Product and entering the appropriate information. Pending Products may be resolved in Agvance Windows at Accounting / Utilities / Resolve Mobile Inventory Received Products Exceptions.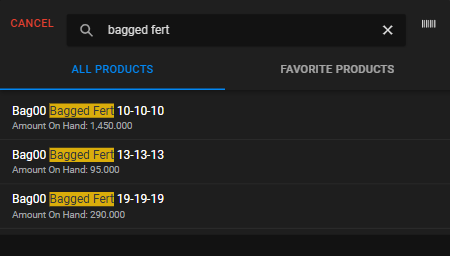
- After selecting the Product to be added, a window displays with some basic Product information. Where applicable, the +/- changes the amount from positive to negative or vice versa.
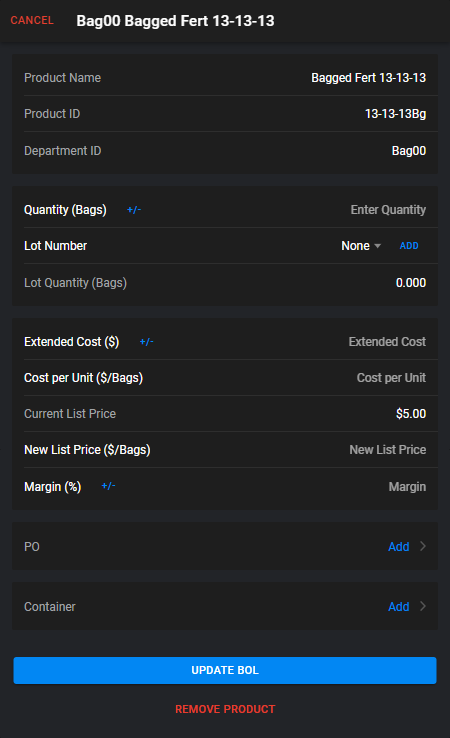
- Indicate the Quantity.
- Optionally select a Lot Number from the drop-down, or choose Add to enter a new Lot Number. If a Lot Number is included, the Lot Quantity can then be entered.
- Entering the Extended Cost recalculates the Cost per Unit and the Margin. Changing the Cost per Unit recalculates the Extended Cost and the Margin.
- The Current List Price is displayed as information only.
- Entering a New List Price recalculates the Margin %. Changing the Margin % keeps costs intact and recalculates the New List Price.
- A PO can be added by tapping Add. This lists Purchase Orders available for the Vendor/Product with an option to Show Company Wide Purchase Orders.
- A Container can also be specified if needed by selecting Add.
- Choose Update BOL to save changes made to the Product. The Number of Line Items and Grand Total will be updated as Products are added.
Note: This updates the received products on the BOL in the app only. The BOL must then be pulled in through a Purchase Receipt. - If the Product should not be included on the BOL, tap Remove Product.


Selecting Save updates the BOL in the app only. The saved BOL can be viewed at Accounting / Inventory / Purchase Receipt. Select the Vendor and choose Mobile Inventory to view the Product coming in and what is listed on the BOL.
