Agvance Blending for Centralized Blending can be used when one company with a blend facility is blending for another company that does not have a blend facility.
There are several steps to properly set up Agvance to utilize the Centralized Blending Transfers functionality.
Company Ordering Blend (Non-Blend Facility)
The cross referencing of Products can be accomplished using Blend Factors or Product Attributes between the two Agvance databases.
After the method to use for the cross referencing of Products is determined, the Product Set must also indicate the preferred method using the Blend Factor To Use drop-down menu on the Blender Interface / Print Preference tab when adding or editing a Product Blend Set at Blending / Setup / Product Sets. If an automated blender interface is being used by the blending facility, these values should match the proper value in the Product setup of the non-blend facility.
Additionally, set the Blender Type to SSI Standard Ascii.

Create a Blend Ticket using the Product Set with the proper blender interface setup. After saving the Blend Ticket, verify the Create Automated Blender File option is selected.

The file will be saved to the folder set up on the Product Set for that Blend Ticket. The file can now be picked up by the blend facility with access to the shared folder. If the blend facility does not have access, the files may need to be moved to FTP, Google Drive, or email.
Company Processing the Blend (Company with Blend Facility)
Set up a Customer for the non-blend facility. It is recommended to set up the folder using the Customer ID established in Agvance. This allows the Customer ID to be associated with the import path selected.
Note: If the Customer ID does not match the folder name, Agvance will not automatically fill out the Grower ID in the Import Other Company Blend Files window.
After the Agvance Customer and folder are set up, the files received from the non-blend facility are now ready to be imported to create a Blend Ticket for the blend facility.
Navigate to Blending / Utilities / Ascii Transfers / Blend Plant Transfers / Import. Use the Ellipsis to browse to the necessary folder. Select Apply to see the files in the folder.
Note: Once one file has been imported from a location, the folder path will be remembered in the Import Directory drop-down.

Select the file(s) to import, and then select the Import button. The Print window displays to optionally print the new Blend Ticket documents. By selecting the Apply 1st Print Settings to All option, if multiple Blend Tickets were imported, additional tickets that were imported will print the same blend documents as selected on the first ticket.
Note: The Control Number on the new Blend Ticket will be populated with the non-blend facility’s Blend Ticket number. Additionally, the Blend Comments will be populated with the Blend Ticket number, Customer, and Acres from the non-blend facility.
When the Blend Ticket is completed and marked as loaded by the blend facility, navigate to Blending / Utilities / Ascii Transfers / Blend Plant Transfers / Export. On the Export Other Company Blend Files window, use the Ellipsis button to browse to the folder, and then select OK.
If the Customer ID does not match the folder name, Agvance will not automatically fill out the Grower ID in this window.
Note: Once one file has been imported from a location, the folder path will be remembered in the Import Directory drop down.

Select Export and the file(s) will be sent to the folder with an extension of .ACT. The file needs to be moved to the shared folder for the non-blend facility (unless the non-blend facility shares the same folder).
The non-blend facility is now ready to read the file(s), which can be read as an automated blender file, updating the Blend Ticket quantities and loading the blend.
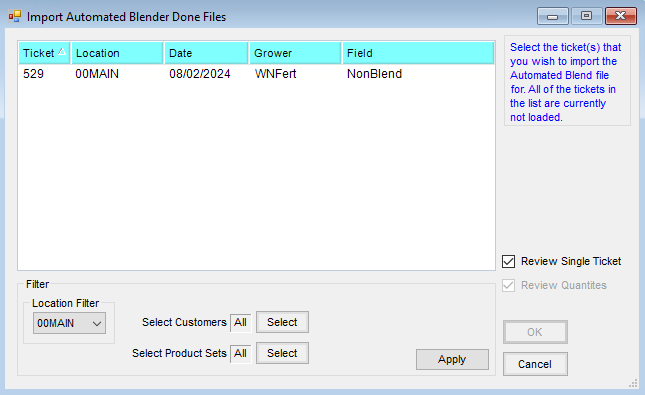
Below are non-blend facility options to import automated blender done files.
- At Blending / Edit / Import Automated Blender Done Files, select the file(s) to import, optionally review, and select OK.
- On the Select A Blend Ticket window, highlight the Blend Ticket and select the Edit button or double-click the Blend Ticket to edit. In the Edit Blend window, select Capture Blender.
- On the Select A Blend Ticket window, highlight the Blend Ticket, and choose Read Blender.

Using one of these three options marks the Blend Ticket as Loaded in the non-blend facility’s database.
