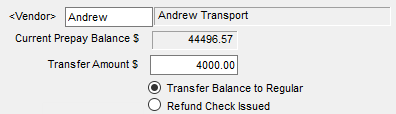
- If necessary, change the transfer amount to be refunded or credited to the vendor account and choose the appropriate option: Transfer Balance to Regular or Refund Check Issued.
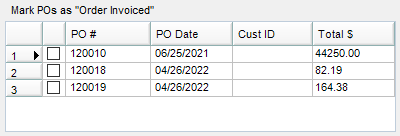
- If one or more Purchase Orders appear in the grid in the lower left corner, optionally check the boxes to mark them as Order Invoiced to close out those Purchase Orders. This will prevent the Purchase Orders from being selected in Purchase Invoices later.
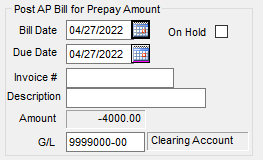
- If choosing to transfer the prepay balance to the regular account and leave it there as a credit, enter an Invoice # in the upper right corner. Optionally enter a bill Description.
- If choosing to process a refund check issued by the vendor, the upper right corner of the screen will not be necessary and will be unavailable.
- If the Transfer Balance to Regular option was selected, Agvance will create a Vendor-Type Prepay Journal Entry that moves the prepay dollars out of the vendor prepay account. Optionally enter a JE Description. A credit bill will then be created to place the credit on the vendor's regular account.
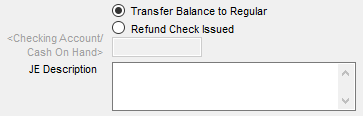
- If the Refund Check Issued option was selected, a Vendor-Type Prepay Journal Entry will be entered, removing the prepay balance from the vendor account and placing it in the checking or cash account chosen. The account selection option is made available when the Refund Check Issued option is selected.


Newest
Recently Updated