Shipping Order Manager helps with wholesale business by managing the shipment of product from the manufacturer directly to the customer or from company inventory to the customer. Associated release numbers (pickup numbers) can be entered and tracked with the product. It automatically creates the required Agvance documents so inventory is correct and the customer can be efficiently billed.
Shipping Order Manager includes Truckload Manager, a utility designed to manage the loading of Delivery Tickets. This program allows selecting an unloaded Delivery Ticket, entering the Gross and Tare weights of the load, and printing the corresponding documents. When a Truck Load Out is saved, the Delivery Ticket is marked as Loaded in Agvance.
Setup
Shipping Order Manager is an add on module found in Accounting under Inventory / Shipping Order Manager. When entering the module for the first time, an activation is required, and the following screen appears.

Reach out to SSI Support to activate the add on module. Support can be reached through the following options:
Contact Support
- Email: support@agvance.net
- Phone: 800.752.7912
- Submit a Support Ticket
Wholesale Inventory Department
Wholesale products used in Shipping Order Manager should be kept in a separate inventory department. When setting up this department, mark the option to Inventory This Department on the G/L Posting tab. All units of measure for the products in this department should be set up in Tons (or Tns).
Note: Shipping Order Manager always uses Tons. Using any other unit of measure causes issues with inventory amounts, product costing and pricing, and reports.
When adding wholesale products, costs should be set on the products. Pricing can be set up on the product or entered in Shipping Order Manager when creating pickup numbers or editing Shipping Orders.
Delivery & Commission Products
If delivery charges, commissions, or any other type of handling charges are passed on to the Customer make sure to add those charges as products in Accounting. Once those products are added in Accounting they can be setup in Shipping Order Manager under Setup / Preferences.

Delivery Products are used on Delivery Tickets and Invoices when the Shipping Order is edited to mark the Include Freight checkbox and the product is selected from the drop-down menu. Enter a per ton rate on the Shipping Order so Agvance will calculate the appropriate total charge on the Agvance document.
Commission Products may be included by marking the Include Commission checkbox and selecting the Commission Item from the drop-down menu. The total dollar amount of the commission to be paid by the customer must be entered in the Amount field on the Shipping Order. This amount will be deducted from the per ton price of the product.
When the Do not replace Price per Ton with PO cost option is selected, the price per ton on a Shipping Order does not update based on the Purchase Order cost.
Freight Vendors
Freight Vendors for selection on Shipping Orders are set up at Setup / Freight Vendors. To add a new Vendor to the list, double-click the Freight Vendors column heading to select the Vendors. Only these Freight Vendors are available to select on Shipping Orders.

Origins
Origins are set up at Setup / Origins. At least one origin must be set up before a PVO (Product / Vendor / Origin) can be created. An Origin is a place (usually a city or town) from which product may be picked up.

Product / Vendor / Origin (PVO)
Once all Products, Vendors, and Origins are added, PVOs can be setup. A PVO must be created for every Product, Vendor, and Origin shipping is done for. For example, a Product (P), such as Dap is being shipped by two separate Vendors (V). Each Vendor will be shipping the DAP to different Origins (O). An individual PVO must be created to account for each Product (P) to Vendor (V) to Origin (O) scenario.

PVOs are accessed in Shipping Order Manager from File / Open / Product/Vendor/Origins.

- ID – Use up to 10 characters to identify each PVO. Once saved, this cannot be modified.
- Description – Enter up to 50 characters to provide information to easily identify which PVO to use.
- Product ID – Double-click in this field to choose the Agvance Product to which the PVO applies.
- Vendor ID – Double-click in this field to choose the Agvance Vendor to whom the PVO applies.
- Origin – Select the origin for the PVO. Origins are maintained at Setup / Origins.
- Inactive – Mark this checkbox to remove the PVO from the default PVO drop-down. The PVO may still be selected at the Add Pickup Numbers screen by changing the filter to Inactive, but the PVO will not be in the list of active PVOs that automatically display.
- Truckload Manager is used to manage the load outs for this Product/Location – Mark this checkbox if product is shipped from a manufacturing location using Truckload Manager. If checked, unloaded Delivery Tickets are created in Agvance when these Shipping Orders are edited and sent to Agvance.
- Save Pickup Number As Control Number – Choose this checkbox to use the Pickup Number as the Control Number in Truckload Manager. This option is available only if the Truckload Manager checkbox is selected.
- Create Purchase Receipt – Mark this checkbox to always create an Agvance Purchase Receipt for this PVO. If unchecked, Purchase Receipts are not automatically created when Shipping Orders are edited and sent to Agvance. This option is available only if the Truckload Manager checkbox is unchecked.
- Use Wholesale Cost On Invoice – Mark this checkbox to use the Shipping Order cost on the Invoice instead of the department level cost. This option is available only if the Truckload Manager checkbox is unchecked.
- Bagged Product ID – Choose an Agvance product to add to Invoices created from a bagged product Shipping Order. This product should exist in the wholesale inventory department.
Pickup Numbers
Pickup Numbers allow numbers to be generated and then verified and updated with Purchase Order Numbers. Once Pickup Numbers are obtained from the shipping location, they can be added in Agvance by selecting the Add Pickup Numbers menu item in Shipping Order Manager. They can also be added with the Add Pickup Numbers button found at Shipping Orders / Edit Method / Select Shipping Orders window.

- Select a Product/Vendor/Origin – Double-click to choose the PVO to which the new pickup numbers apply.
- Add – Enter the number of loads (pickup numbers) to be created.
- Pickup Numbers beginning at – Specify the first pickup number. The rest will populate sequentially from that number based on the rules listed under the Generate section below.
Note: Pickup numbers that have non-numerical characters will not be able to be used for Purchase Orders or Delivery Tickets in Agvance. It is recommended to leave off dashes that the shipping location might include. - Default load size to – Specify the load size for the pickup numbers (Ex: 25 tons or 100 tons for railcars).
- Price – Optionally set the price per ton. If set, this price will import into the Invoice in Agvance Accounting.
- Save Load Size As Actual Tons – Selecting this option causes the load size entered in the Default load size area to default into the Shipping Order's Actual Tons data field. This data may be edited on the Shipping Order even if this checkbox is selected.
- Cost $/Unit – Optionally, set a Cost $/Unit. Depending on the PVO setup, this cost may optionally be used as the Invoice cost if the Shipping Order creates an Invoice.
- Generate Our PO Numbers beginning at – Specify if the Purchase Order numbers should automatically be generated for these pickup numbers. The beginning Purchase Order number is entered, and Purchase Order numbers are sequenced according to the rules specified under the Generate section. Once PO numbers are generated they can be used when entering the corresponding POs in Accounting.
Note: Shipping Order Manager does not generate Purchase Order transactions. They must be added separately in the Accounting module. - Default Our PO number to the Pickup Number – Check this box to generate Purchase Order numbers that are the same as the accompanying pickup number.
- Select PO number for Pickup Number – Check this box to choose an existing Purchase Order from the Accounting module.
- These pickup numbers are for prepaid purchases – Check this box to indicate that the purchases created by this set of pickup numbers have been prepaid by the company.
- These pickup numbers are for prepaid sales – Check this box to indicate the customer(s) associated with these pickup numbers have prepaid the company for the product. When both this box and the Delivery option on the Shipping Order are checked, the Shipping Order is automatically marked as a prepaid sale and a loaded Delivery Ticket is created (instead of an Invoice). If this box and the Invoice option on the Shipping Order are checked, then an Invoice may be previewed and created. Normal Booking rules apply when importing the Delivery Ticket created in this scenario into an Invoice.
- These Pickup Numbers are for Rail Cars – Select this option if the pickup numbers in this group are for rail car orders. If selected, the Via Rail Car checkbox on the Shipping Order is automatically checked but may be edited. If a Car Number is entered on the Shipping Order, it is referenced on both the Purchase Receipt and the customer Invoice or Delivery Ticket.
- These Pickup numbers are all for the same customer – If all the pickup numbers are for the same customer, select the customer and, optionally, the customer Ship To address.
- Generate – This generates a sequence of pickup numbers beginning at the number entered in the Pickup Numbers beginning at area using the rules below. This option should be selected after the selection Generate Our PO Numbers beginning at is chosen.
Note: Shipping Order Manager supports pickup numbers that contain letters or dashes. However, pickup numbers that will become Delivery Tickets instead of Invoices (via Truckload Manager or prepaid sales Shipping Orders) must be numeric only because the pickup number becomes the Delivery Ticket number. Special characters or letters are not allowed in Delivery Ticket numbers.- If the first number does not have dashes or letters (i.e. 2423097), increment each number by one (i.e. 2423098, 2423099, 2423100, etc.).
- If the first number has a dash or a letter (i.e. 98071-01), increment the number after the last dash or letter. If a batch of 100 pickup numbers is being created, the pickup numbers generated will be 98071-02, 98071-03, 98071-04, …98071-100.
- If the first number ends in a letter (i.e. 1559-001XYZ), increment the number portion according to the rules above and append the letters to the number. (i.e. 1559-002XYZ, 1559-003XYZ, 1559-004XYZ, etc.)
- If the pickup number is prefixed with one or more letters or dashes, use the rules above and prefix the letters or dashes to each pickup number.
- Add Row to Grid – This manually adds a row to the Pickup Numbers grid to enter one or more pickup numbers. Pickup Numbers, Our PO Numbers, and Load Size may also be changed by selecting in the grid and typing the desired numbers.
- Save – When saved, a Shipping Order is created for each Pickup Number.
Shipping Orders
Shipping Orders is the process that allows managing orders individually and creating Agvance documents. Shipping Orders is found at Shipping Orders / Edit Method. The Shipping Orders window can be filtered based on PVO, order status, timeframe, or pickup number. Once the orders grid is loaded select the order line to manage and choose Edit Shipping Order or double-click in any cell of the order line. The Edit Row window will display to make changes. Individual orders may be selected or multiple may be selected using the Shift or Ctrl key on the keyboard. If multiple orders are selected they will be edited one at a time, progressing to the next via the Next button.

- Product/Vendor/Origin ID – Double-click to select the PVO for the Shipping Orders to be edited.
- Truckload, Rail Car Orders, or Both – Filter the Shipping Orders by selecting Truckload, which only shows Shipping Orders that do not have the Via Rail Car checkbox marked, Rail Car Orders, which only shows Shipping Orders that do have the Via Rail Car checkbox marked, or Both, which displays all Shipping Orders for that PVO.
- Select order status to show – Filter the Shipping Orders that display based on the status of the checkmarks on the Shipping Orders for the selected PVO.
- All – All Shipping Orders in the selected range.
- Unassigned/Unscheduled – Shipping Orders in the selected range that are not checked as Cancelled or Scheduled (for delivery).
- Scheduled but not delivered – Shipping Orders in the selected range that are checked as Scheduled but not checked as Delivered.
- Delivered but not invoiced – Shipping Orders in the selected range that are checked as Delivered but not checked as Invoiced.
- Delivered without freight bill – Shipping Orders in the selected range that are marked as Delivered but not marked as Freight Bill Received.
- Rail cars delivered but not released – Shipping Orders marked as Delivered but not marked as Released.
Note: This does not display only Shipping Orders marked to deliver via rail car unless Rail Car Orders is selected. - Unassigned/Prepaid – Shipping Orders not marked as Scheduled but marked as a prepaid purchase.
- Unassigned/Not Prepaid – Shipping Orders not marked as Scheduled and not marked as a prepaid purchase.
- Undelivered Only – Shipping Orders not marked as Delivered.
- Select order range to show – Filter the results in the grid by the Order Date on the Shipping Orders. The filter may be set to All, Last 30 Days, Last 60 Days, Last 90 Days, and Last 1 Year.
- Apply (in the Product/Vendor/Origin ID area) – After setting all the filters as desired, select Apply to apply those filters to the results in the grid.
Shipping Order Grid
- Pickup Number – To search for a specific Pickup Number, enter the number in this area and then choose Apply to the right. As a note, when searching by Pickup Number, a Product/Vendor/Origin ID is not required to be selected.
- PS – This checkbox is checked for Prepaid Sales.
- PP – This checkbox is checked for Prepaid Purchases.
- H – This checkbox is checked for orders set to On Hold.
- X – This checkbox is checked if the order has been cancelled.
- S – This checkbox is checked if the order has been scheduled.
- D – This checkbox is checked for orders that have created a Delivery Ticket.
- I –This checkbox is checked for orders that have created an Invoice.
- R – This checkbox is checked for Rail car orders.
- Add Pickup Numbers – Open the Add Pickup Numbers window.
- Edit Shipping Order – Click the row number to highlight the appropriate Shipping Order(s), and select this to edit.
- Delete Shipping Order – Click the row number to highlight the appropriate Shipping Order(s), and select this to delete.
- Print Shipping Order – Click the row number to highlight the appropriate Shipping Order(s), and select this to print.
- Compress the grid – Selecting this option removes the first three columns, Product, Vendor, and Origin, from the uncompressed grid. This checkbox always defaults as selected.
- Cancel – Exit the screen.
- Search Function – Type search terms in the Find This area. Choosing Any Part as the Match Type looks for the search term in any part of a word. Exact Match searches for the exact pickup number entered. Start of looks for pickup numbers starting with what was entered. Choose the appropriate column in the In this column drop-down. Select Find First to begin the search. If Agvance finds a match, the button changes to Find Next. If necessary, select Find Next as needed.
Edit a Shipping Order Screen
This screen is accessed from Shipping Orders / Edit Method / Select Shipping Orders by double-clicking on a Shipping Order or highlighting a Shipping Order and selecting Edit Shipping Order. It is used to update details on a particular Shipping Order.

- Product/Source – Defaults from the Product/Vendor/Origin ID selected and may not be edited.
- Pickup Number – Defaults from the Pickup # column on the Select Shipping Orders window. This may not be edited. This becomes the Delivery Ticket # if creating a DT or becomes the Control # on the Invoice, if creating an Invoice.
- Customer ID – If this is a customer order, select the Agvance customer who will be picking up or receiving the product. This is required to create documents in Agvance. As a note, all orders must have a customer selected, although some details may be added to the order without first selecting the Customer ID.
- Cost $/Unit – Defaults into the Shipping Order from the pickup order cost if one was saved. This field is editable. Depending on the PVO setup, this may become the Invoice cost. If the PVO is not set to use the Wholesale cost on the Invoice, the Inventory Department cost is used.
- Est. Tons – Defaults from the Default load size to area on the Add Pickup Numbers window. This box is not editable.
- Customer Name – When a Customer ID is selected, the name of the customer defaults into this box. This is not editable.
- Booking – If the customer prepaid for this order, double-click in this area to see the customer’s available Bookings. This field is not required to mark the Shipping Order as a Prepaid sale. The Booking selection on the Shipping Order has no impact on the Invoice created; Agvance follows its normal Booking rules.
- Remaining – Displays the quantity remaining on the Booking. Edits to this field are not saved on the Shipping Order.
- Ship To – Optionally select the customer’s Ship To address.
- Terms – Optionally select the payment Terms to apply to this customer order.
- Order Date – Select or type the date the order was made. This date must be entered for the Shipping Order to be sent to Agvance. This becomes the Ordered date on the Delivery Ticket and the Invoice Date on the Invoice.
- Comments – Optionally enter Comments pertaining to this order. These comments appear on the Agvance documents created from this Shipping Order.
- PO – This number may default from the Pickup Number generation, may be manually entered, or may be selected by double-clicking. There is an option to relieve this Purchase Order when sending to Agvance if a Purchase Receipt is created. If a Purchase Order is selected, the Purchase Order cost becomes the Invoice price unless the Do not replace Price per Ton with PO Cost option is selected at Setup / Preferences.
- Notes – These are for internal notes and do not carry forward to any Agvance documents.
- Bagged – This checkbox adds the PVO’s bagged product to the Invoice or Delivery Ticket.
Note: This option does not carry forward, it is for internal use and only available at this screen. - Prepaid sale – Select this box if the order is prepaid.
- PVOs not marked for Truckload Manager – Agvance creates a loaded Delivery Ticket instead of an Invoice if the Prepaid Sale checkbox and Delivery option is selected. If the Prepaid Sale checkbox and Invoice option is selected, the Invoice will be previewed before saving in Agvance.
- PVOs marked for Truckload Manager – This checkbox has no effect.
- Delivery – Select this checkbox if the Shipping Order should be marked for delivery.
- Invoice – Select this checkbox if the Shipping Order should be invoiced.
- Customer will pay supplier direct – When this checkbox is selected, Shipping Order Manager will not create any documents in Agvance Accounting.
- Customer PO – Optionally enter a direct ship Purchase Order number here if one exists. When multiple Shipping Orders are selected and the Apply to All function is used, this number will increment by one.
- Price per Ton – This number may default from the Pickup Number generation. It may also be edited at this screen. This price carries through to the Invoice. If a Booking exists for the product, there will be a Quote status on the Invoice. This can default from the Purchase Order Cost. To disable this function, uncheck the Do not replace Price per Ton with PO cost option at Setup / Preferences.
- Include Commission – Selecting this option includes a commission item on the customer documents created in Agvance. At least one commission item must be set up at Setup / Preferences before this option may be used.
- Commission Item – Choose a commission item from those set up at Setup / Preferences to include on the customer documents.
- Amount – Enter the per unit amount the customer will be charged for the commission item in this field. This amount comes out of the wholesale product price.
- Include Freight – Select this option if a freight (delivery) charge should be added to the customer documents, and choose the delivery product from the drop-down. These items should be setup at Setup / Preferences.
- Freight Vendor – Select the freight Vendor from those setup at Setup / Freight Vendors. This is for informational purposes and will not follow through to the purchase documents. Therefore, in Agvance Accounting, a freight Vendor must manually be selected on the Purchase Invoice for it to be included.
- Rates per ton – Enter the freight charge per ton to be applied on the delivery charge product on the Agvance documents created.
Note: The three previous freight fields, if used, cause a delivery item to be added to the Delivery Ticket or Invoice. - Via Rail Car – Select this checkbox if the order will be delivered by rail car. This checkbox is used in Shipping Order Manager reports and in sorting options on Shipping Order edit windows.
- Car Number – Enter the rail car number. This number will be referenced on the Agvance documents created from this Shipping Order.
- Arrival Date – Select or enter the rail car arrival date. This date is for informational purposes only and won't appear on Agvance documents created from this Shipping Order.
- Scheduled – This checkbox is typically used for freight management to indicate that pickup or delivery of the load has been scheduled. This is for filtering and reporting purposes only.
- Pickup Date – Select or type the scheduled delivery date here. This date is informational only but does appear on Shipping Order Manager reports.
- Include Freight – Select this option if a freight (delivery) charge should be added to the customer documents, and choose the delivery product from the drop-down. These items should be set up at Setup / Preferences.
- Freight Vendor – Select the freight vendor from those set up at Setup / Freight Vendors. This is for informational purposes and will not follow through to the purchase documents. Therefore, in Agvance Accounting, a freight vendor must manually be selected on the Purchase Invoice for it to be included.
- Rate per ton – Enter the freight charge per ton to be applied on the delivery charge product on the Agvance documents created.
Note: The three previous freight fields, if used, cause a delivery item to be added to the Delivery Ticket or Invoice. - Freight Bill Received – This may optionally be used to indicate the freight bill has been received. This is informational only.
- Additional Products – Select products to include on Delivery Ticket or Invoice from the the Pickup Number selected.
- Delivery Method – Optionally choose a delivery method from this drop-down. It is for informational purposes only and does not appear on Agvance documents.
- Contact – This is often used to record the person who made the freight arrangements. It is informational only.
- Delivered – Mark this checkbox if the product has been delivered to the customer. This is for informational purposes only.
- Delivery Date – Enter the date the customer received the product. This date is required to send a Shipping Order to Agvance if the PVO is not set up for Truckload Manager, but it does not appear on any Agvance documents. On the Delivery Ticket, the Ordered date will be the Order Date from the Shipping Order.
- Delivery Ticket – This number automatically populates after the information has been sent to Agvance and the Delivery Ticket is created. It may also be edited or entered manually.
- Bill of Lading – Optionally enter this number after receiving the Bill of Lading for the product. It is used as the Control Number on the Additional Info tab of the Invoice but only if entered before the information is sent to Agvance to create documents. It may be edited on both the Additional Info tab of the Invoice and on the Shipping Order in Shipping Order Manager.
- Actual Tons – Enter the actual amount of product received by the company or customer. The actual tonnage is required before a Shipping Order for a PVO that is not set up for Truckload Manager is sent to Agvance.
- Invoiced – This option is automatically marked if an Invoice is created when the information is sent to Agvance. If a Delivery Ticket is created, the Update Shipping Orders utility in Shipping Order Manager marks this box after the Delivery Ticket is processed. It may also be checked manually.
- Invoice Number – This number is automatically populated if an Invoice is created with the Prepaid Sales checkbox selected. If a Delivery Ticket is created, the Update Shipping Orders utility in Shipping Order Manager completes the Invoice number after the Delivery Ticket is processed. It may also be filled out manually.
- Released – This option tracks rail car released status. The checkbox is only available if the Via Rail Car checkbox is selected on the Shipping Order. It is used on Shipping Order Manager reports and sorting options on Shipping Order edit windows.
- Release Date – Optionally enter the date the rail car was released.
- On Hold – This option indicates the Shipping Order should not be processed. It will not stop the order from being processed if it is edited, but it is used on Shipping Order Manager Reports.
- Cancelled – Optionally check this box if the order has been cancelled by the vendor or the customer. Use caution with this checkbox as it will not stop an order from being processed and will not appear on Shipping Order Manager reports. It is for informational purposes only.
- Transferred To Agvance – This box is automatically selected when the Send to Agvance button is selected. It cannot be edited by the user, and Shipping Orders cannot be sent to Agvance more than once.
- Include Freight on PR – This option will always default to unchecked. Marking this box indicates to include the delivery charge on the Purchase Receipt as well as the customer document.
- Update PO – Select this box and double-click in the PO area to select the Purchase Order to relieve when sending the information to Agvance.
- Create PR – Use this button to create a Purchase Receipt when the Shipping Order does not include a customer and the Purchase Receipt should be created in Agvance Accounting.
- Send To Agvance – See the Send to Agvance section below.
- Apply to All – When editing a selected group of Shipping Orders, use this button to apply the changes made on the current Shipping Order to all the selected Shipping Orders.
- Print Method – Select whether to roll up prices and product names.
- Save – Choose to save the current Shipping Order.
- Next – Use this button to proceed to the next Shipping Order being edited.
- Cancel – Use this button to cancel out of any changes made to the current Shipping Order.
- Send to Agvance – Select this button to process the Shipping Order and create Agvance transactions based on the PVO setup.
Note: See the Process Flows section for information on Agvance transactions created after selecting the Send to Agvance option.
Update Shipping Orders Utility
The Update Shipping Orders utility may be used to update Shipping Orders with the Invoice date and number, after the Invoice has been entered. This utility is found at Shipping Order Manager / Utility.

Enter a date and select OK to update invoiced Shipping Orders after the entered date.
Reports
There are four Wholesale Reports available at Shipping Order Manager / Reports / Wholesale Reports.
Note: Some Whole Sale Reports have an Include RWG Companies checkbox that controls whether Customer will pay supplier direct Shipping Orders are included or not.
Total Report (Wholesale Reports)
This report shows the total tons of product sold. The numbers are grouped by Customer, although Customers do not appear on this report, and by PVO. Each Product has a grand total. This report may be filtered by PVO or Customer, and the results may be narrowed by choosing Truckload Orders, Rail Car Orders, or Both. A Delivery or Order Date range may be entered as well.
Shipping Order Status Report (Wholesale Reports)
This report shows each Shipping Order (Pickup Number) and its Delivery Date, Order Date, Pickup Date, and the ID of the Customer on the order. It also shows the status of each of the following:
- Prepaid sale or purchase
- Rail car (as opposed to truck load)
- Scheduled
- Delivered
- Invoiced
- Rail car released
- If a freight bill has been received
- If the order is On Hold
Specific Order Status may be narrowed down by Scheduled, Delivered, Invoiced, On Hold, and Rail Released.
Filters are available for one or more specific PVOs and/or Customers. Enter a Delivery or Order Date range and filter by Truckload Orders, Rail Car Orders, or Both.
Shipping Order Detail Report (Wholesale Reports)
This report displays details about each Shipping Order, such as Invoice Number, Actual Tons sold, Price per Ton, and Bill of Lading number. Optionally filter for a specific status on the data elements of Scheduled, Delivered, Invoiced, On Hold, and Rail Released. There are also options to choose one or more PVOs and/or customers, select a Delivery or Order Date range, include Truckload Orders, Rail Car Orders, or Both, and Include Costs. The report has three Sort By options from which to choose for the report.
Material Requirements (Wholesale Reports)
The Material Requirements report is used for planning. It shows product usage for each calendar month in the range. The report may be sorted by Location, Vendor, or Customer. The Location and Vendor styles are used for planning the ordering for future seasons. The Customer style report may be given to wholesale customers for their own planning needs.
Truckload Manager
Truckload Manager is a utility for loading out Delivery Tickets created from Shipping Orders. It provides a simple and secure interface that allows a user to verify pickup numbers, record weights, and print shipping papers as trucks enter and leave the facility, without needing prior Shipping Order Manager or Agvance Accounting experience. Truckload Manager is not required to use with the Shipping Order Management module.
Truckload Manager Setup
Truckload Manager is included with Shipping Order Manager. It can be accessed in two ways:
- Use the shortcut icon from within Shipping Order Manager.

- Access it directly as a standalone program from a desktop icon.

The appropriate access method depends on who is using the program. SSI Support can help decide the best option for the situation.
Setting up a Truckload Manager Icon
- Right-click on the desktop where the Truckload Manager icon is to be placed and go to New / Shortcut.
- Select Browse to find the TrkLdMgr.exe file in the Agvance program files, then choose Next.

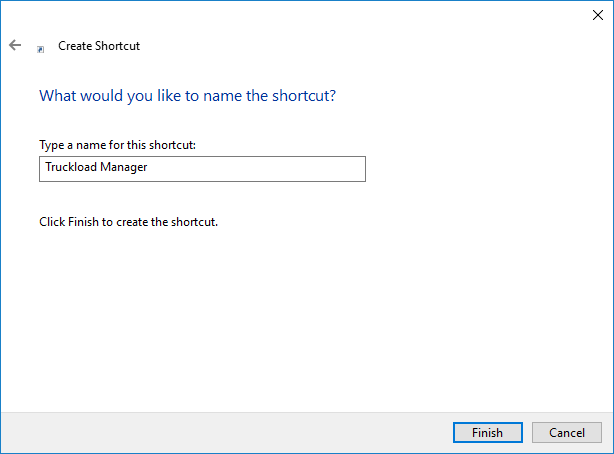
- Name the shortcut something recognizable then select Finish.
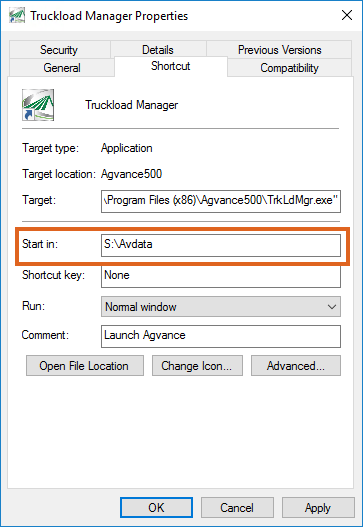
- The icon displays on the desktop. Right-click the new icon and choose Properties.
- Change the Start in path to match the properties on the regular Agvance icon.
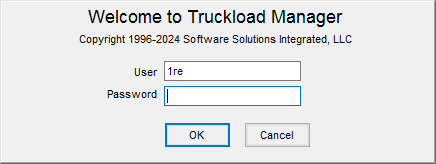
- Double-click on the icon to log into Truckload Manager. Truckload Manager requires a separate login. If Agvance is set up to log Users in with their Windows credentials, this screen will not display. Otherwise, log in with the normal Agvance User and Password.


Truckload Manager Preferences
For security, the Truckload Manager Preferences screen is password protected. This password can be obtained by calling SSI.

- Product Grid – Select the products available to load out of Truckload Manager. These should be the products being used with Shipping Order Manager. Unloaded Delivery Tickets in Agvance containing the selected products will be available for load out through Truckload Manager. If a product is not on the list, Delivery Tickets containing that product cannot be loaded out of Truckload Manager.
- Instructions for empty trucks – Optionally enter instructions for empty trucks. These instructions appear on the Truck Load Outs screen where unloaded Delivery Tickets are selected to print.
- Instructions for loaded trucks – Optionally enter instructions for loaded trucks. These instructions appear on the Truck Load Outs screen where unloaded Delivery Tickets are selected for load out.
- Maximum gross weight – Enter the maximum gross weight.
- Minimum tare weight – Optionally enter the minimum tare weight.
- Require control numbers – Check this box to require control numbers to be entered when loading tickets.
- Minimum control number – If a number is entered in this box, control numbers must be higher than this number.
- Maximum control number – If a number is entered in this box, control numbers must be less than this number.
- Print To – Select the printer for the Truckload Manager documents.
- # Copies – Defaults to 1. If more copies of documents are needed, edit the number to the desired number of copies.
- Save – Saves the changes to the preferences.
- Cancel – Exits the screen without saving. If changes have been made, Agvance asks to save before closing.
Truck Load Outs
Go to Truckload Manager / Truck Load Outs to bring up the Truck Load Outs screen. There are two options - print a load copy for an empty truck, or enter weights for a loaded truck.
Printing an Unloaded Ticket
Double-click in the Ticket # area at the top of the screen to display the Select a Delivery Ticket screen and choose a ticket. Choose Print to print a copy of the unloaded ticket.
![]()
If the ticket has been printed from either Accounting or Truckload Manager, the following message will display indicating the Delivery Ticket has already been printed.

Loading a Delivery Ticket
The same Truck Load Outs screen is also used to load tickets as trucks leave the facility.

Double-click to select the ticket and enter the Gross and Tare weights. Weights should be entered in lbs. Optionally enter a Control #, Comments, and choose to Print on Save. Select Save to update and load the ticket.
Truckload Manager Report
Delivery Ticket Status Report (Truck Load Outs)
The Delivery Ticket Status report shows loaded Delivery Tickets for the products set up in the Truckload Manager preferences. It is found at Shipping Order Manager / Reports / Truck Load Outs. It displays the Product, Customer, and Quantity on each Delivery Ticket. Select the Date, Control Number, or Ticket Number ranges.
Note: Product selection is available however, only Delivery Tickets for products that are set up in the Truckload Manager preferences are shown on this report.
Shipping Order Manager Use Scenarios
Shipping Order Manager is capable of managing multiple wholesale product movement scenarios such as:
- Scenario 1 – The company buys product and immediately sells it to a customer (drop ship). The customer does not prepay. In this case, an Agvance sales Invoice and an Agvance Purchase Receipt are created.
- Scenario 2 – The company buys product and immediately sells it to a customer (drop ship). In this case, the customer does prepay and an Agvance loaded Delivery Ticket and a Purchase Receipt are created.
- Scenario 3 – The company ships product directly from their own manufacturing facility, which uses the Truckload Manager program. In this case, an Agvance unloaded Delivery Ticket is created.
- Scenario 4 – A sister company pays the supplier direct, and the main company only uses Shipping Order Manager to track the pickup numbers. In this case, no Agvance documents are created.
Workflow Processes
The following is a break down of basic Shipping Order Manager workflows based on different company use scenarios.
Scenario 1 – Non Prepay Drop Ship
Product is purchased and sold to a customer simultaneously. The customer has not prepaid for the product. The company does not use Truckload Manager.
Key Settings:
- PVOs used are not set to use Truckload Manager
- PVOs used are set to create Purchase Receipts
- An arrangement is made with a vendor to purchase a certain number of loads of product. Each load is assigned a pickup number by the vendor.
- Add Pickup numbers in Shipping Order Manager to create Shipping Orders.
- If Purchase Orders are used in Agvance Accounting enter the POs, mark as Direct Ship, and select the appropriate Customer.
- Update the Shipping Order with available information such as Customer, Cost $/Unit, Ship To, Booking, PO, etc.
- As arrangements are finalized, update the Shipping Order with new information.
- When the Bill of Lading is received, update the Actual Tons on the Shipping Order, with the amount the Customer received.
- Select if the Shipping Order should be set to Delivery or Invoice. If Delivery is selected an unloaded Delivery Ticket will be created once sent to Agvance. If Invoice is selected, an Invoice will be created once sent to Agvance. An unloaded DT will not affect the product inventory balance or the customer's G/L balance. An Invoice will update both the product inventory balance and the customer's G/L balance.
- The Shipping Order should be processed by choosing Send to Agvance. A Purchase Receipt will be created along with either an unloaded DT or Invoice depending on above selection.
- After the customer is invoiced, the Update Shipping Orders utility may be used to update the Shipping Order with the Invoice date and number.
Scenario 2 – Prepay Drop Ship
Product is purchased and sold to a customer simultaneously. The customer prepaid for the product. The company does not use Truckload Manager.
Key Settings:
- PVOs used are not set to use Truckload Manager
- PVOs used are set to create Purchase Receipts
- An arrangement is made with a vendor to purchase a certain number of loads of product. Each load is assigned a pickup number by the vendor.
- Add Pickup numbers in Shipping Order Manager to create Shipping Orders. Select These pickup numbers are for prepaid sales.
- If Purchase Orders are used in Agvance Accounting enter the POs, mark as Direct Ship, and select the appropriate Customer.
- Update the Shipping Order with available information such as Customer, Cost $/Unit, Ship To, PO, etc. Select the appropriate prepaid Booking.
- As arrangements are finalized, update the Shipping Order with new information.
- When the Bill of Lading is received, update the Actual Tons on the Shipping Order, with the amount the Customer received.
- The Shipping Order will default in as Prepaid sale. If Delivery is selected an unloaded Delivery Ticket will be created once sent to Agvance. If Invoice is selected, an Invoice will be created once sent to Agvance. An unloaded DT will not affect the product inventory balance or the customer's G/L balance. An Invoice will update both the product inventory balance and the customer's G/L balance.
- The Shipping Order should be processed by choosing Send to Agvance. A Purchase Receipt will be created along with either an unloaded DT or Invoice depending on above selection.
- After the customer is invoiced, the Update Shipping Orders utility may be used to update the Shipping Order with the Invoice date and number.
Scenario 3 – Stockpiling/Manufacturing
The product is stored or manufactured at the facility. The company uses Truckload Manager to load Delivery Tickets.
Key Settings:
- PVOs used are set to use Truckload Manager
- PVOs used are set to create Purchase Receipts
- A customer requests one or more loads of a product.
- The user adds pickup numbers for each load. The Customer, Price, and Cost$/Unit may be selected when adding the pickup numbers.
- As arrangements are finalized, the Shipping Order is updated with new information.
- When arrangements are complete, the Shipping Order is sent to Agvance. Shipping Order Manager creates an unloaded Delivery Ticket, regardless if Delivery or Invoice is selected. An unloaded DT will not affect the product inventory balance or the customer's G/L balance.
- Truckload Manager is used to load the Delivery Ticket when the product is picked up.
- After invoicing the customer, the Update Shipping Orders utility may be used to update the Shipping Order with the Invoice date and number.
Scenario 4 – Supplier Paid Direct
Only the pickup numbers are managed by the company, and no Agvance transactions are required.
Key Settings:
- PVOs used are not set to use Truckload Manager
- PVOs used are not set to create Purchase Receipt
- An arrangement is made with a vendor to purchase a certain number of loads of product. Each load is assigned a pickup number.
- Add pickup numbers in Agvance to create Shipping Orders.
- A customer requests one or more loads of a product.
- The user determines which supplier/location will fill the order and either uses existing pickup numbers or obtains new ones from the supplier.
- The user updates the Shipping Order with the customer.
- As arrangements are finalized, the Shipping Order is updated with new information.
- When the Bill of Lading is received, the Shipping Order is updated with actual tons received by the customer.
- The Shipping Order is never sent to Agvance because there are no payables or receivables involved.
