When the Customer has a credit Regular balance, a refund check may be written to them with the following procedure.
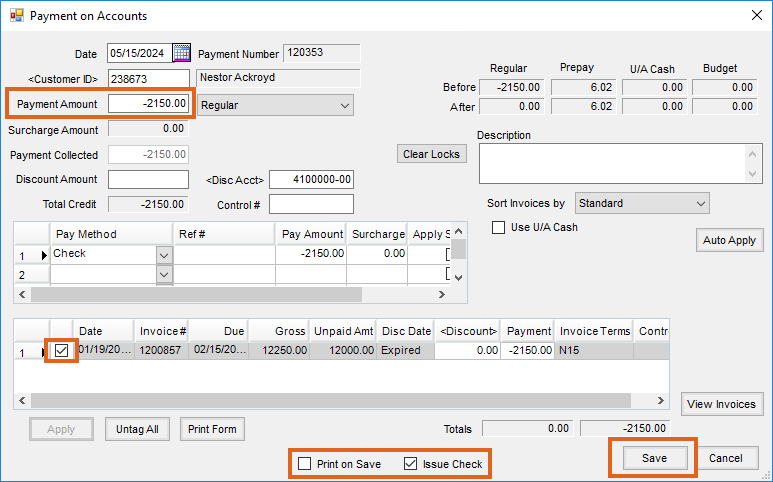
- Go to Accounting / A/R / Payments and select Add to choose the Customer who will be receiving a refund check. Alternatively, go to Accounting and choose shortcut icon to add a Payment on Account.

- Tag the Credit Invoice that will be used to issue the refund check.
- Enter the amount of the refund (as a negative number) in the Payment Amount field. An amount in Unapplied Cash to be refunded would also be entered as a negative number in this field.
- Select the Issue Check option at the bottom of the screen.
- To print the payment, also select Print on Save at the bottom of the screen.
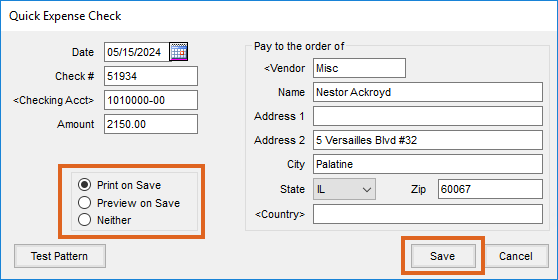
- Choose Save to save the payment and view the information that will print on the check.

- The information on this screen will automatically populate, but, the first time using the screen, the Vendor ID must be selected by double-clicking in the data field and choosing the appropriate Vendor. The Miscellaneous Vendor is normally chosen so that all checks from this function will be in a central location. The Customer name and address are also automatically populated by Agvance. This is the information that will print on the check.
- After verifying that the check number and all other information on the check is correct, set the Print on Save option and Save.


