Overview
All Plans are displayed including the Plan Name, Date, Customer, Location, Field, and Status.
Note: Plans must be enabled in SKY Admin before they can be viewed in SKY Order.
Search for Plans by Plan Name, Date, Location, Customer, Field, Visible in G360, and Status.
Select the Ellipsis on any Plan from the Plans tab and choose from the following:
- View Plan – Select to view the Plan's Order and Product Details.
- Edit Plan – Edit multiple areas of the Plan.
- Set Status to Blend – This imports the Plan into a Blend Ticket, retaining all the Plan properties.
- View PDF – Select to view a PDF copy of the Plan details.
- Download PDF – Select to download a copy of the Plan details.
- Delete – Select to permanently remove the Plan. Once deleted, a Plan cannot be recovered.
To batch edit Plans, select individual Plans or choose Select All. Choose the Ellipsis to Change Approval Status, Change Grower360 Visibility, or Set Status to Blend.
Additionally, choose to update the Status of a Plan by selecting the Status column of the Plan line and choosing from Offered or Approved.
Choose to mark a Plan as visible in Grower360 by setting the Visible in G360 column to Yes.
Add a Plan
A new Plan can be added by selecting the blue + Add Order icon in the lower right-hand corner and selecting + New as Agronomy Order.
Step 1: Order Details
- Optionally select a template from the Template drop-down. Use the Template Location drop-down to filter by that specific Location.

- From the Order Type drop-down, select Plan.

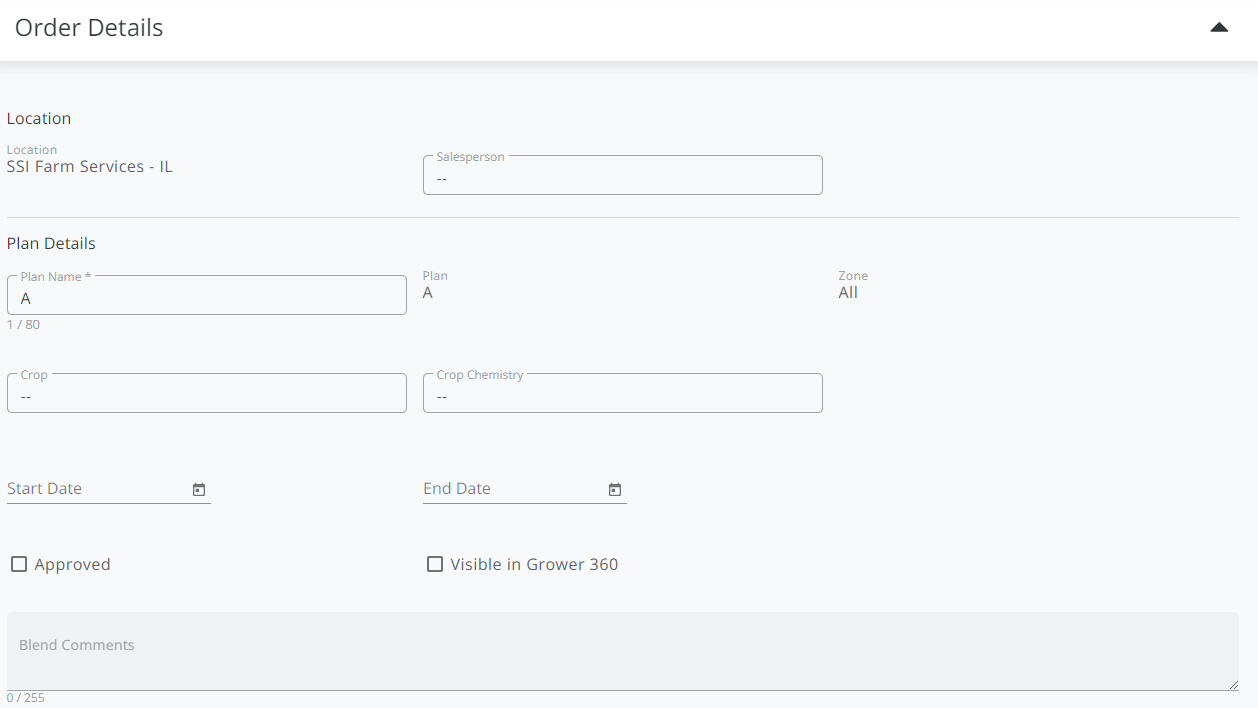
- Enter the Location for the Plan. The Salesperson defaults as the Salesperson selected on the User profile in SKY Admin but can be adjusted.
- Select the Show in Grower 360 option to mark the Plan as visible to the grower in the Grower360 app.
- Under the Plan Details section, the Plan Name is required and the Start Date, End Date, Crop Chemistry, and the Crop are optional.
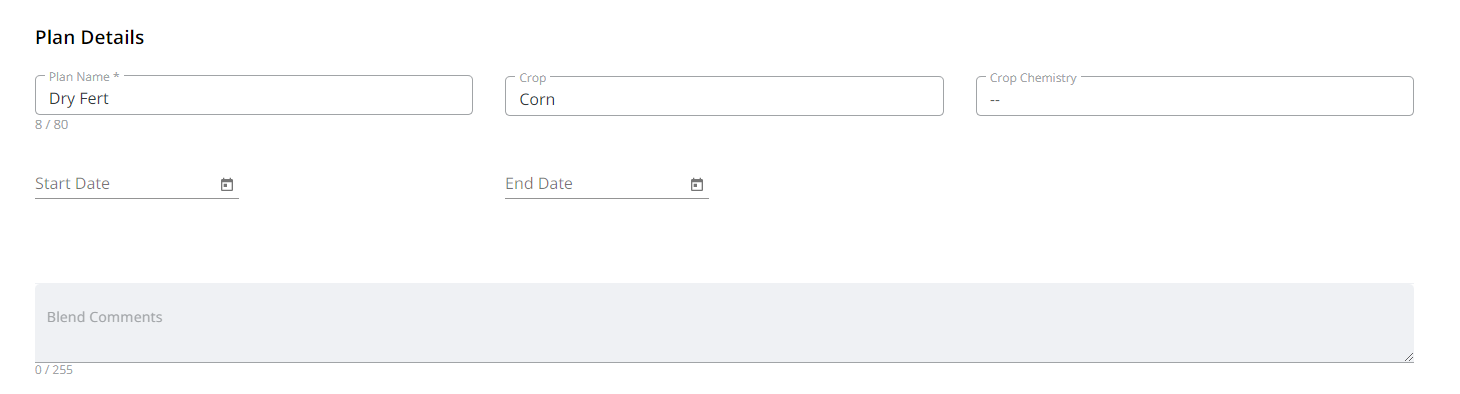 Note: The Start Date and End Date follow the Start Date and End Date preferences set in Agvance.
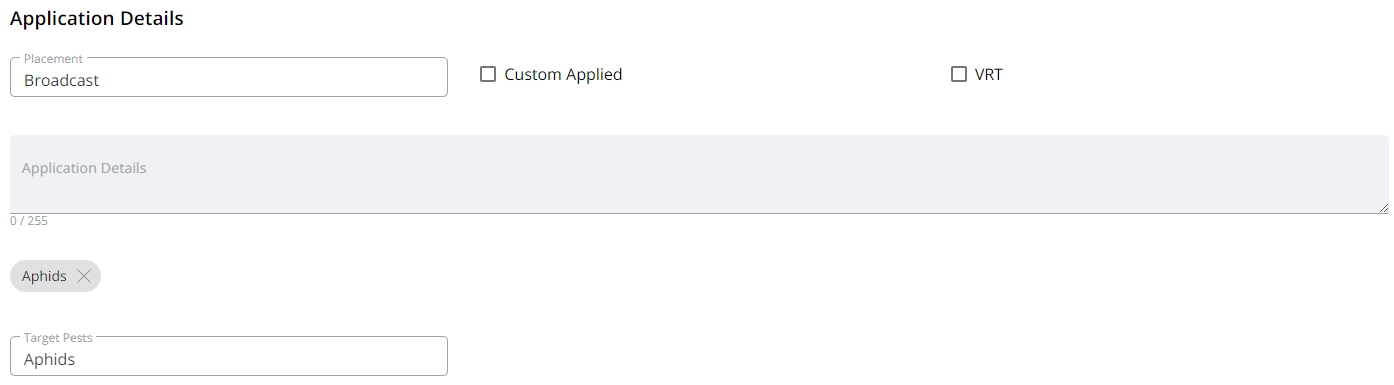
 - Under the Application Details section, the Placement can be entered and the Plan can be marked as Custom Applied and/or VRT. Indicate Target Pests if applicable.
- Under the Basic Product Details section, the Product Set is required. The Price By defaults to Products but can be adjusted.
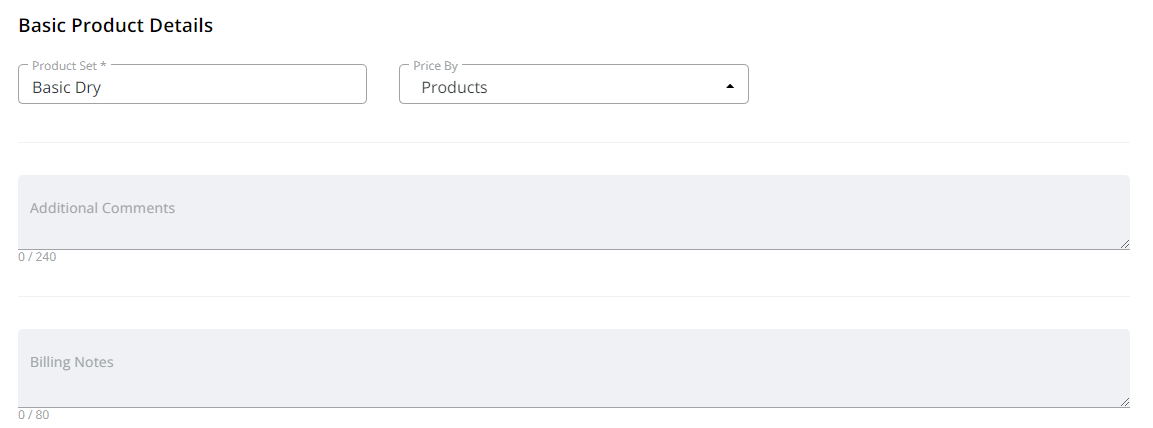
- Selecting Next Step advances to the Fields step. The next step in the process list can also be selected to advance once all required information is entered.


 Note: The Start Date and End Date follow the Start Date and End Date preferences set in Agvance.

Step 2: Fields
- Select the Field(s) for the Plan by using the Search Fields area. Selecting a Field adds the customer to the Selected Field area. The customer information on the Field split displays below the Field.
Note: If multiple fields are selected, a Plan is saved separately for each field.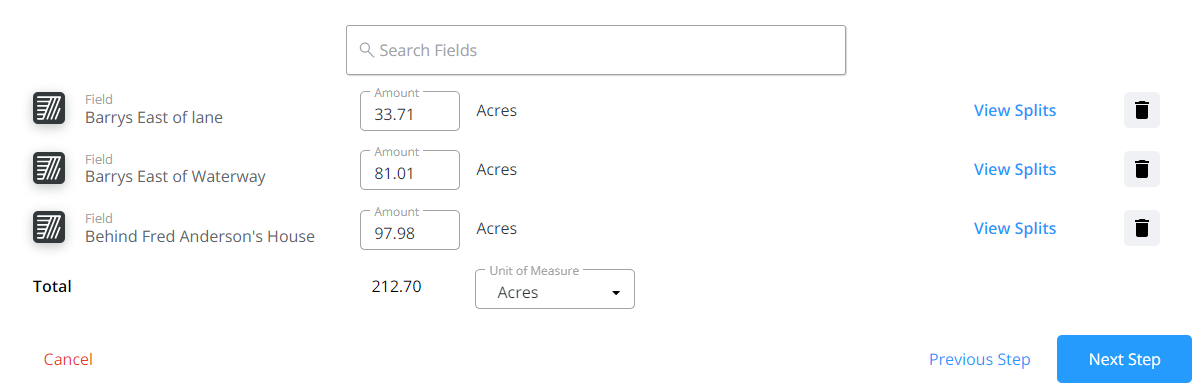 Note: If the Plan was started from Customer, the Field is already populated as the Selected Field.
 - Adjust the area and/or Unit of Measure if needed.
Note: Changing the Unit of Measure will change the unit for all Fields on the Blend but will not convert the Amount. - A Field can be removed by selecting the Trash Can icon to the right of the Field. The Search Fields area can then be used again to search for and select a new Field(s) for the Plan.
- Selecting Next Step advances to the Products step. The next step in the process list can also be chosen to advance once all required information is entered.
 Note: If the Plan was started from Customer, the Field is already populated as the Selected Field.
Step 3: Products
Note: If a Template was selected in Step 1, any Products/Formulations from that Template will be included here.
- Add products by typing a product name or description in the Search Products field.
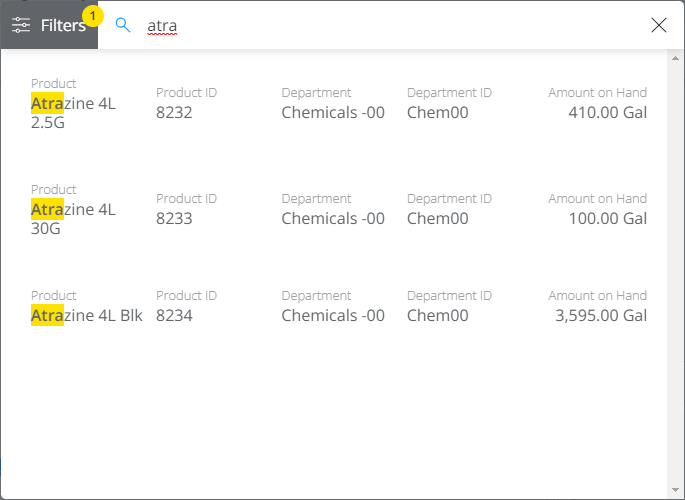
- Select the appropriate product(s) out of the resulting list to add the products to the Products area.
- Choose Filters to search for Products in a specific department.
Note: The Product ID, Department, Department ID, and Amount on Hand information for each product displays on the product line.

OR
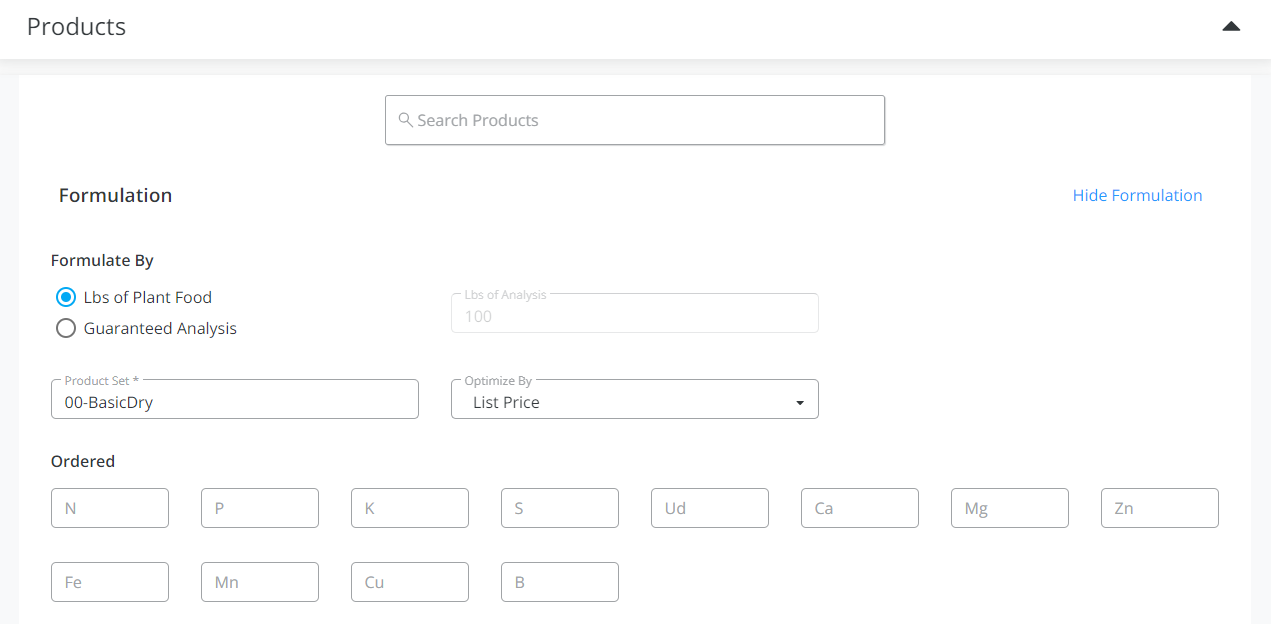
- Indicate if formulating by Lbs of Plant Food or Guaranteed Analysis. If choosing Guaranteed Analysis, enter the Lbs of Analysis.
- Select the appropriate Product Set and Optimize By options.
- Enter requested nutrients in the Ordered area.
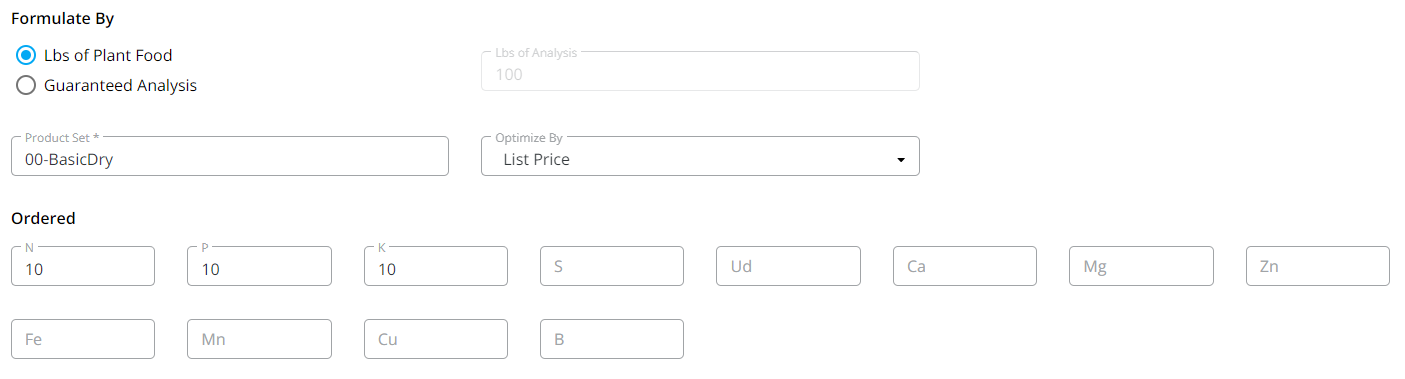
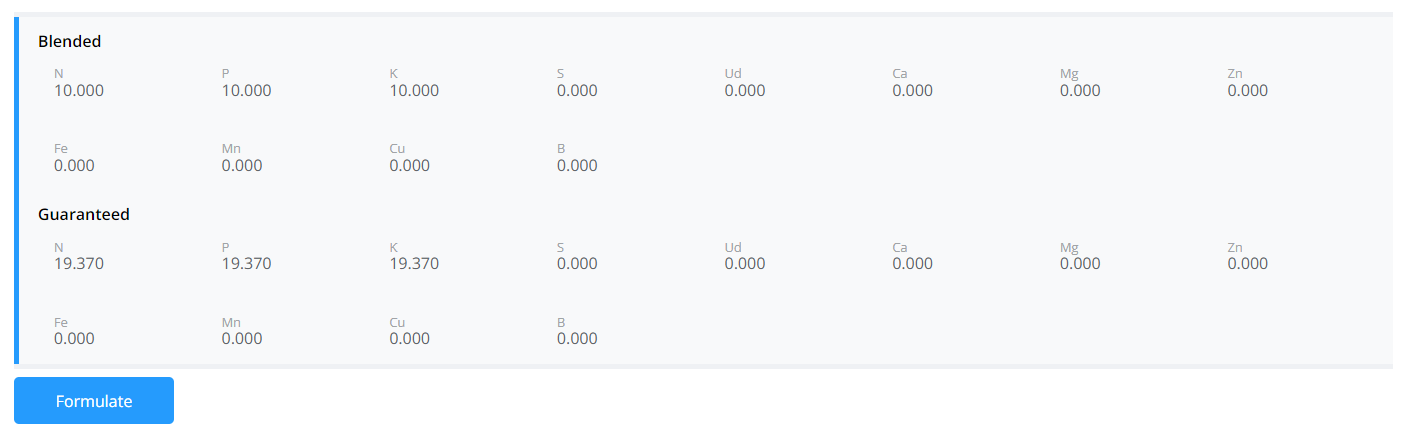
- Select Formulate.
- Review the Calculated Analysis.
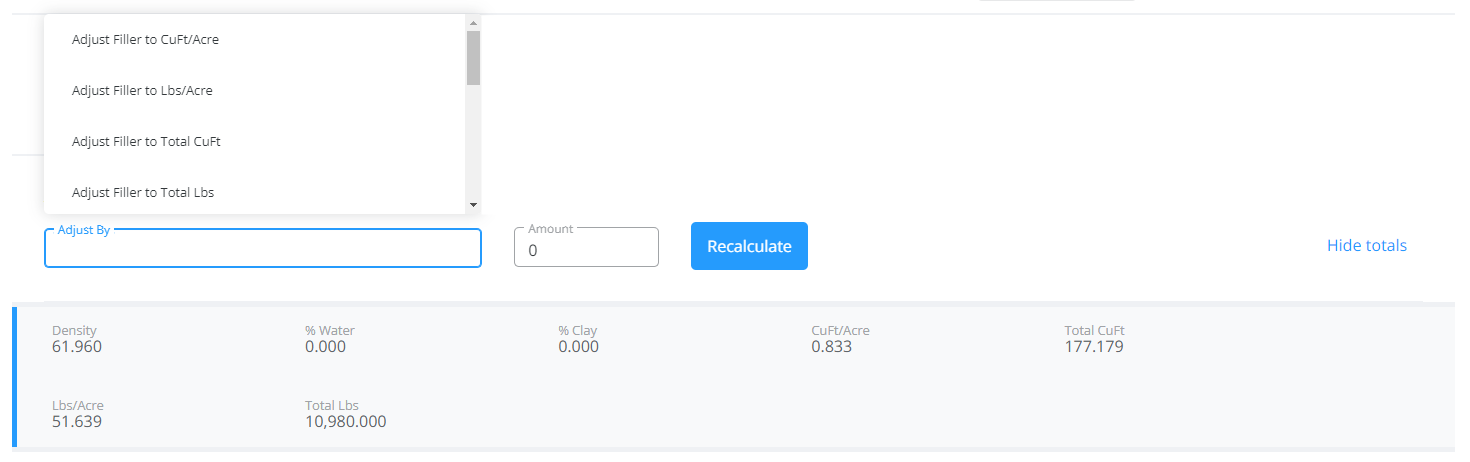
- To recalculate the Blend accommodating for water, filler, or carriers, choose an Adjust By option which is based on the Product Set selected for the Blend. Enter the Amount and then select Recalculate to update the Blend. Use the Carrier checkbox to identify which Product is the carrier.
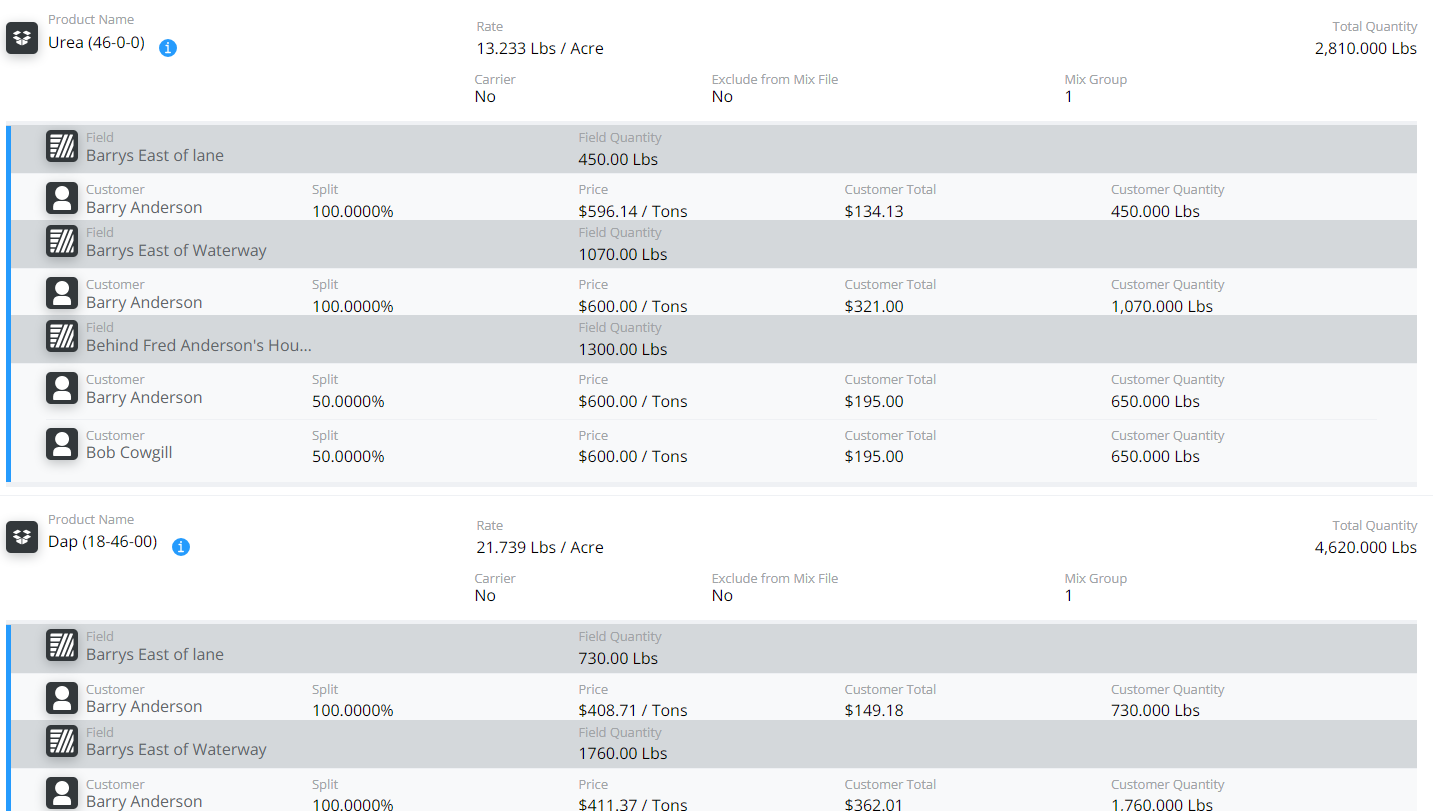
- The Rate/Acre (Rate/Ton, Rate/Hect, etc.), Total Product, or Blended amounts can be set on each product line.
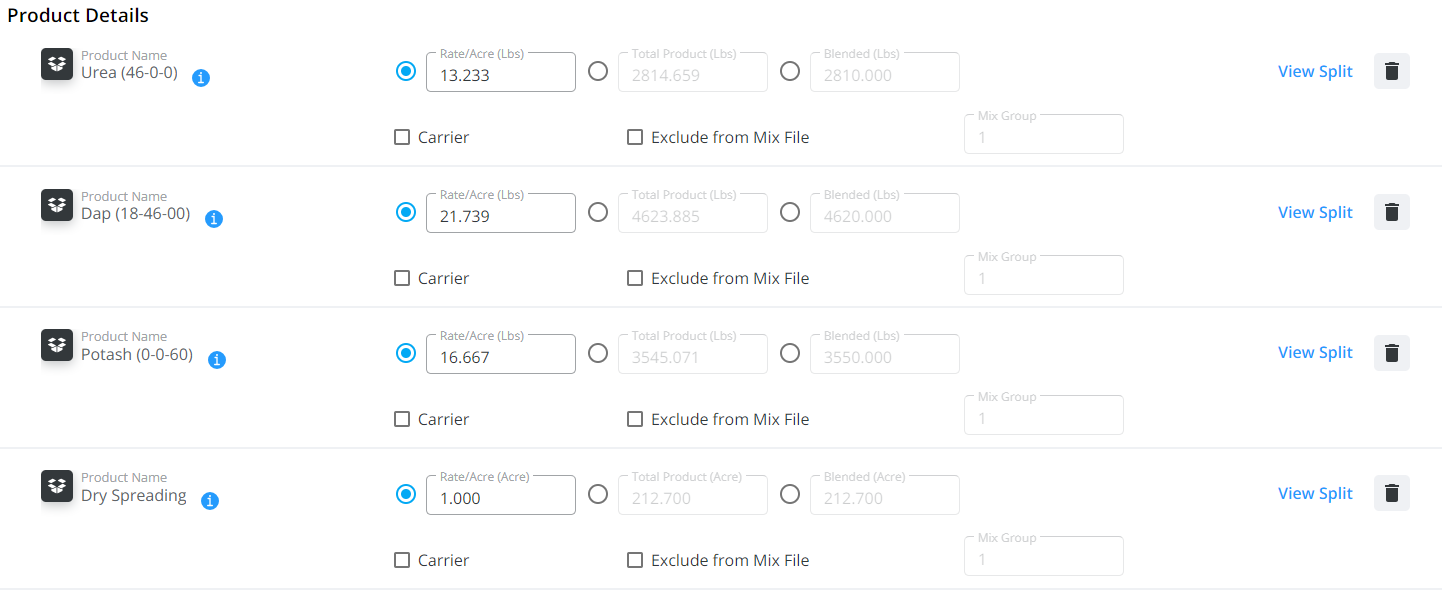
- The Exclude from Mix File option can be selected for products that should not be sent to the automated blender. If the VRT checkbox was selected in the Order Details section, the Mix Group can be edited to indicate what should and should not be blended together.
- On the product lines, a Federally Restricted icon is displayed beside the Product Name. When this icon is displayed, a Permit must be selected from the Permits area.
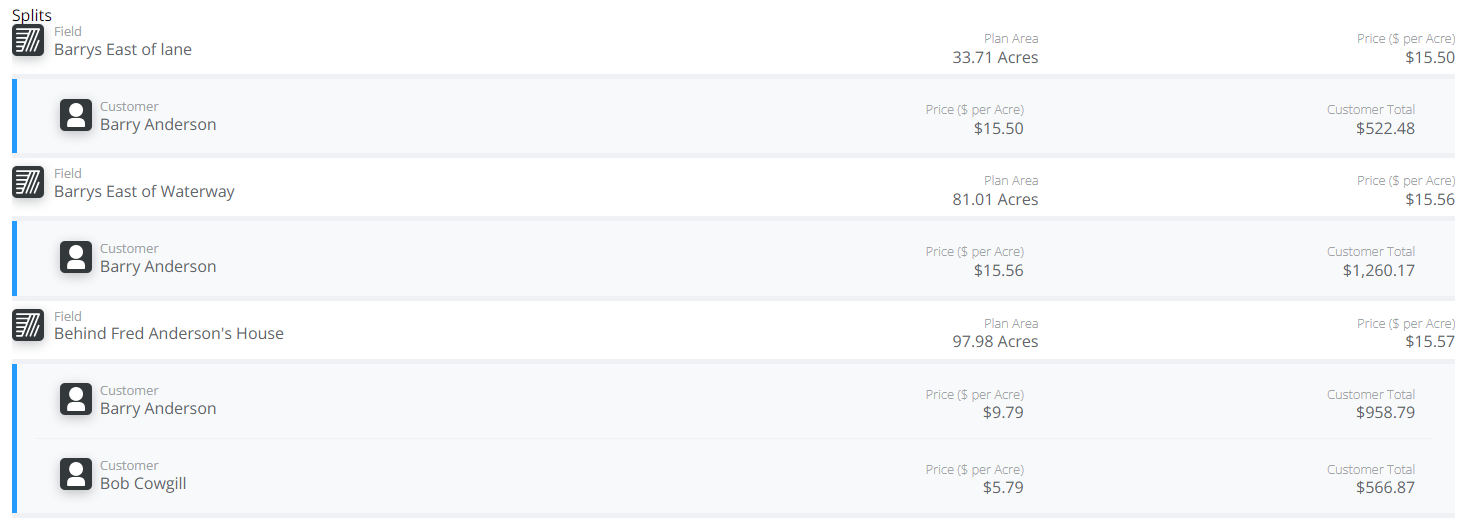
- The following pricing options must be selected and set for each customer, allowing customers on the split to be priced independently. Choose View Split to make these selections for each product.
- Use Price Levels – This adds the default price in the Price $ field. If multiple Price Levels are available, they can be chosen by selecting the down-arrow in the Price $ field. If this option is selected and there are no Price Levels established, a Price $ must be manually entered in order to complete the order.
- Custom Price – This changes the price to 0 and a custom price can be entered in the Price $ field.
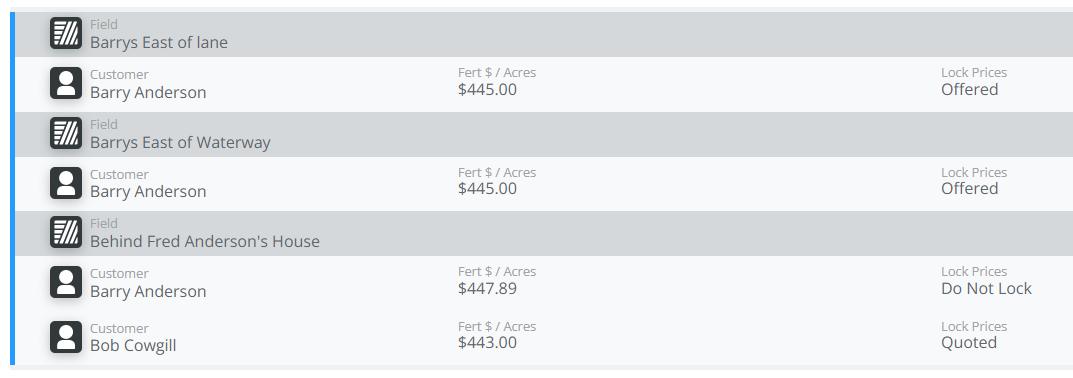
- Under Price Options, indicate the Fert $/Acres and Lock Prices options. If multiple customers exist, an option to Apply Pricing to All Customers is available.
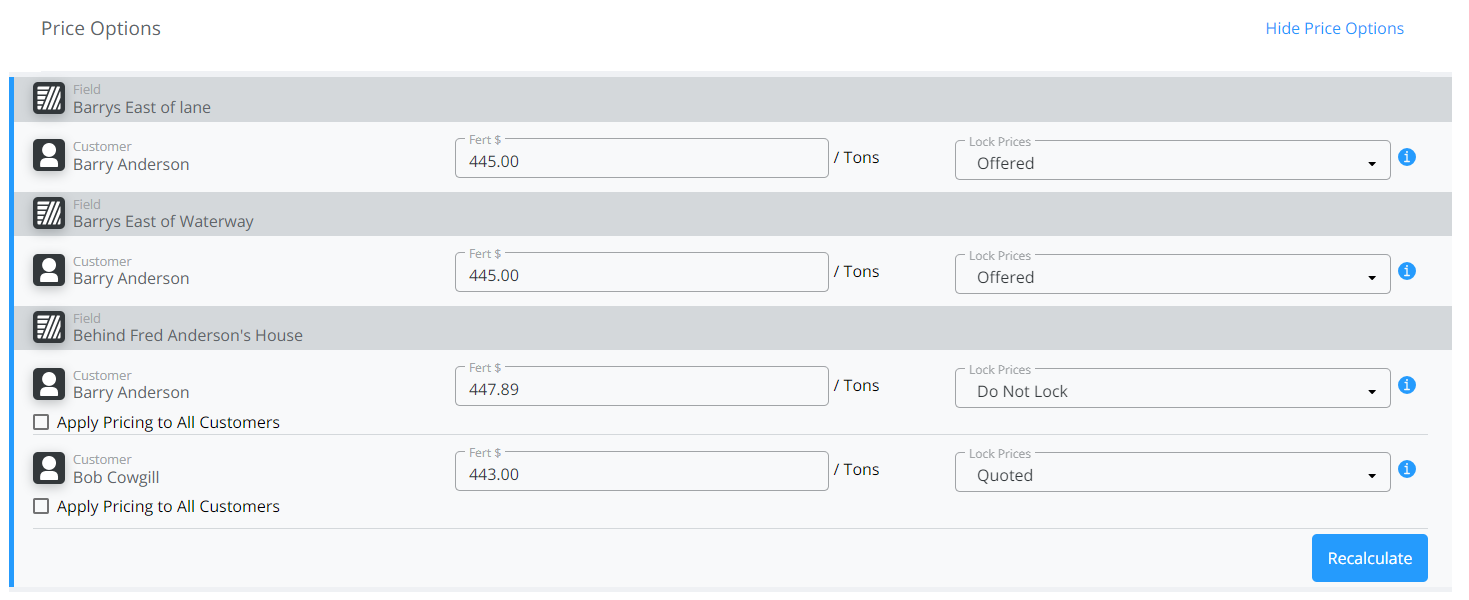
- Enter the Fert $/Acres and select Recalculate.
- Choose one of the Lock Prices options.
- Selecting the Trash Can icon on the right of the product row removes that product from the selected products.
- Selecting Next Step advances to the Review Order step. The next step in the process list can also be selected to advance once all required information is entered.


Step 4: Review Order
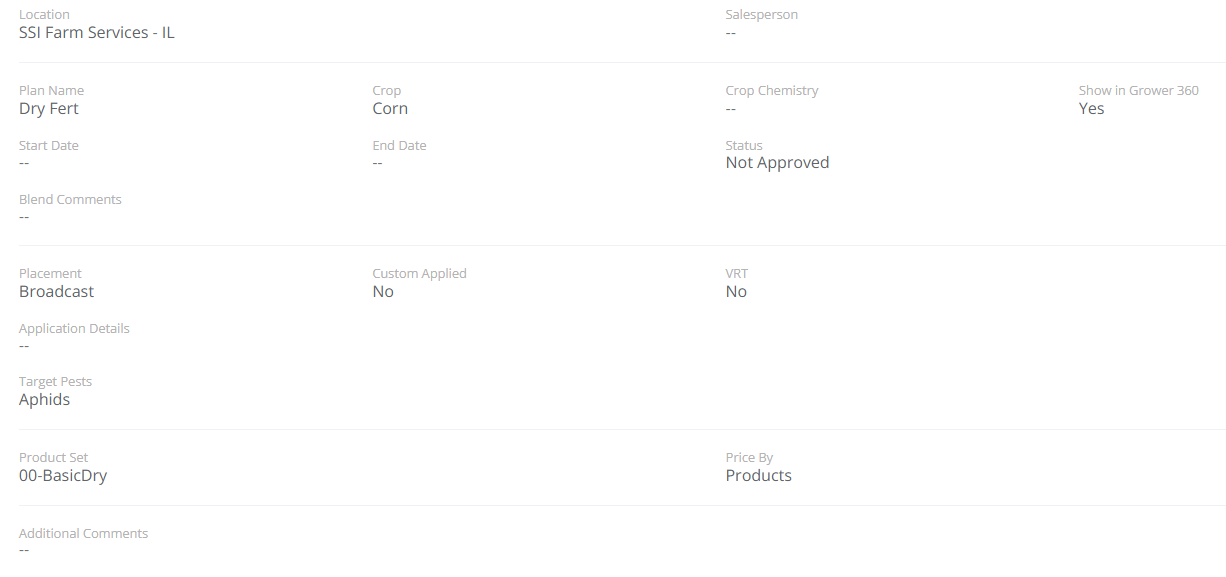
- All details of the Plan can be reviewed on the Review Order step.
- Corrections to the Plan can be made by using Previous Step to navigate to the previous step or select the stage from the process list.
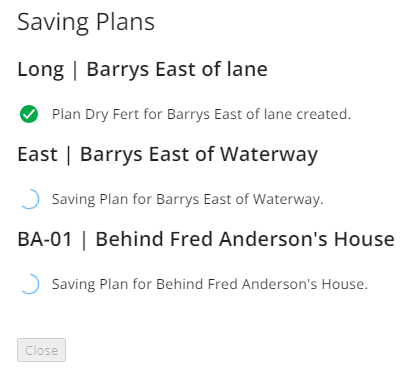
- When Save is selected, the Plan is saved and can be viewed from the Plan tab of SKY Order and in Agvance. If multiple fields are selected, a Plan is saved separately for each field.
- If multiple fields are selected, a Plan is saved separately for each field.


Edit a Plan
Plans can be edited by selecting the Ellipsis and choosing Edit Plan or by viewing the Plan and selecting the Ellipsis then Edit Plan from there.
- Under Order Details, update any information except for the Location.
 The following are available for editing in this section:
- Salesperson
- Plan Name
- Crop
- Crop Chemistry
- Start Date
- End Date
- Approved
- Visible in Grower360
- Blend Comments
- Placement
- Custom Applied/VRT
- Application Details comments
- Target Pests
- Product Set
- Price By
- Additional Comments
- Billing Notes
- Area
- In the Products section, add/remove products manually or via formulation.
 The following are available for editing in this section:
- Formulate By
- Lbs of Analysis
(if Guaranteed Analysis is selected) - Product Set
- Optimize By
- All quantities
- Pricing
- Carrier
- Exclude from Mix File
- Adjust by
- Lock Price options
- Fert $/UOM
- Lock Prices
- Once all edits are complete, select Save Plan.
 The following are available for editing in this section:
 The following are available for editing in this section: