Management Area Analysis Layers can be added to a field using one of the two templates SSI provides or by creating a new template.
Setup
- Navigate to Setup / Template Manager to add a Management Area template. Choose the Add button to create a new template.
- Select Management Area as the File Type and select Manual Only.
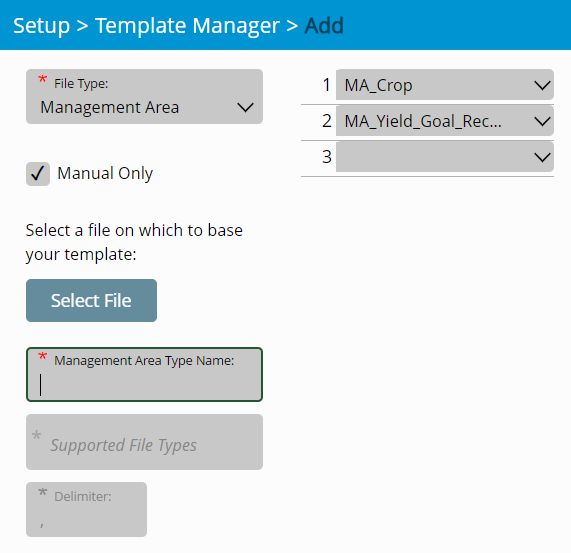
- Enter a Management Area Type Name then select any attribute(s) from the drop-down(s) if applicable.
- Select Save.
Field
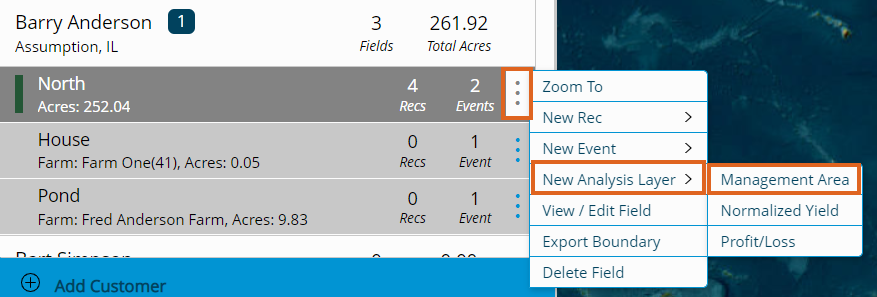
- Find the desired field and choose the vertical Ellipsis.
- Select New Analysis Layer then Management Area.
- Enter an Analysis Layer Name and choose the appropriate Season from the drop-down.
- Select the template created in the Setup section above from the Management Area Type drop-down.
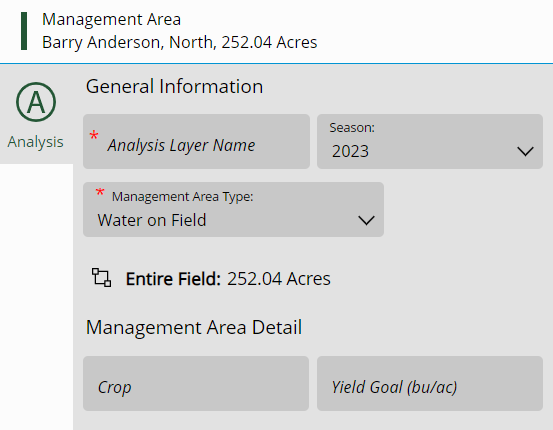
- Enter additional details in the Management Area Detail section. Attributes set up on the template determines what information can be entered here.
Note: Crops entered here must be the same name as what is entered in Agvance. - Zones can also be created using the Zones toolbar which is similar to other places in the program.
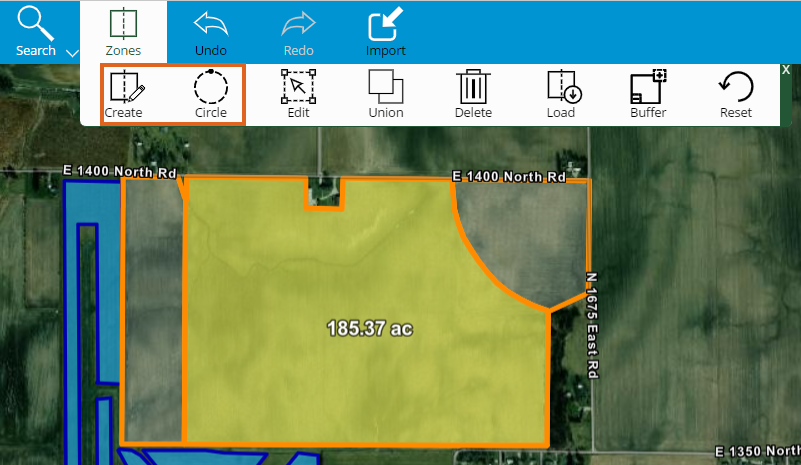
- Each zone can then be selected (indicated by being highlighted) to enter information specific to that area in the Management Area Detail section. The Zone and number of acres is indicated to ensure the appropriate area is selected.
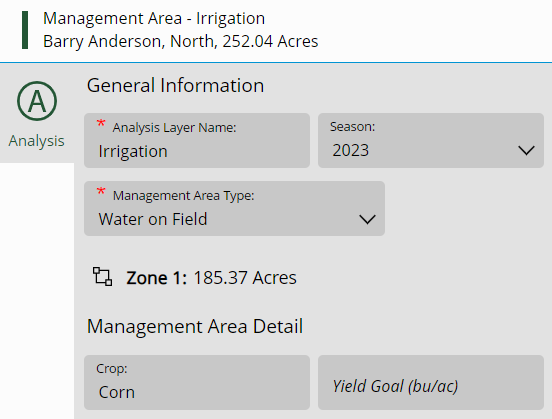
- Select Save when finished.
Note: Upon saving, the status will display Processing to indicate the changes are being saved and then Completed when done processing.
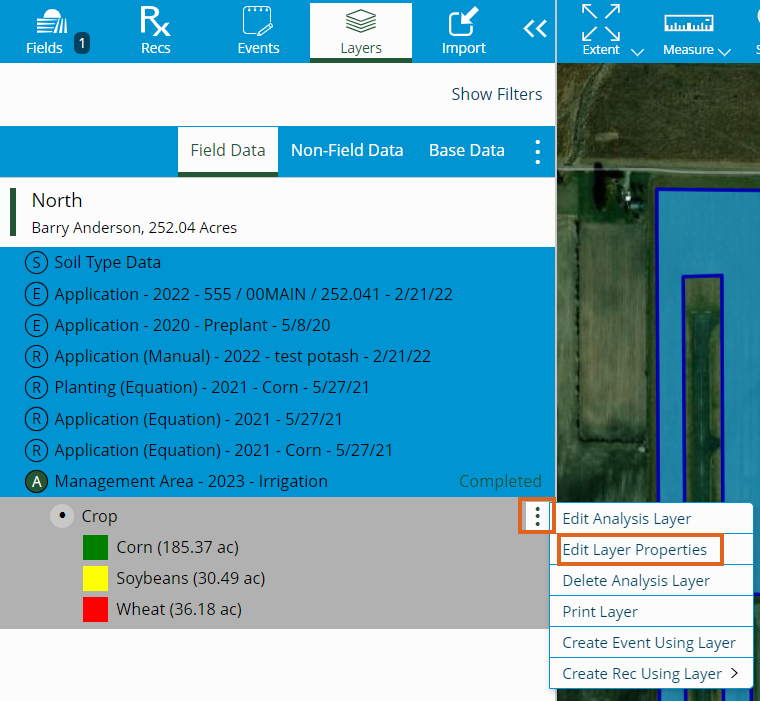
- Each Zone will be indicated with a different color. To change the color scheme, select the vertical Ellipsis on the Analysis Layer for the field and choose Edit Layer Properties.
- Choose a color scheme from the Color Ramp drop-down. A preview of what colors will be used for each section is available on the right.
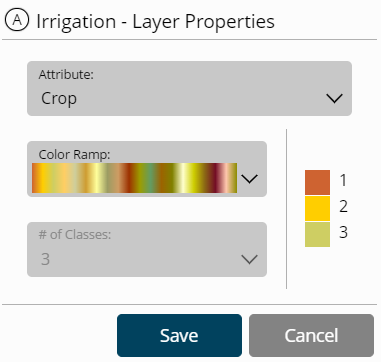
- Select Save and the selection will be applied to the map.
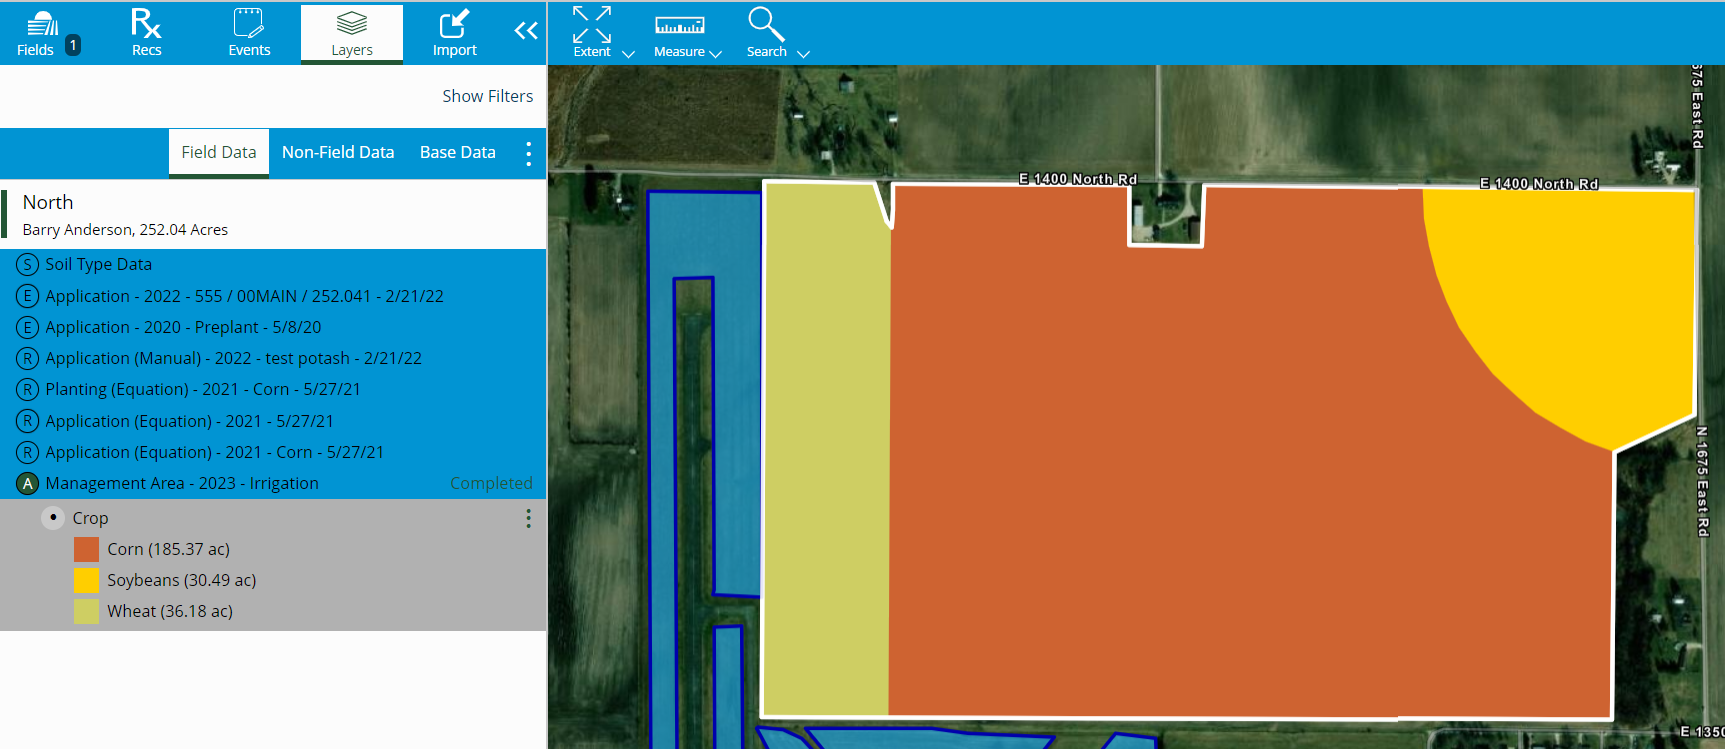
- Select the vertical Ellipsis on the Analysis Layer for the field to edit or delete the Analysis Layer. If editing, all areas can be changed except the Management Area Type.


