The following covers adding Grain Freight charges on multiple Grain documents and reconciling using the Reconcile Grain Freight utility.
Setup
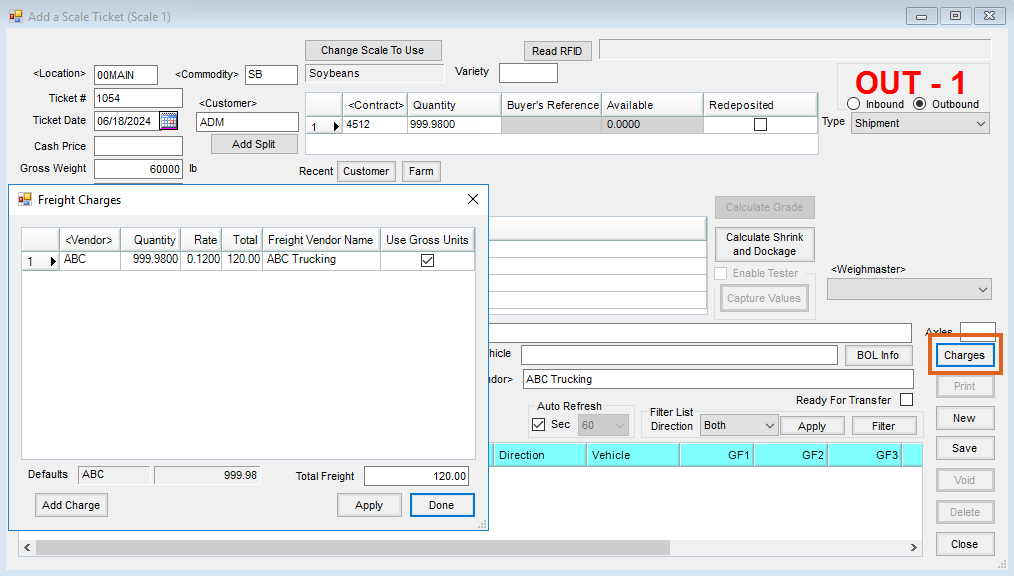
Add Freight on Scale Tickets
- At Grain / Operations / Scale Tickets, add or edit a Scale Ticket.
- Double-click in the Freight Vendor field, and select the Vendor.
- Select Charges.

- On the Freight Charges window, choose Add Charge.
- Edit the quantity and rate. Select Apply.

Add Freight on a Shipment
- At Grain / Operations / Shipments, add or edit a Shipment.
- Double-click in the Freight Vendor field and select the Vendor.
- Select Charges.

- On the Freight Charges window, select Add Charge.
- Edit the quantity and rate. Select Apply.

Add Freight on a Commodity Transfer
- At Grain / Operations / Commodity Transfers, add or edit a Commodity Transfer.
- Double-click in the Freight Vendor field, and select the Vendor.
- Select Charges.

- On the Freight Charges window, select Add Charge.
- Edit the quantity and rate and choose Apply.
Add Freight on a Grain Bank Shipment
- At Grain / Operations / Grain Bank Shipment, add or edit a Commodity Transfer.
- Double-click in the Freight Vendor field, and select the Vendor.
- Select Charges.

- On the Freight Charges window, select Add Charge.
- Edit the quantity and rate, then choose Apply.

Add Freight on the Scale Interface
- At Grain / Operations / Agvance Grain Scale Interface / Operations / Scale Ticket, double-click in the Freight Vendor field and select the Vendor.
- Select Charges.
- On the Freight Charges window, select Add Charge.
- Edit the quantity and rate and choose Apply.

At the Scale Interface, the Use Gross Units option is automatically checked. If net is desired, enter the quantity manually and uncheck the Use Gross Units option.
Reconcile Grain Freight
- At Grain / Utilities / Reconcile Grain Freight, select the Vendor.
- In the Filter - Include section, choose to set a variety of Source grid filters to simplify the reconciliation. G/L Accounts populate in the grid as determined by the Filters section.
Note: With first time use of the Grain Freight Reconciliation, set up default accounts (see the Grain Ledger GL Posting Accounts tab). - Mark the checkboxes in the grid to select the Source items to reconcile.
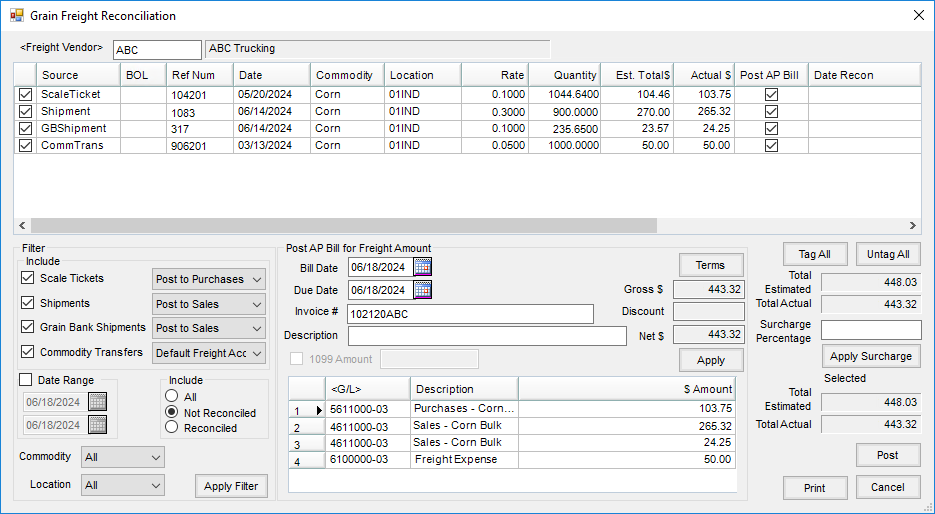
- Verify the reconcile Actual $ are correct.
- In the Post AP Bill for Freight Amount section, add the Invoice # and select Apply.
- Select Print to print the grid and then Post.

Notes
- If the Source checkbox is unchecked in error and is checked again, the Post AP Bill checkbox must also be checked again if wanting to create an AP Bill in Accounting.
- To reconcile freight already paid through Accounting or entered in error, check the Source checkbox and uncheck Post AP Bill. This reconciles the item without creating an AP Bill.
- If a Source is reconciled in error without Post AP Bill checked, a manual AP Bill can be created in Accounting. A Source cannot be un-reconciled.
Grain Ledger GL Posting Accounts
- At Grain / Setup / Grain Ledger G/L Posting Accounts, designate a default Grain Freight Account for each Location.
- Select a Location from the G/L Accounts for Location drop-down.
- Double-click the Grain Freight Account field to choose an account from the Select a G/L Account window, then choose Select.
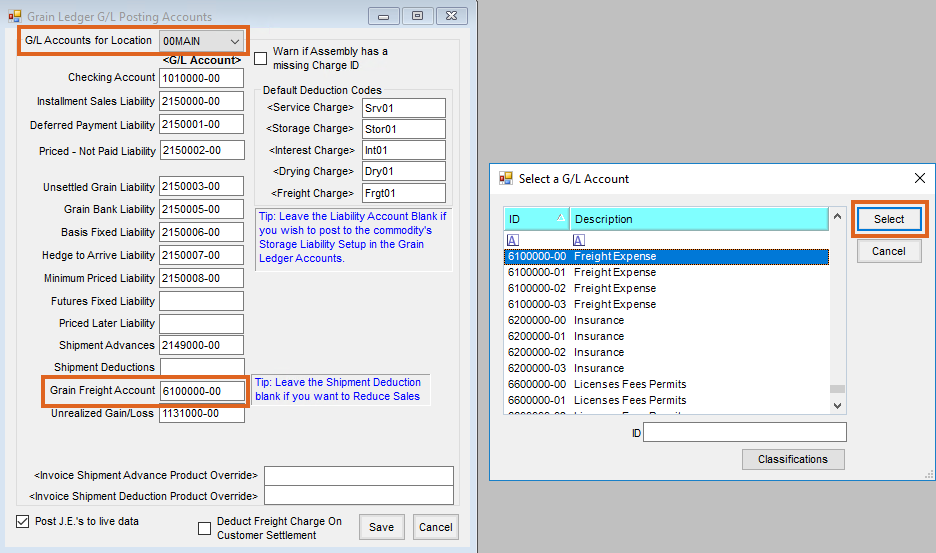
- Select Save on the Grain Ledger G/L Posting Accounts window. Repeat for additional Locations as needed.

Reports
A report of all details of Freight Purchase paid accounts can be run at Grain / Grain Reports / Freight Purchases / Freight Reconciliation.
- Indicate a Vendor by choosing Select, check the Reconciled Date option, and enter a Start Date and End Date.
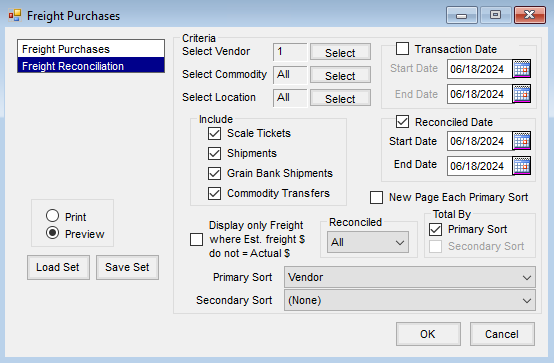
- Select OK.
- The report can be sent with the AP Check to the vendor.
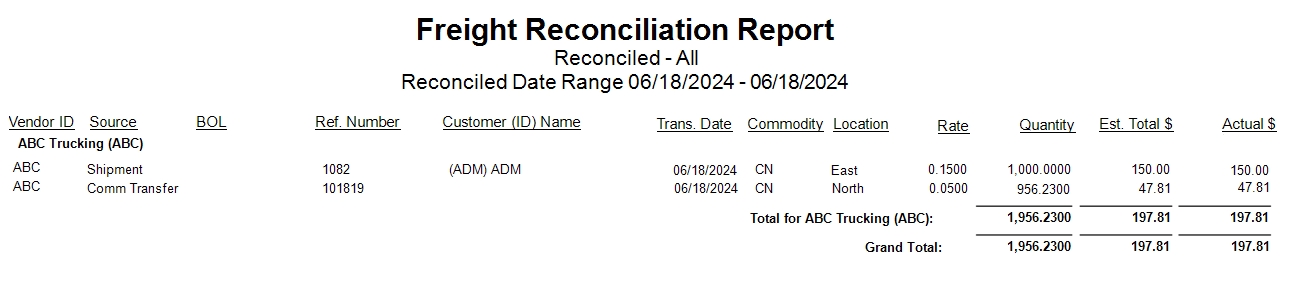


To run a report of freight accrual balances for month-end Journal Entries, set Select Vendors, Select Commodity, and Select Location to All.
- Ensure the Dates filters are not checked, and set the Reconciled option to No.
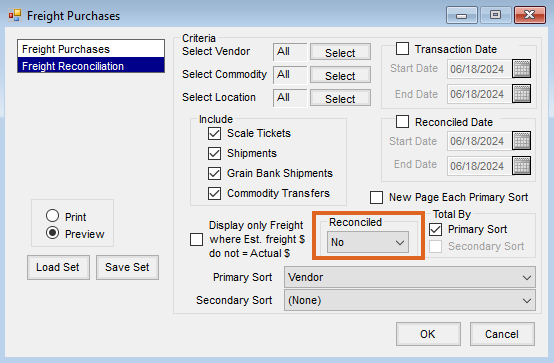
- Select OK.

