Overview
AP Purchase Orders are available in the left navigation of Agvance SKY Vendor.
The AP Purchase Orders grid displays AP POs with the option to search and filter.
Options are available to Edit, Void, or Download Attachments at the far-right of the grid.
Note: If editing, an option is available to Mark as Processed which will cause the AP PO to no longer be available to import into an AP Bill. This option may be needed if the AP PO was not pulled into an AP Bill and is no longer needed.
Select the Filter button next to the User drop-down to filter by Vendor Status, PO Status, Approval Status, and/or Date Range. After filters have been selected, choose Apply Filters.
Selecting the Vendor Name opens that Vendor's profile as view-only information.

Select the PO # to view additional details.

Add an AP Purchase Order
Adding AP Purchase Orders is available for those with Add/Edit AP Purchase Orders turned on in Agvance SKY Admin. Select the + button to add an AP Purchase Order.
General Info
- Choose the appropriate Vendor from the drop-down, then determine the PO Numbering Location from the drop-down. This determines the Location used for Purchase Order auto-numbering.

- Enter the Purchase Order # and Purchase Order Date. The PO number may default if auto numbering is set up in Agvance Windows. The date defaults as today's date but can be modified. A Description can optionally be entered.
- Choose Attach File to upload applicable documents for the AP PO. These files will flow to the AP Bill when the AP PO is imported into an AP Bill.

Upload via Desktop
Drag and drop the file(s) into the designated area, or select browse to find the appropriate file(s). Files display indicating the size and if it is Ready to upload. Select the X to remove the file. When finished, choose Attach.

Upload via Phone/Tablet
When uploading an a file with a mobile device, tap browse. From the menu that displays, choose to open the Photo Library, Take Photo, or Choose Files. The Take Photo option opens the device's camera to take a picture of the document if it has not yet been saved to the device.

Expense Breakdown & Predefined Split
- Indicate the Split ID and Amount if the Purchase Order is to be split across multiple accounts. Choose Apply. This will apply the split and remove any existing lines.
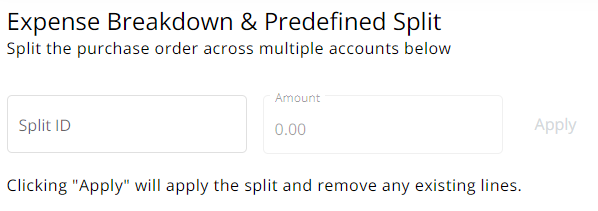 Note: Split IDs must first be set up in Agvance Windows at Accounting / Setup / G/L / G/L Splits.
-OR-
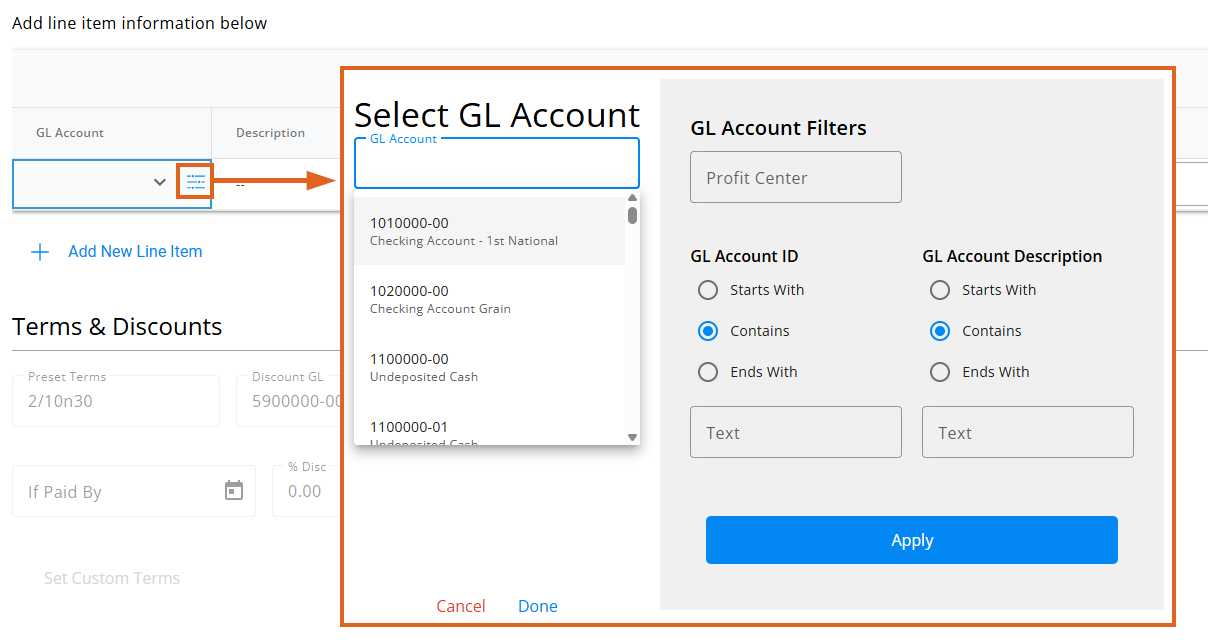
Select in the GL Account* field and choose the appropriate account for this PO. The Description defaults in as the description entered on the account. Optionally enter the Amount, a brief Comment, and the Quantity. Select a Vehicle Location and/or Vehicle from the drop-down. Optionally enter a Unit Price and/or Part #. Select Add New Line Item to create additional lines.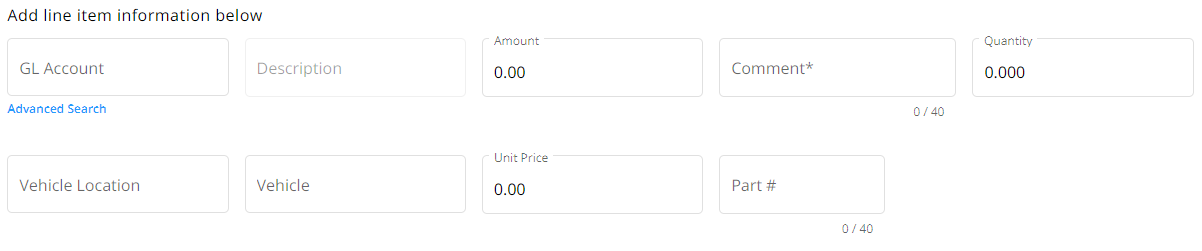 Optionally select the Filter icon within the GL Account field to filter the GL Account drop-down. Filter by Profit Center, GL Account ID, and/or GL Account Description. Once filters are indicated, choose Apply. Select in the GL Account drop-down on the left to display GL Accounts matching the filters applied. After choosing the appropriate GL Account, select Done.
 Note: Split IDs must first be set up in Agvance Windows at Accounting / Setup / G/L / G/L Splits.
 Optionally select the Filter icon within the GL Account field to filter the GL Account drop-down. Filter by Profit Center, GL Account ID, and/or GL Account Description. Once filters are indicated, choose Apply. Select in the GL Account drop-down on the left to display GL Accounts matching the filters applied. After choosing the appropriate GL Account, select Done.

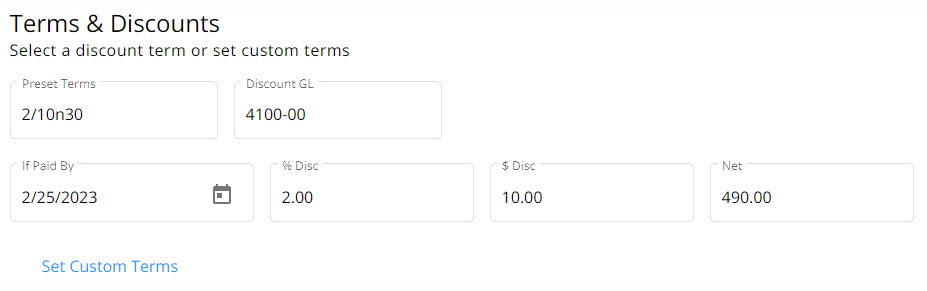
Terms & Discounts
- Select in the Preset Terms field to set terms for this Purchase Order. The Discount GL defaults from the Location setup but can be changed by selecting from the drop-down.
 Note: An Amount must be present in the Expense Breakdown & Predefined Split section for this option to be available.
 - The If Paid By date(s) default if a Preset Term is selected but can be modified. If a Purchase Order was imported, any applicable discount information will be populated but can be altered.
- Select Set Custom Terms to enter discount information not currently saved as Preset Terms. Choose Add Custom Terms to apply this discount to the Purchase Order.
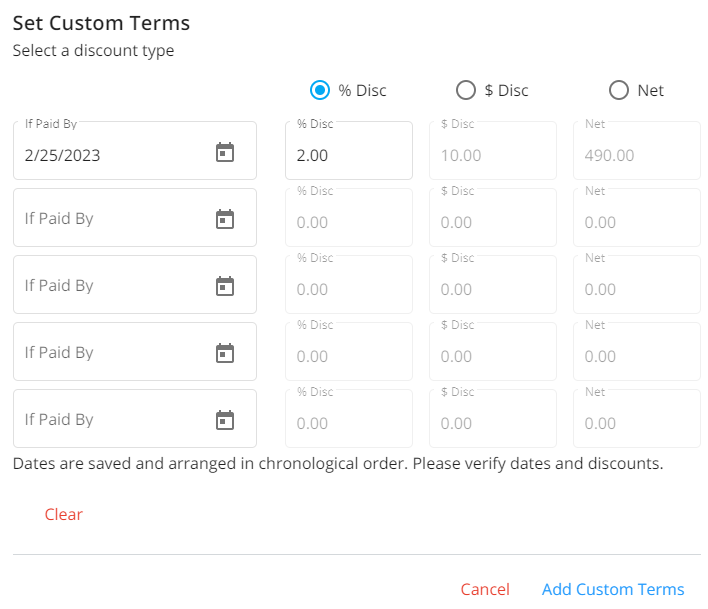
- Select Set Custom Terms to enter discount information not currently saved as Preset Terms. Choose Add Custom Terms to apply this discount to the Purchase Order.
 Note: An Amount must be present in the Expense Breakdown & Predefined Split section for this option to be available.
Notes & Posting
Enter any additional Notes and review the Total, Discount, and Net amounts. Select Post & Start New to post this Purchase Order and enter another or Post Purchase Order to post the Purchase Order and return to the AP Purchase Orders screen.

