Sales Orders are found in SKY Order under Accounting and display in an interactive grid. This grid operates much like an Excel spreadsheet. For more information on how the grid functions, see Using Grids in Agvance SKY.
Note: Sales Orders must be enabled in SKY Admin before they can be viewed in SKY Order.
A Delete option is available, but once a Sales Order is deleted, it cannot be recovered.

The Sales Order Status can be changed by selecting the current status for that Sales Order then choosing from the options that display.

Additional filtering options are available under the Filters button.

Add/Edit a Sales Order
Sales Orders can be added by selecting + Add Sales Order.
Note: If editing an existing Sales Order, the Location and Customer or Field information cannot be modified other than adding a Ship To if applicable.
Use the navigation on the left to move to different sections of the Sales Order.
Sales Order
Location
- Select the Location for the Sales Order.

Customer or Field
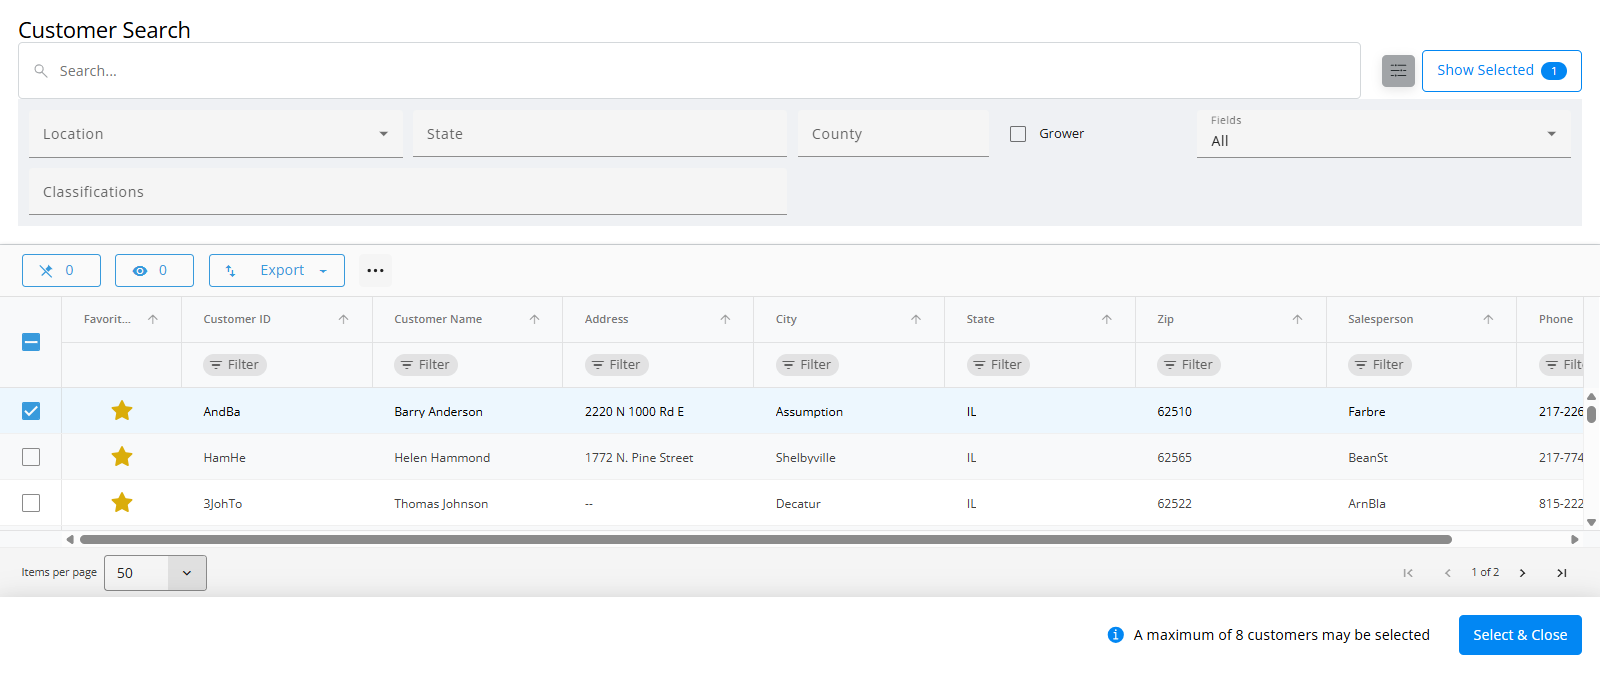
- Under Customer or Field, choose + Add Customer or + Add Field. A grid of Customers (or Fields) displays. Use the Search field to find the specific Customer or scroll through the list. A maximum of eight Customers may be added. If adding by Field, only one Field can be selected. The Filters button to the far right of the Search bar can be used to narrow down the list of Customers.

- The Show Selected button next to the Search bar is enabled after choosing the Customer(s). The number indicates how many Customers are currently checked. Selecting the button filters the grid to show only the selected Customers.
- Once the Customers are selected, choose Select & Close.
- A Ship To can optionally be added if applicable.

Order Details
- The Ticket Number will default once the Location has been selected.
- The Salesperson defaults as the Salesperson selected on the User profile in SKY Admin but can be adjusted.
- The Ticket Date automatically displays today's date but can be modified if needed.

- Indicate the Estimated Delivery Date.
- Choose the Type from the drop-down - Pickup, Deliver, or Booking.
- Optionally select a Payment Term and/or a Sales Order Contract for this Sales Order from the respective drop-downs.
- The Start, Expiration, and Offer Expires Dates are optional entries but can be helpful if populated.
- Expiration Date – This defaults from the Sales Allocation, if selected. If this order is imported to a Booking, this Expiration Date imports into the Booking Expiration Date.
- Offer Expires Date – This is used on Sales Orders with an Offered status. Populating this date helps keep some preferences true at Planning / Setup / Location Preferences on the Sales Order Prefs tab. If the Offer Expires date passes and the preference is set to Disallow Approval of an Expired Sales Order, the Status option of Approved will become disabled. However, expired Sales Orders can still be imported into a Booking if it was approved prior to that date. This date prints on the Sales Order.
- Select the Status drop-down to choose Offered, Approved, or Declined. This will sync with Windows Agvance.
- If applicable, enter the Check Number. This is limited to 10 characters.
- The Payment Date is an optional field.
Products
- Select + Add Product.
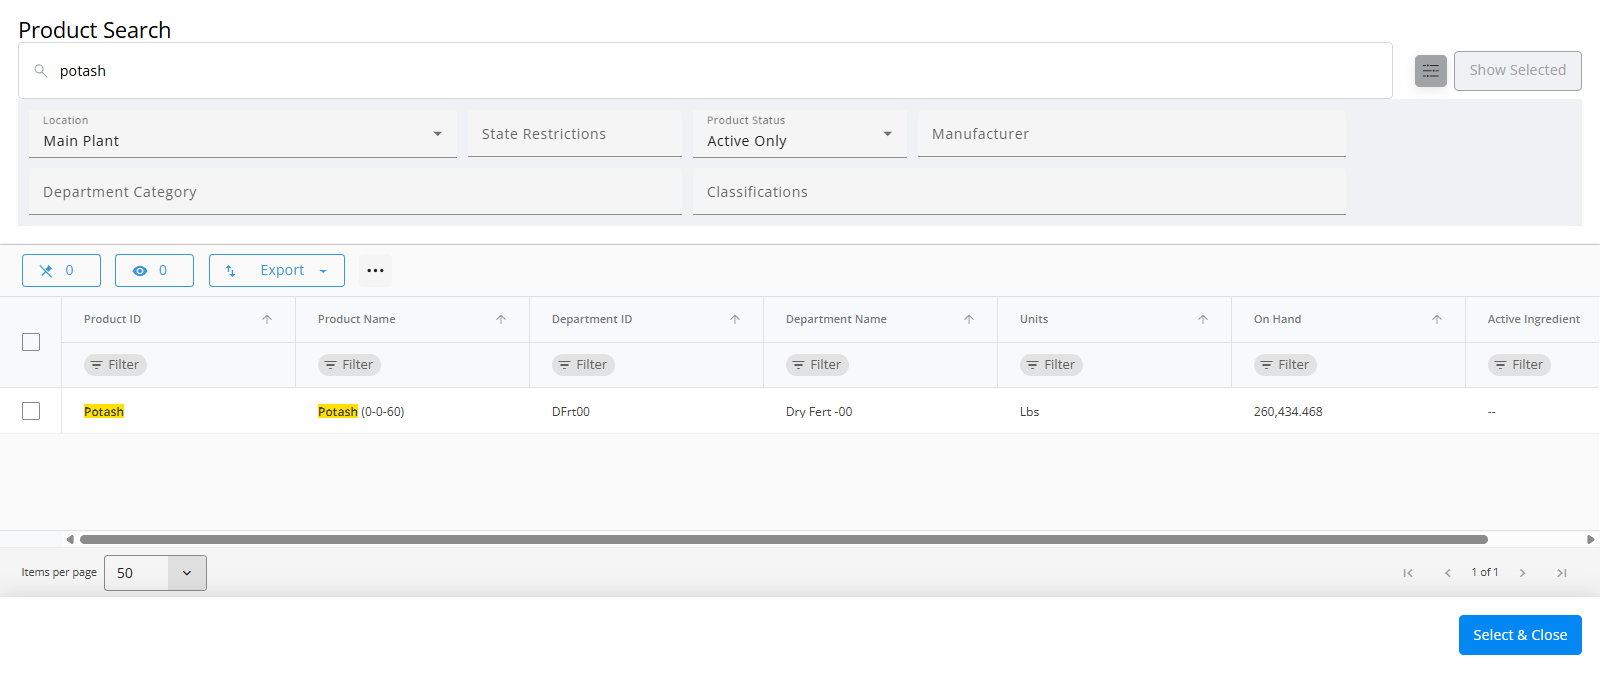
- A grid of Products displays. Use the Search field to find the appropriate Product(s) or scroll through the list. The Filters button to the far right of the Search bar can be used to narrow down the list of Products.

- The Show Selected button next to the Search bar is enabled after selecting the Product(s). The number indicates how many Products are currently checked. Selecting the button filters the grid to show only the selected Products.
- Once the Products are selected, choose Select & Close.
- In the Products section of the Sales Order, indicate the Quantity for each Product.

- Products can be reordered by selecting the grid of dots on the left and dragging to the appropriate position.
- Choose + Duplicate to add another line of that Product.
- The Delete icon can be selected to remove a Product line.
Pricing
- In the Pricing section, indicate the Price ($) / Unit for each Product.

Notes
- Additional Comments can be entered in the Notes section.
Note: A maximum of 240 characters are allowed in this field. - After Notes are entered, Create Order can be selected but additional options are available on the Additional Info and Discounts tabs.
Additional Info and Discounts Tabs
Additional Info
Optionally enter a Customer PO #, Control Number, and/or Territory.

Discounts
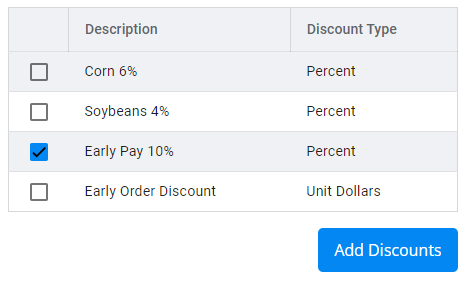
Discounts already set up in Agvance display on this tab. A maximum of five pricing discounts can be applied to a Sales Order.
- Check any of the applicable discounts and select Add Discounts.

- An Active Discounts section displays to indicate the Rate for the Discount. To remove the Discount, select the Delete icon.

- Once all of this information is added, choose Create Order.


