The playlist below covers viewing and entering Deliveries in Agvance SKY Order. Separate videos are also available within each relevant section of this article. It is recommended to expand the videos to full screen to ensure all details are visible.
Viewing Delivery List
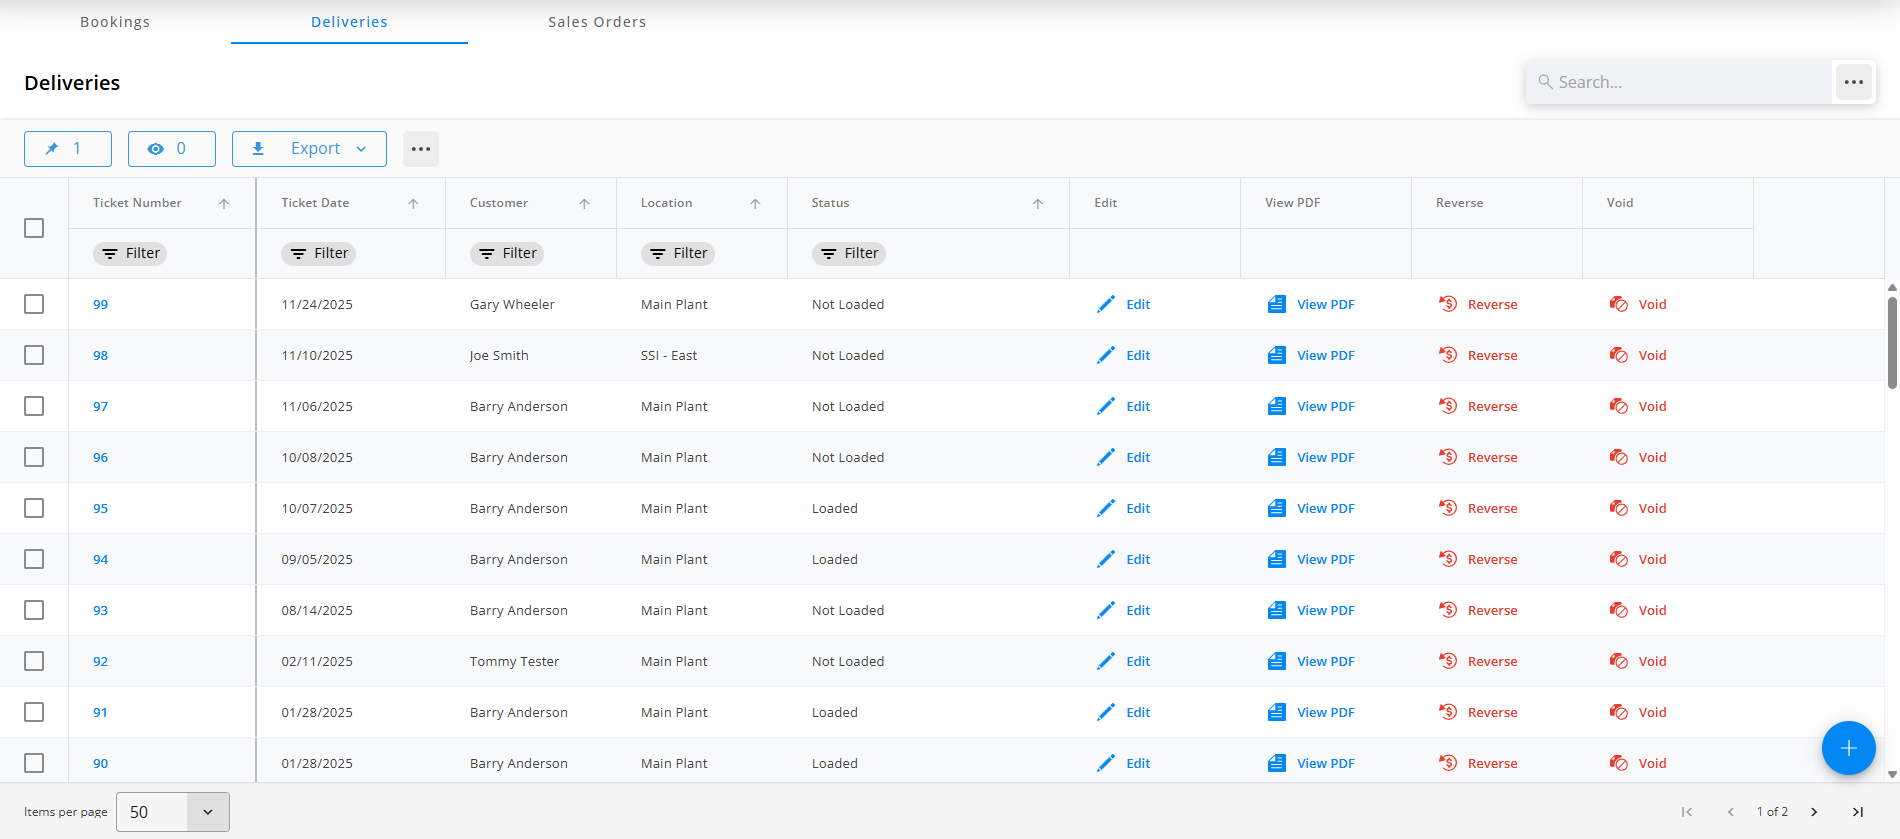
Deliveries are found in Agvance SKY Order under Accounting and display in an interactive grid. This grid operates much like an Excel spreadsheet. For more information on how the grid functions, see Using Grids in Agvance SKY.
Selecting a Ticket Number opens the Delivery as view-only with a button to Edit Order in the lower right if edits need made.
Note: Deliveries must be enabled in Agvance SKY Admin before they can be viewed in Agvance SKY Order.
Additional filtering options are available under the Filters button next to the User drop-down.
- Status (Not Loaded, Loaded)
- Dispatch Job Status (On Hold, Ready, In Process, Completed)
- Salesperson
- Delivery Order Date Range
- Ticket Number Range
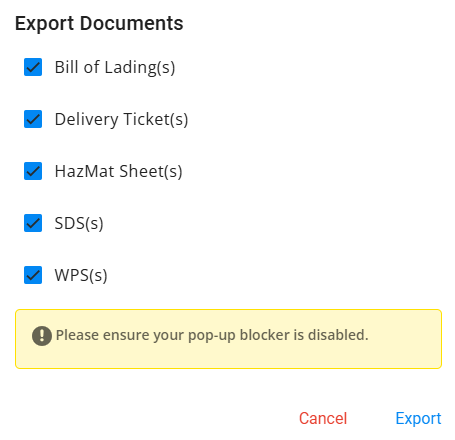
An option is available under the Ellipsis on the Search bar to Export Documents. Check the desired Delivery(ies), then choose this option to open the Export Documents window. From there, choose the desired document types then Export.
Note: The SDS(s) and WPS(s) options are available if Agrian is turned on in the database.
Be sure any pop-up blockers are disabled.
Add a Delivery
Delivery Tickets can be added by selecting + Add Order at the bottom right corner of the page then choosing + New as Delivery.
Note: Auto-numbering for Deliveries must be turned on in Agvance Windows to create a Delivery in Order. The timing of turning on this feature impacts Agvance data. Please contact SSI for assistance.
Use the navigation on the left to move to different sections of the Delivery.
Location, Customer/Field
Location
Select the Location associated with the Delivery.

Customer/Field
Under Customer or Field, choose + Add Customer or + Add Field. A grid of Customers or Fields displays.
By Customer
- Use the Search field to find the specific Customer or scroll through the list. A maximum of eight Customers may be added. The Filters button to the far right of the Search bar can be used to narrow down the list of Customers.
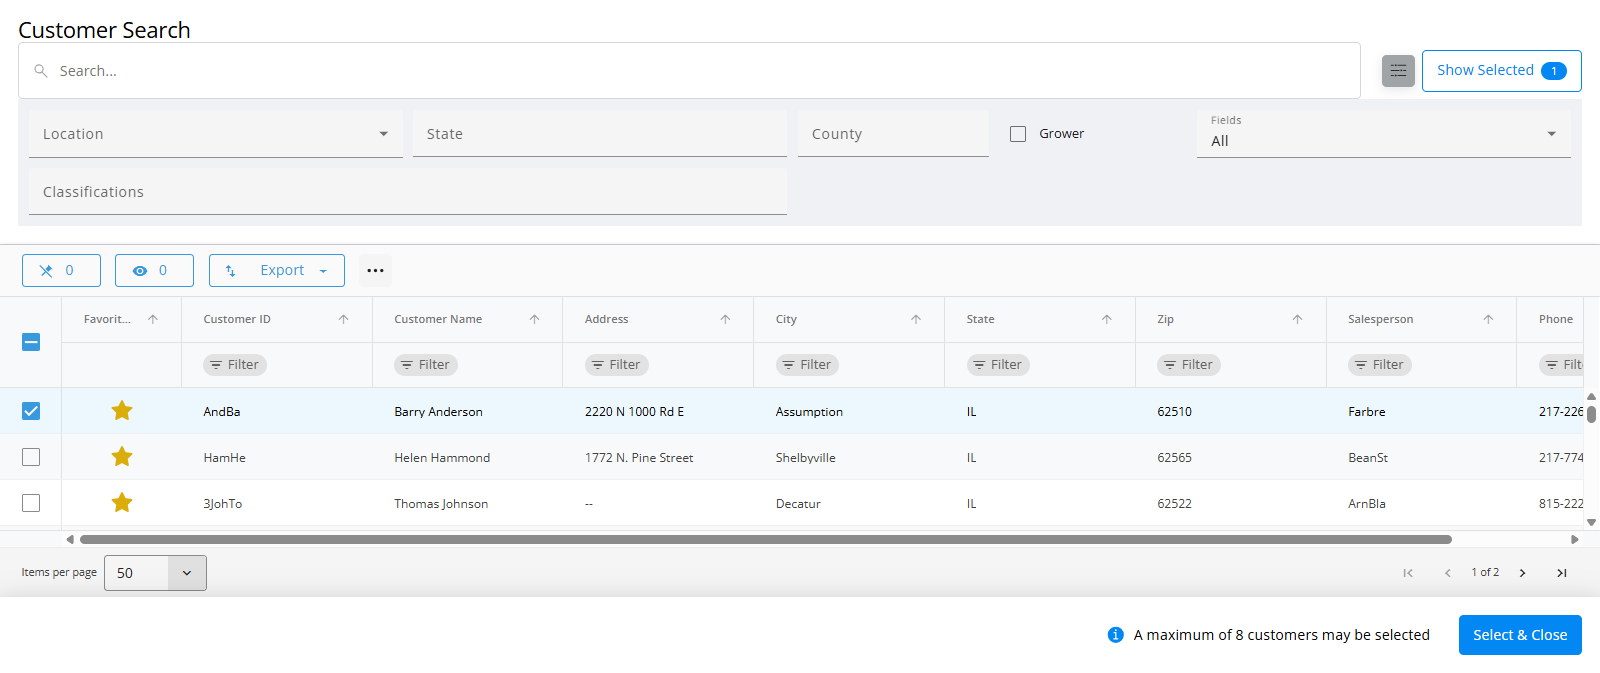
- The Show Selected button next to the Search bar is enabled after choosing the Customer(s). The number indicates how many Customers are currently checked. Selecting the button filters the grid to show only the selected Customers.
- Once the Customers are selected, choose Select & Close.
- If multiple Customers are selected, the Split % can be adjusted but must equal 100. Customers can be removed with the Delete icon.

- A Ship To can optionally be selected from the drop-down if applicable. The Ship To Customer defaults to the first Customer in the table. Rearrange Customers listed by selecting the grid of dots then dragging and dropping in the appropriate order.


By Field
- Use the Search field to find the specific Field or scroll through the list. A maximum of one Field may be added. The Filters button to the far right of the Search bar can be used to narrow down the list of Fields.

- The Show Selected button next to the Search bar is enabled after choosing the Field. The number indicates how many Fields are currently checked. Selecting the button filters the grid to show only the selected Fields.
- Once the Field is selected, choose Select & Close.
- If multiple Customers are part of the Field, the Split % can be adjusted but must equal 100. Customers can be removed with the Delete icon.
Note: The primary Customer cannot be removed.
- A Ship To can optionally be selected from the drop-down if applicable. The Ship To Customer defaults to the first Customer in the table. Rearrange Customers listed by selecting the grid of dots then dragging and dropping in the appropriate order.


Order Details
- The Order Number will default once the Location has been selected.

- The Salesperson defaults as the Salesperson selected in Agvance SKY Admin but can be adjusted.
- Indicate if this will be for Delivery or Pickup.
- If applicable, the Delivery Ticket can be marked as On Hold. This makes the Delivery Ticket unavailable for billing.
- The Delivery can also be marked as Loaded, Mini Bulk, Repacked, or Custom Applied. If Loaded, be sure to indicate the Loaded Date.
- Billing Comments can be entered and will be visible to the Customer.
- Optionally enter the Requested Date.
- The Ticket Date defaults to today's date but can be changed. This field is required.
- Indicate the Priority.
- The Job Status can be selected from the drop-down and indicates the status of the job in Agvance SKY Dispatch. Only Ready or On Hold can be selected (In Process and Complete are disabled here and can only be done in Agvance SKY Dispatch).
Note: If the job is assigned or set to In Process in Agvance SKY Dispatch, the Job Status is view-only. When editing a Delivery that has been assigned in Agvance SKY Dispatch and is set to Ready, a warning will display indicating the job has been assigned, and changes made may impact other processes.


Products
- Select + Add Product.
- A grid of Products displays. Use the Search field to find the appropriate Product(s) or scroll through the list. The Filters button to the far right of the Search bar can be used to narrow down the list of Products.
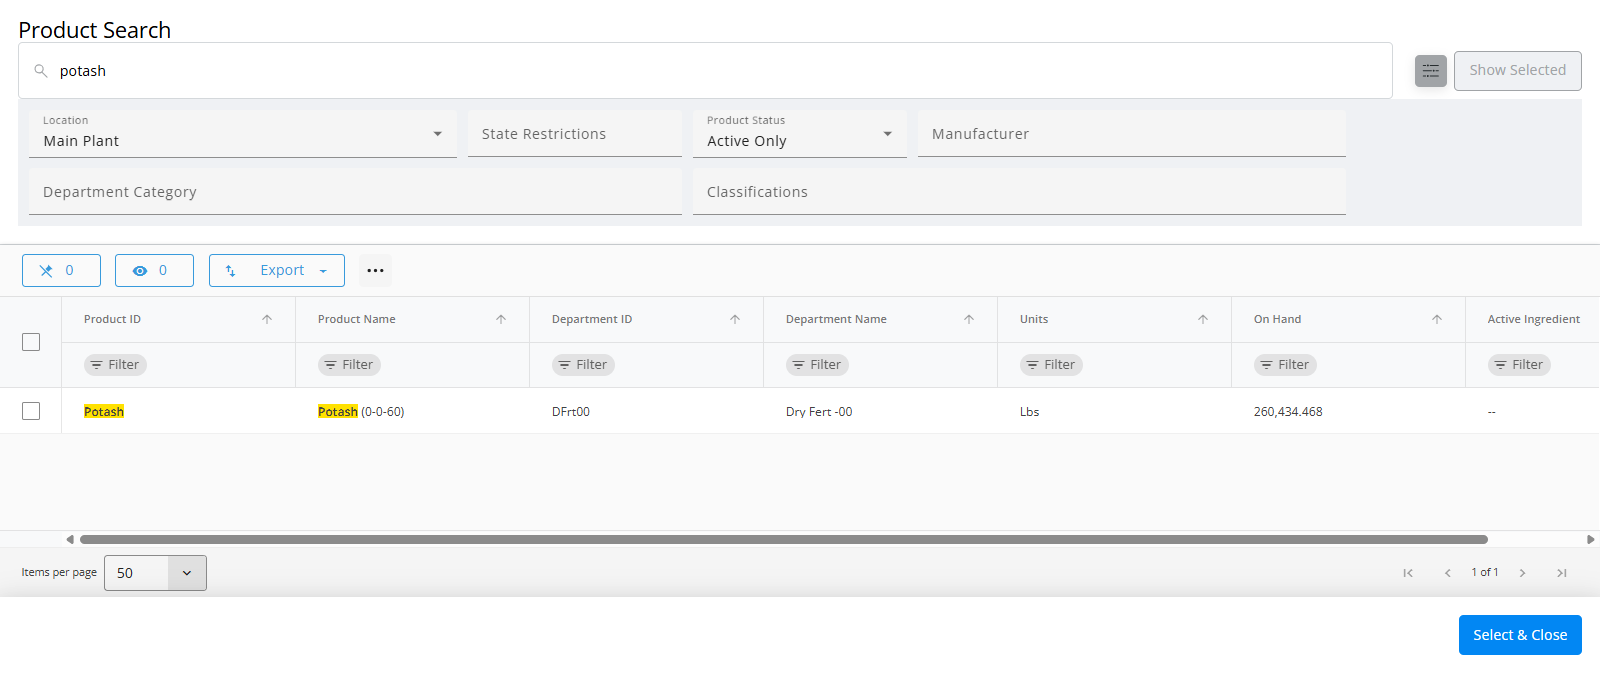
- The Show Selected button next to the Search bar is enabled after selecting the Product(s). The number indicates how many Products are currently checked. Selecting the button filters the grid to show only the selected Products.
- Once the Products are selected, choose Select & Close.
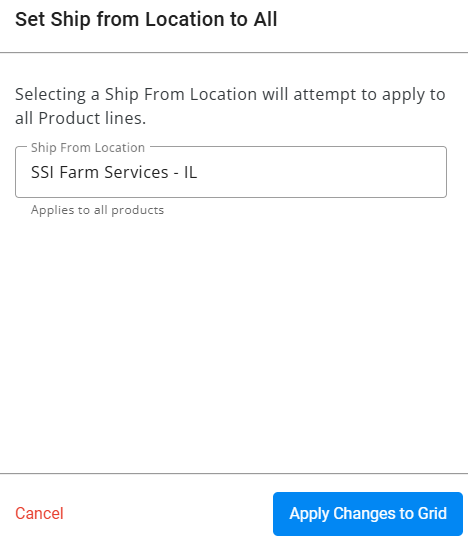
- Optionally choose to Price Delivery. Additionally, the Ship From Location and/or Crop can be applied to all Products.
- Choosing Set Ship From Location for All above the grid opens a new window to choose a Location and that will be applied to all Products in the grid. The Ship From Location can also be indicated on each Product line item. Choose Remove All Locations to remove the Ship From Location from all Products.
- In the Products section of the Delivery, indicate the Quantity for each Product. Products can be reordered by selecting the grid of dots on the left and dragging to the appropriate position.
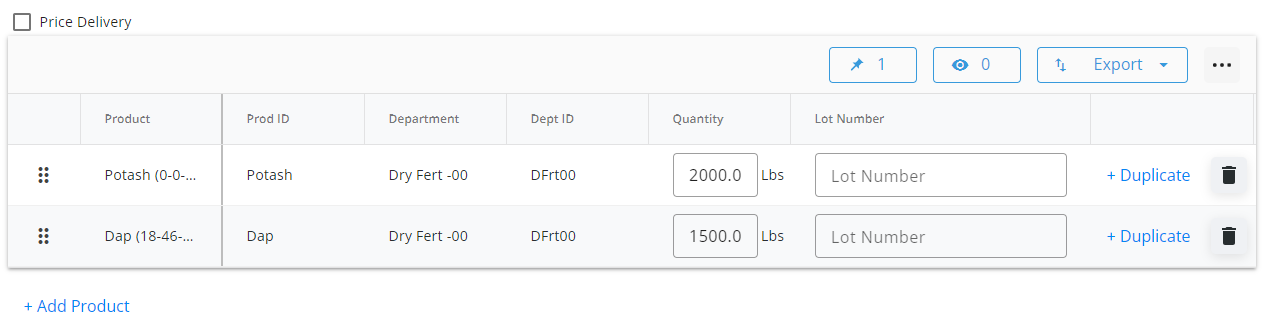
- If applicable, choose a Lot Number from the drop-down.
- If Price Delivery is checked, enter the Price ($) / Unit in the grid for each Product. The Product Total and Delivery Total will be calculated automatically.
- Choose + Duplicate to add another line of that Product.
- Those with access to Agvance SKY Customer can select Price History to open Customer in a new tab and review the Product's previous Costs for that Customer.
- The Delete button can be selected to remove a Product line.


Notes & Additional Info
Notes
- Optionally assign unloaded Delivery Tickets to a Warehouse User with the Assign To drop-down. This will then allow filtering in the Warehouse app to display those tickets to the correct User.
- Additional Comments can be entered in the Notes section.
Note: A maximum of 240 characters are allowed in this field. - After Notes are entered, Create Order can be selected but additional options are available on the Additional Info tab.
Additional Info
In this section, the Customer PO #, Control Number, Territory, and Ship Via can all be included.

Permits
For Products requiring a permit, the appropriate Federal Permit and/or State Permit can be applied. These permits must first be set up in Agvance Windows.

Tech Licenses
For Products that are a part of a Technology Group, the appropriate Tech License can be selected from the drop-down. If only one tech license is available, it will automatically be applied and the drop-down will be disabled.

