Developer Account Setup - Creating an iOS Developer Account
- A valid email to be used for the Developer account must be provided.
- Developer accounts allowing submission of apps to the App Store have a fee of $99/year.
- To complete the application for the developer account, the following information is required:
A D-U-N-S Number
- A Legal Entity status
- Legal, binding authority to enroll the organization in the Apple Developer Program
- Website for the organization that is publicly available, and the domain name is associated with the organization
- Apple’s verification and approval process may take several days to complete.
Steps
- Go to https://appleid.apple.com to sign into the Apple Account. To set up an Apple ID, use the Create Your Apple ID option and complete the required information:
- First name
- Last name
- Country/Region
- Birthday
- Email address for the account
- Password
- Confirm password
- Phone number and verification method
- Type the characters in the image
- Select Continue. A verification code will be sent to the email address and phone number used to create the account. Enter the verification code provided.
- Two-factor authentication is required. To set this up, a trusted device must have signed into the account. A trusted device is an iPhone, iPad, or iPod touch with iOS 9 and later.
- Sign into the Apple Developer Account using an iPhone, iPad, or iPod touch.
- Go to Account Settings/Password & Security.
- Turn on Two-Factor Authentication and select Continue.
- Enter and verify a trusted phone number.
- Select Next. A verification code will be sent to the number provided. Enter this code to verify and turn on two-factor authentication.
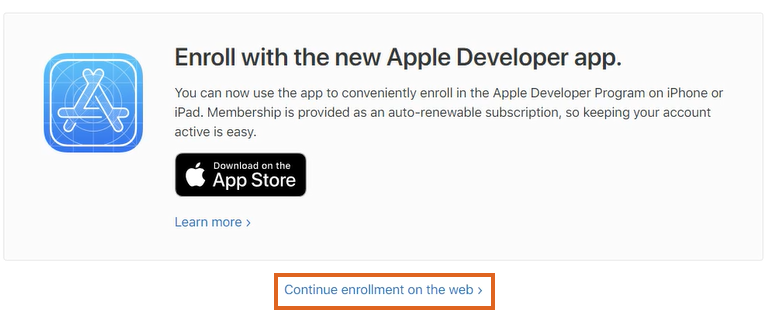
- On the desktop, using a Windows browser, go to https://developer.apple.com, scroll to the bottom of the window and select the Apple Developer Program header.
- Select Enroll. Review the required information and ensure it is available before proceeding.

- Choose Start Your Enrollment.
- Select the option to Continue enrollment on the web.
- Complete the form and select Continue. Use +1 as the Country code for US accounts.
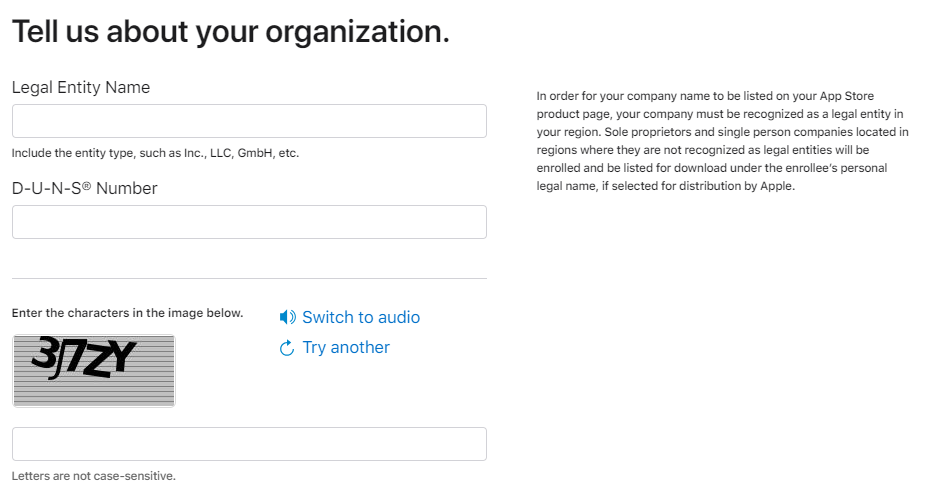
- Choose Company / Organization as the Entity Type and select Continue.
- Enter the organization’s Legal Entity Name and D-U-N-S Number then choose Continue.
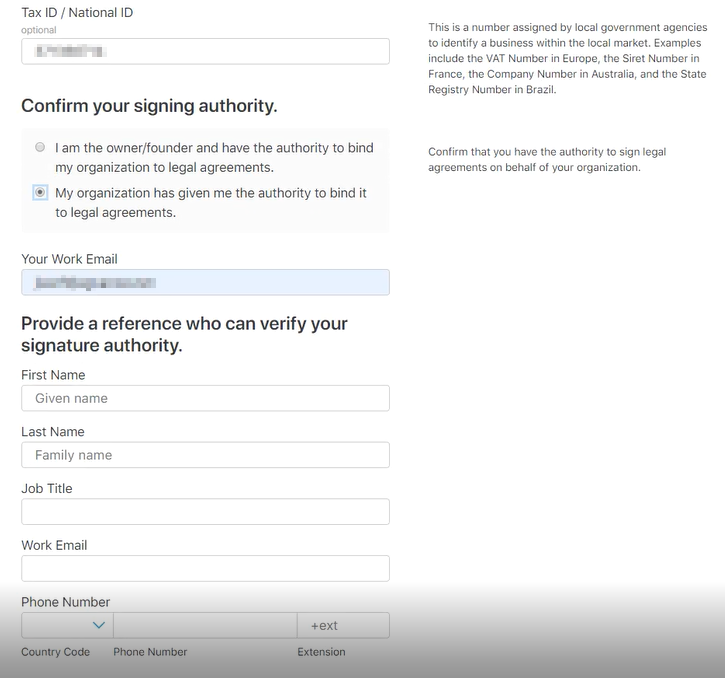
- Provide company information.
- Confirm signing authority. If using the My organization has given me the authority option, a reference to verify signature authority must be provided.
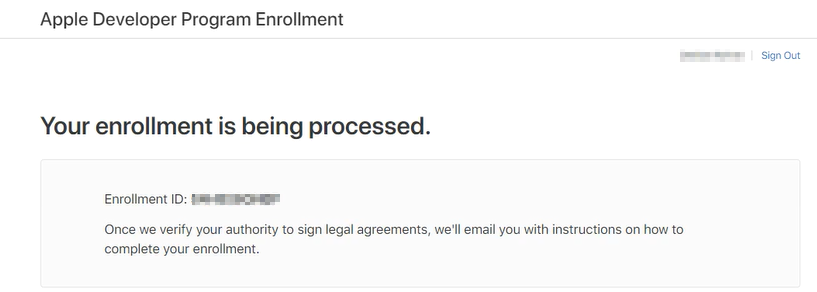
- Select Submit to send the form to Apple and receive an Enrollment ID. Apple will reach out to verify enrollment and will contact the reference provided for signing authority.
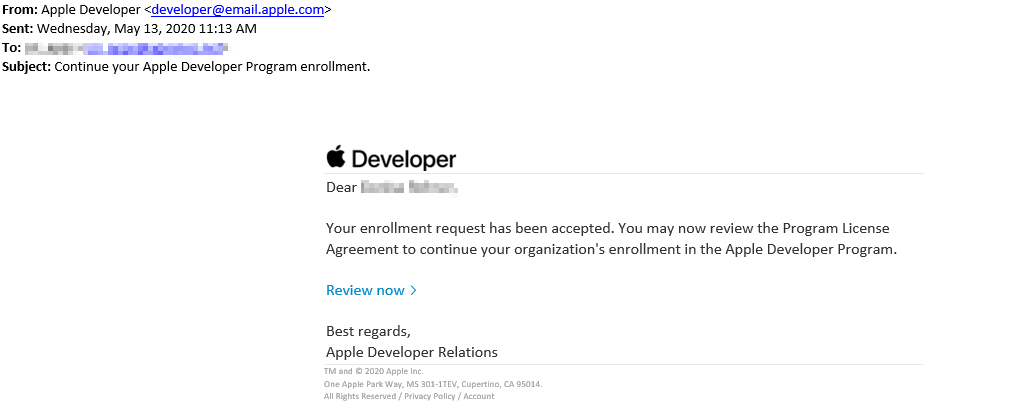
- When the enrollment application has been approved, Apple will send an email. Select Review Now to review and accept the Program License Agreement.
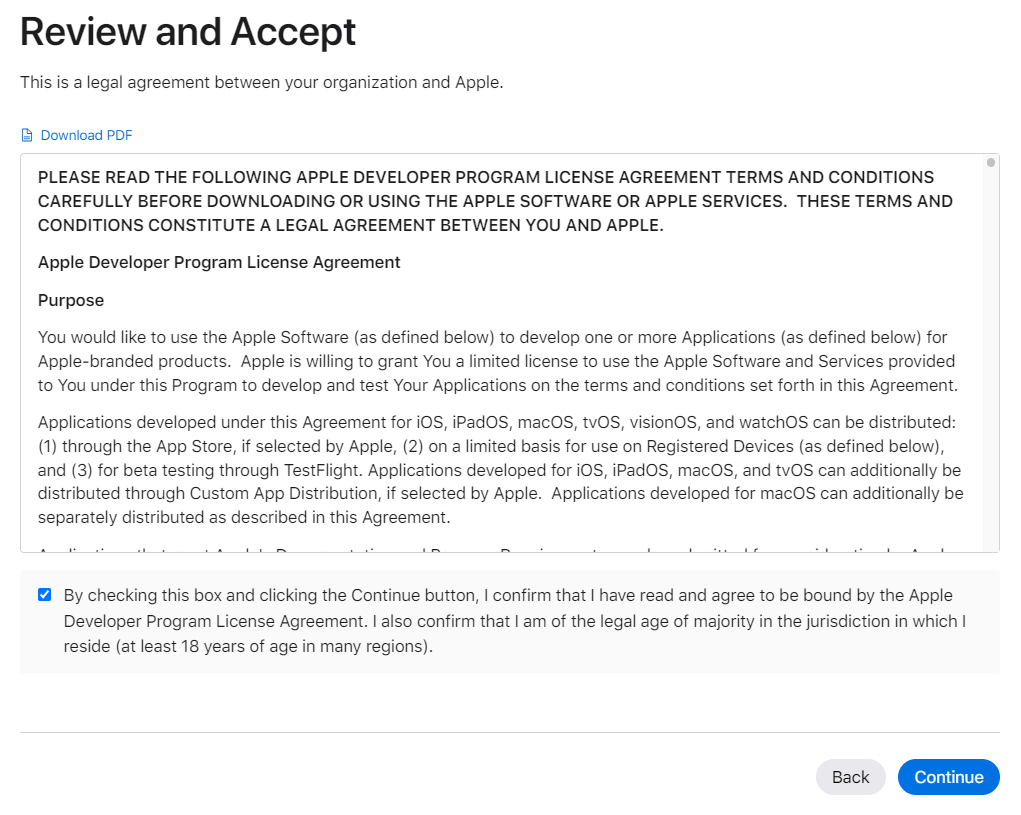
- Review the agreement, check the box to confirm/accept, and select Continue.
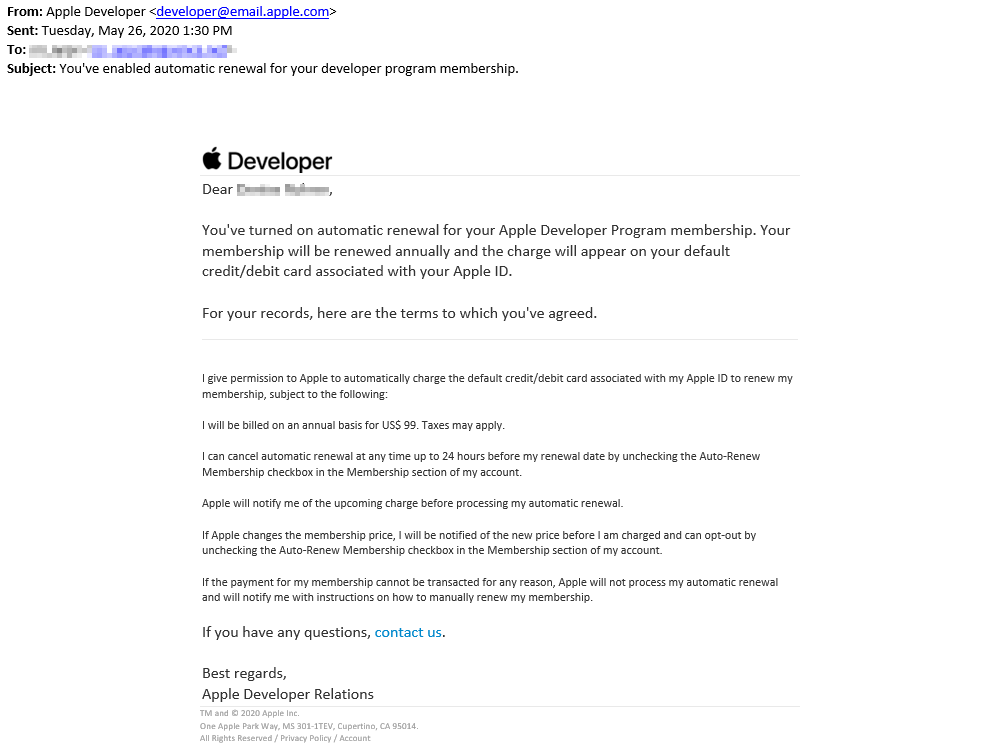
- Complete the Purchase of the Apple Developer Account. Optionally select the checkbox to automatically renew membership annually.
- Select Purchase and sign into the Apple Developer account. Enter payment information and select Place Your Order. Once the payment is approved, an email will be sent. It may take up to 48 hours for payment processing.
- A series of emails from Apple will be sent to the Developer Account. It is important to read these emails and follow any additional steps.
Note: Providing Bank and Tax information is not a requirement for the Grower360 Native App.


iOS Invitation to Build Grower360 App
Email the following information to SSI at support@agvance.net:
- Icon sized 1024 x 1024 pixels in a .JPG format.
- Name of the App as it will appear in the Apple Store. It is recommended to keep the name less than 30 characters long. Special characters cannot be used in the App Name (@, &, *, ', ", -, .).
After providing this information, complete the following steps in the Apple Developer Account:
- In a web browser, navigate to https://appstoreconnect.apple.com/login.
- Sign in with a paid developer account and navigate to Users and Access. To set up a developer account, go to https://developer.apple.com/programs/enroll/ and use an existing Apple ID or create a new Apple ID to create a developer account.
- Select Plus to add a user with the following information:
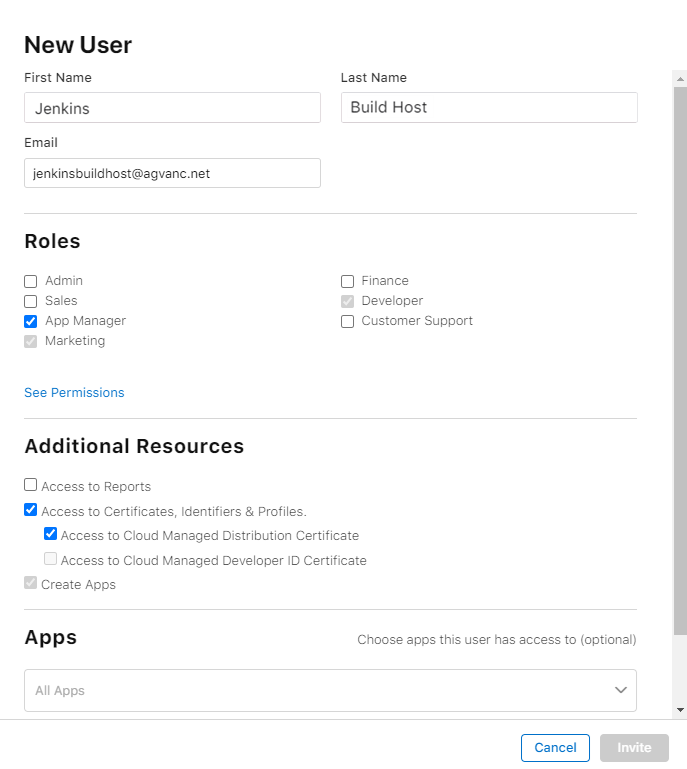
- First Name: Jenkins
- Last Name: Build Host
- Email address: jenkinsbuildhost@agvance.net
- Role: App Manager
- Select the Access to Certificates, Identifiers & Profiles and Access to Cloud Managed Distribution Certificate options.
- Choose Invite.
- Notify SSI when all steps are completed by emailing support@agvance.net. In the email, confirm the invitation process has been completed for the Grower360 Native App setup, specify the app name, and include the icon associated with the app.

Submitting the App for Review
SSI will send a notification when the build for the app has been published. Once notified, additional app information must be completed in the developer accounts before Apple can review the app submission.
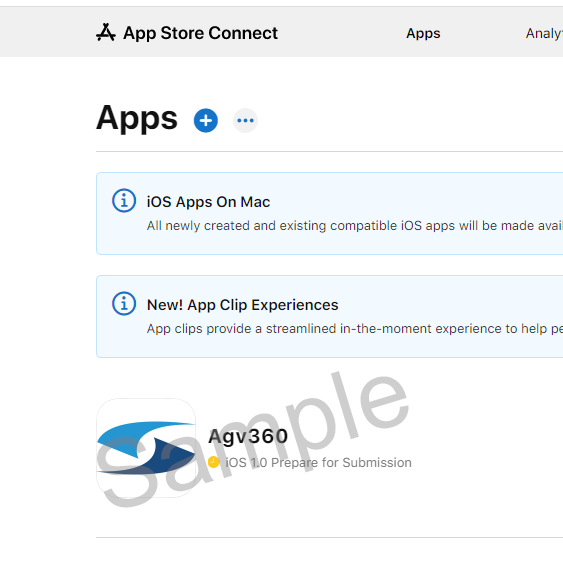
To begin the app submission process, go to appstoreconnect.apple.com/login and log into the developer account.
- Select My Apps.
- Select the app from the list provided.
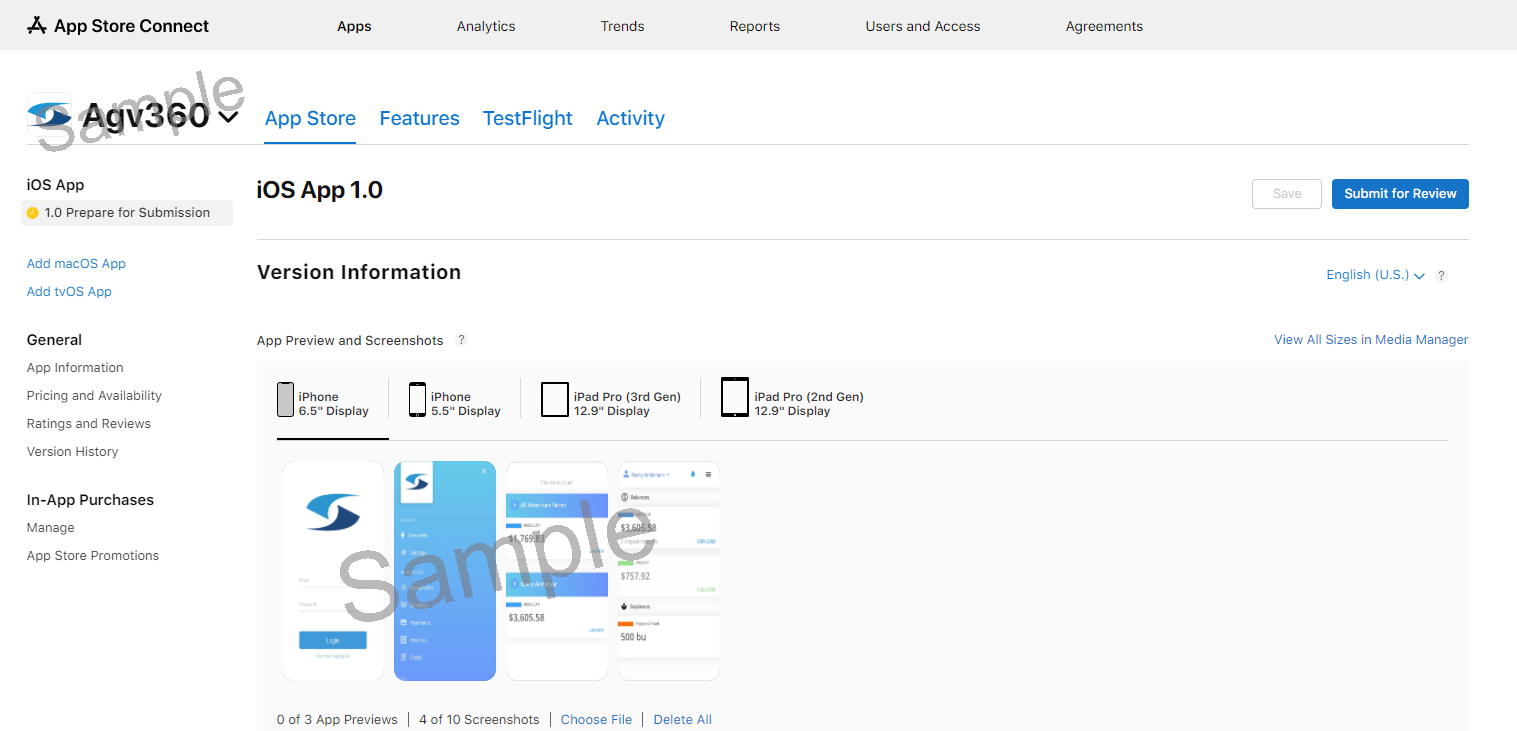
- Complete the Version Information for the App Store.
- Version Information
- Screenshots – Provide up to three app previews and 10 screenshots for both the iPhone 6.5 and 5.5 displays. Both iPad Pro (3rd Gen) and iPad Pro (2nd Gen) screenshots are also required, but the same images can be used in both areas. All screenshots must be in JPG or PNG format.
- Promotional Text – The text provided informs App Store visitors of any current features without requiring an updated submission. This text will appear above the description on the App Store with devices running iOS11 or later.
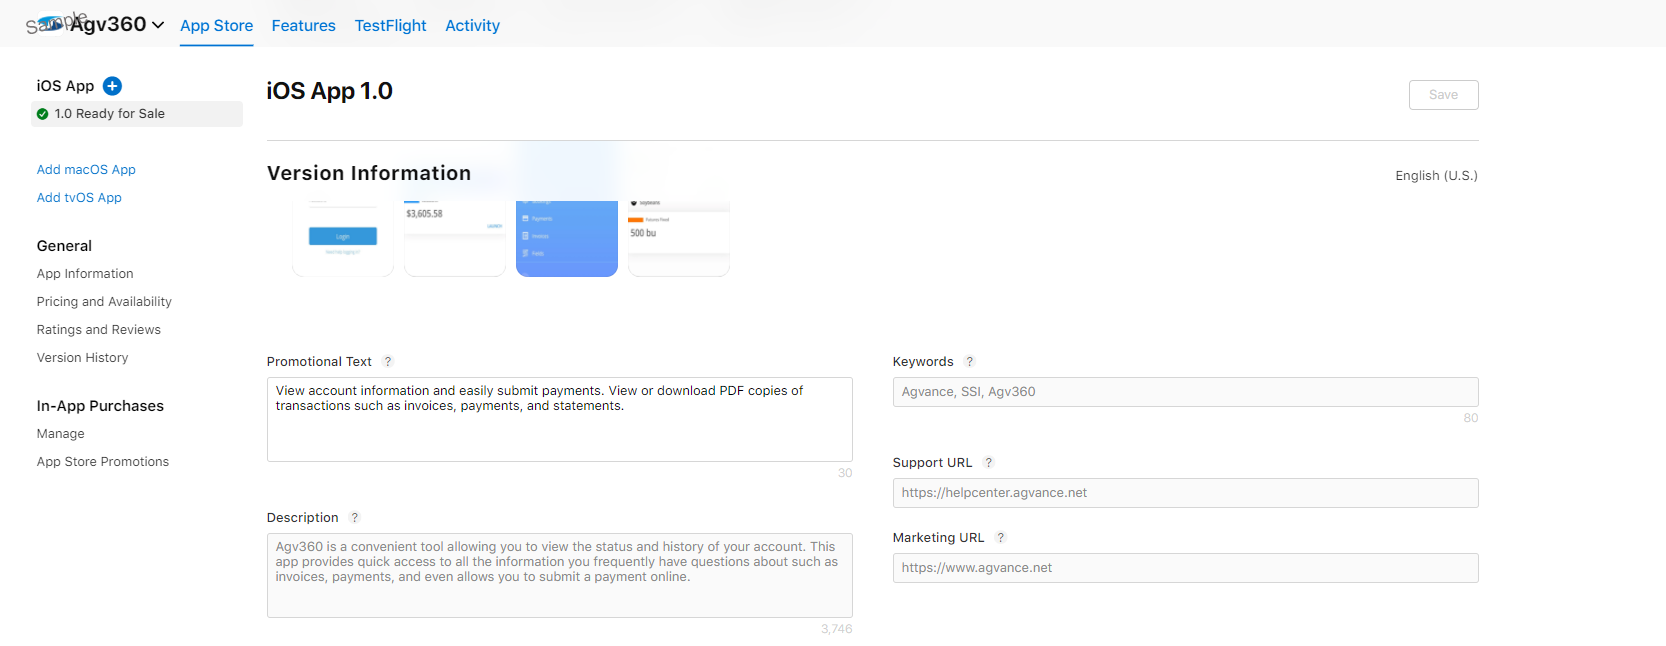
- Description – Enter text detailing features and functionality.
- Keywords – Include one or more keywords that describe the app which will make search results more accurate.
- Support URL – This is not required but https://help.grower360.info/home can be entered as the URL for support.
- Marketing URL – Provide the address for the company website.
- Screenshots – Provide up to three app previews and 10 screenshots for both the iPhone 6.5 and 5.5 displays. Both iPad Pro (3rd Gen) and iPad Pro (2nd Gen) screenshots are also required, but the same images can be used in both areas. All screenshots must be in JPG or PNG format.
- Version Information


Build
The current build will be listed.

General App Information
- App Icon – This icon will be used on the App Store.
- Copyright – Use the copyright symbol with the year and company name. Example: ©2020 Company Name.
- Version – This is the same as listed on the Build.
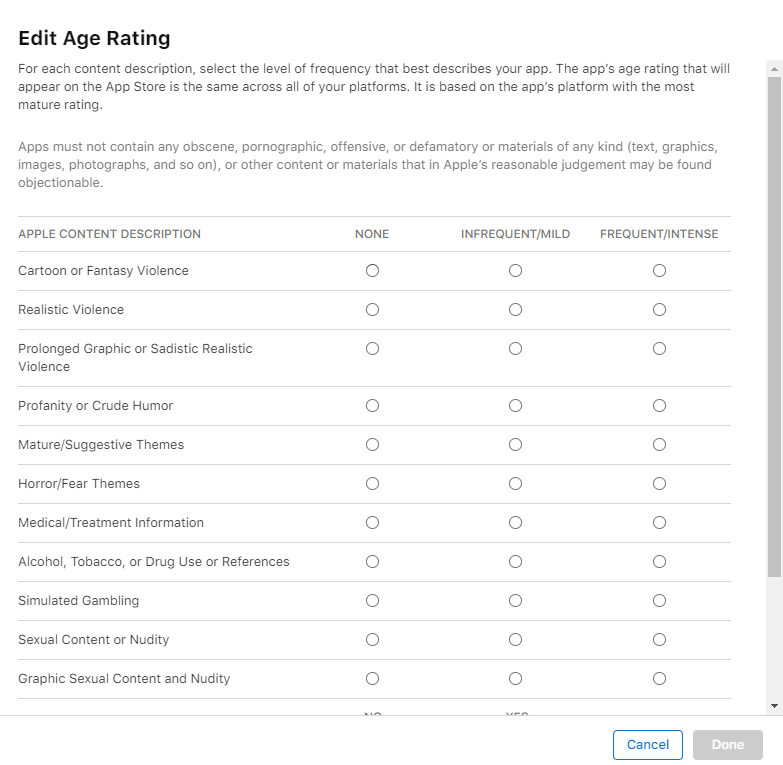
- Age Rating – Select Edit to complete a questionnaire regarding the content of the app. Once this is completed, Apple will automatically assign an age rating.

App Review Information
- Sign-in Required – A sign-in must be provided for review of the app. To do this, the user must be set up in the Admin area for the Grower360 account. See Create Grower360 Users for instructions on completing this step.
Note: Valid user information is required as Apple uses this information to verify app functionality. - Contact Information – A First/Last name as well as phone number and email must be provided.
- Notes – Provide any additional notes about the sign-in process.
Version Release & Advertising Identifier
Select the option to Automatically release this version. This allows the app to be available once the review process has been completed.
The Advertising Identifier (IDFA) is a unique ID for each iOS device and is the only way to offer targeted ads. Users can choose to limit ad targeting to their iOS device. Select No, it doesn't.

App Information
Using the left-hand menu navigation, select App Information under the General heading.

Complete the following information:
- Localizable Information
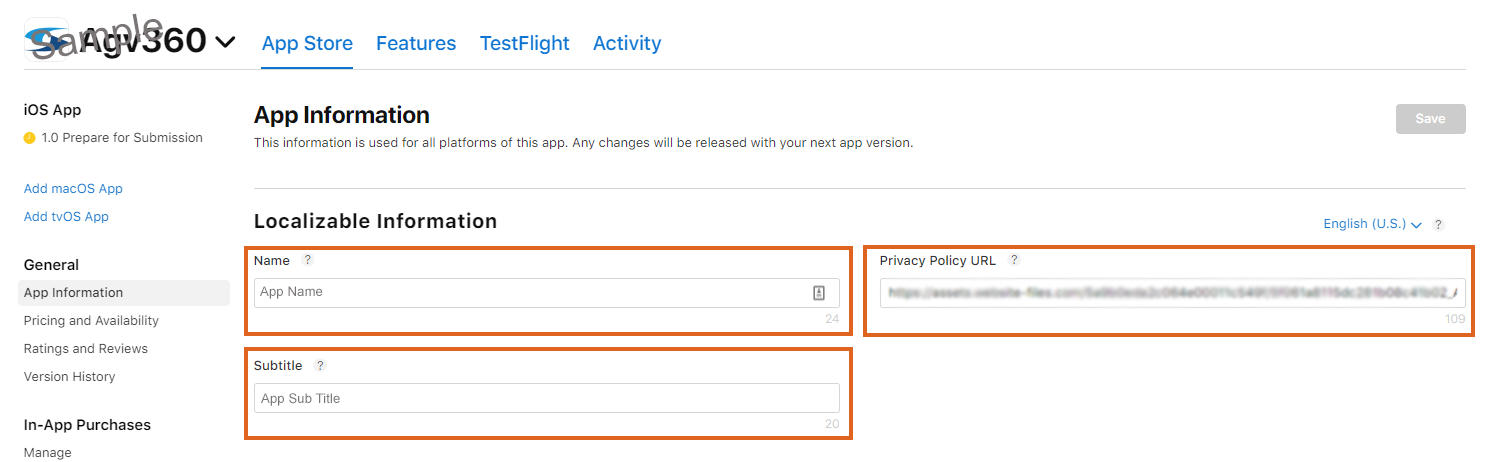
- Name of App
- Subtitle for App
- Privacy Policy URL link
- General Information
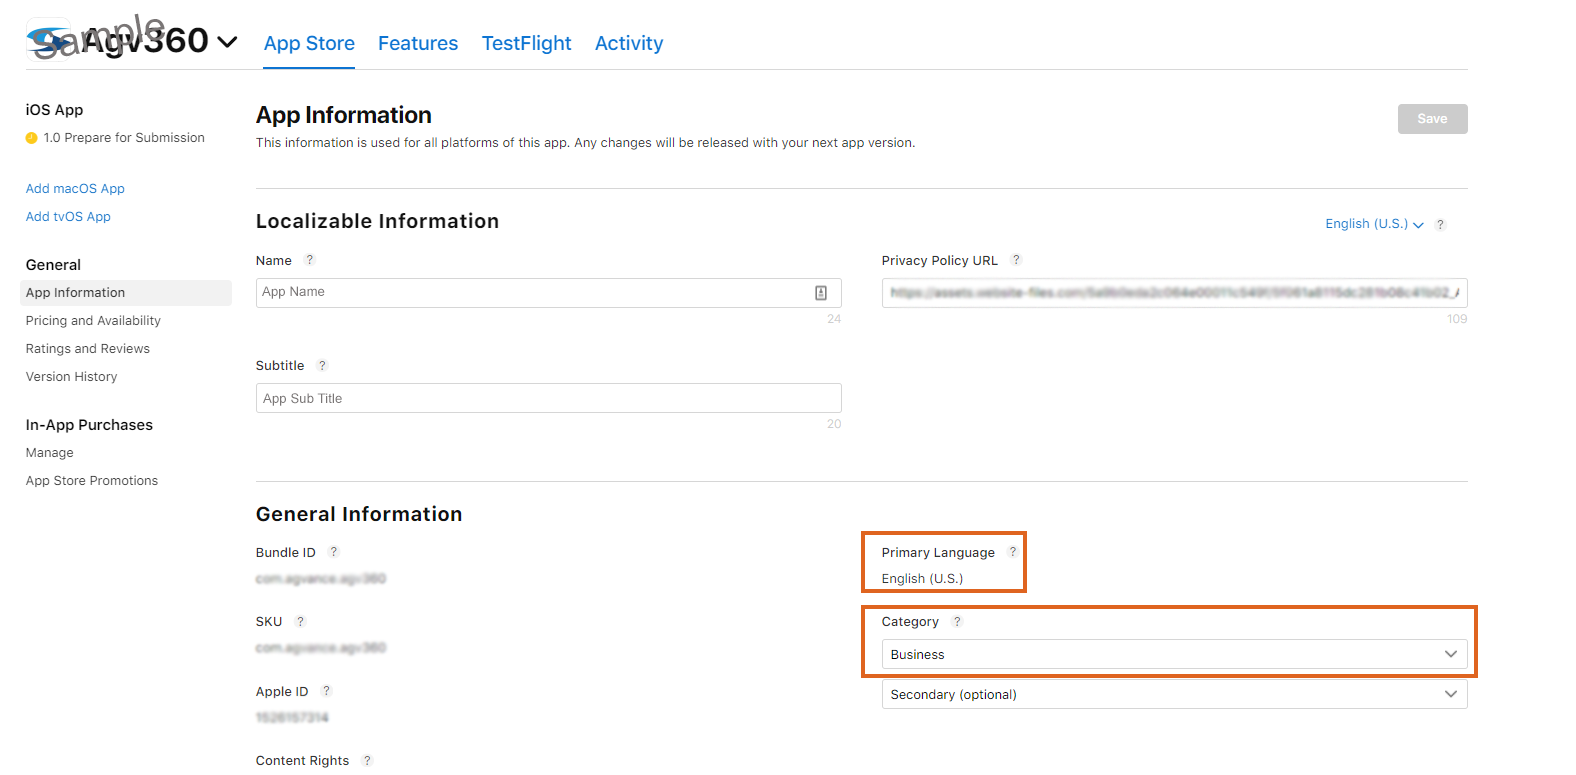
- Primary Language
- Category (Business)


Pricing and Availability
- Price – USD Free. Start date will default to current date. No End Date.
- Availability – Select the countries this app will be available.
- iOS Apps on Mac – Do not select Make available on Mac.
- Distribution for Business and Education – Accept the default.
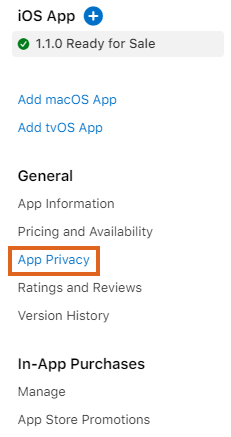
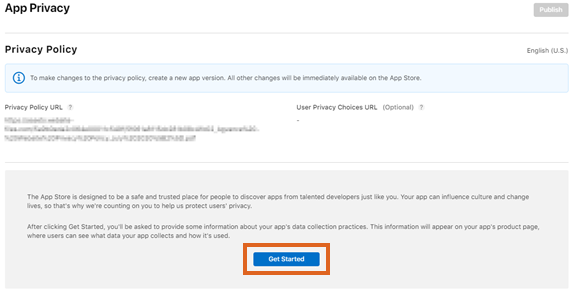
App Privacy
- Choose App Privacy from the General section.
- Select Get Started.
- Select the Yes, we collect data from this app option, then choose Next.
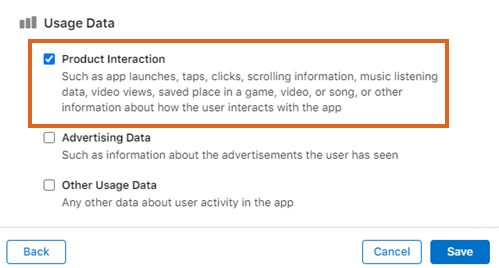
- Under Usage Data, select the Product Interaction option. No other options should be selected here. Choose Save.
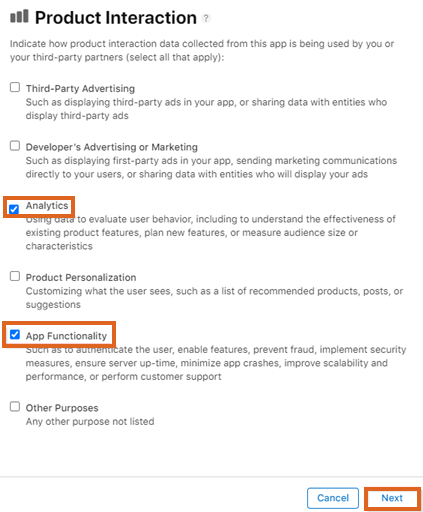
- Under Data Types, select Set Up Product Interaction.
- Select the Analytics and App Functionality options, then choose Next.
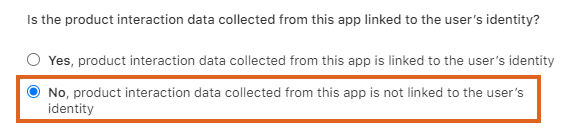
- Choose the No, product interaction data collected from this app is not linked to the user's identity radio option, then select Next.
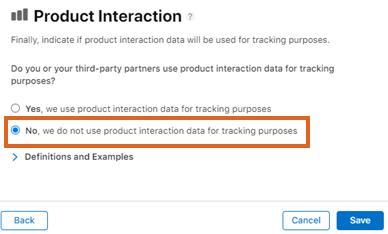
- Continue to select Next until the following Product Interaction screen displays. Select the No, we do not use product interaction data for tracking purposes radio option, then choose Save.
- Choose Publish to complete and publish the App Privacy requirements.


App Info
Under Content Rights, select the option stating No, it does not contain or access third-party content.

When all information has been completed, select Submit for Review.

Apple will review the information provided and send notifications if any area needs to be addressed. Once the app has been approved, an email notification is sent.
Adding a New Build
When a new iOS build is released, the build will need to be added in the App Store for the Grower360 Native App. The latest build number will be communicated via email when a new build is available.
- Go to appstoreconnect.apple.com/login
- Sign in using the Apple ID used to create the paid developer account and select the Grower360 developer account previously set up.
- Upon opening the app, select the blue + beside iOS App in the left navigation menu. In the new version dialog, enter an incremental App Store version number.
Note: These App Store versions are subject to change and may vary from the screenshots. The latest build number will be communicated via email when a new build is available.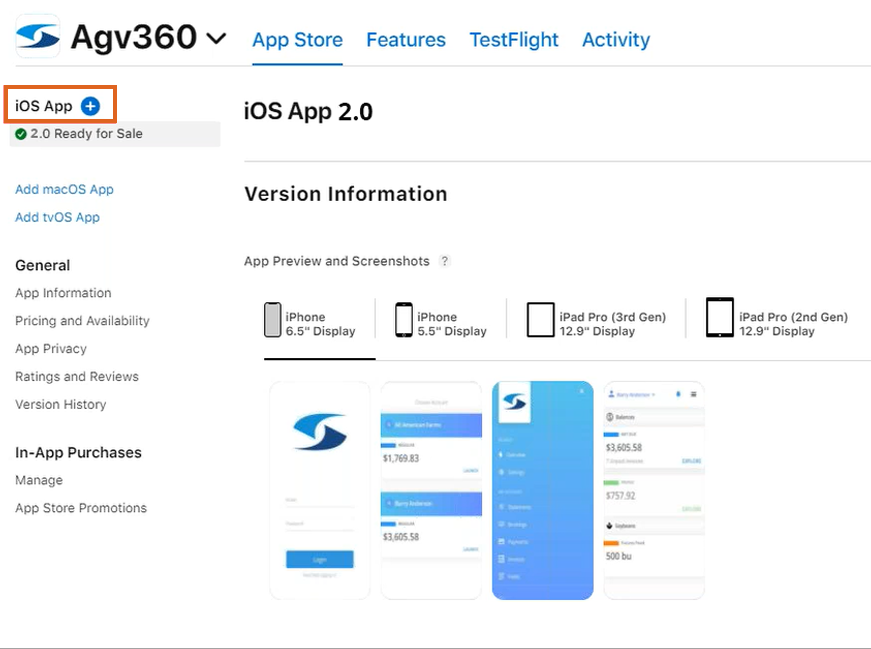
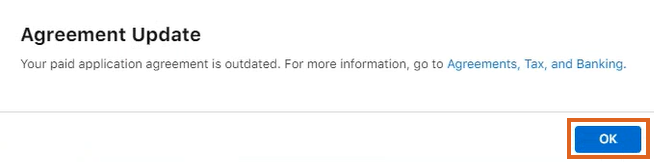
- An Agreement Update may be available. If so, it will need agreed upon before continuing with the version update.
- If an Agreement Update window displays, select OK to proceed to the agreement terms and conditions.
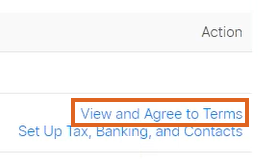
- Choose View and Agree to Terms in the Agreements grid.
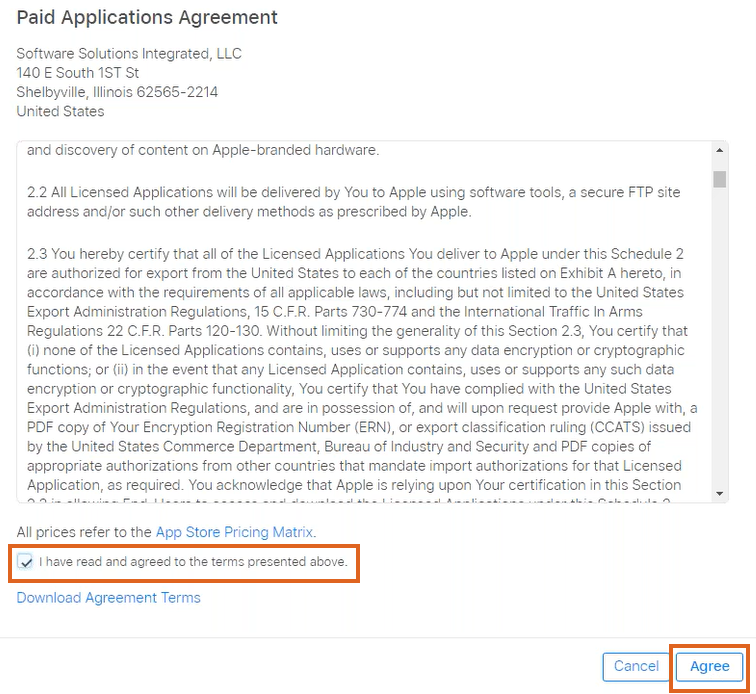
- Check I have read and agreed to the terms presented above checkbox on the Paid Applications Agreement window and choose Agree.
- Once terms have been agreed to, select App Store Connect at the top of the window. Then choose My Apps on the App Store connect page to navigate back to the app page.
- Select the blue + next to iOS App in the left navigation menu again to proceed with adding a new build.
- If an Agreement Update window displays, select OK to proceed to the agreement terms and conditions.
- Review and enter metadata about the new version.
- When a new version is created, the metadata from the current version is automatically transferred to the new version.
- For a description of the version properties, visit Platform version information. For the required and localizable properties, refer to Required, localizable, and editable properties.
- Choose Add Build.
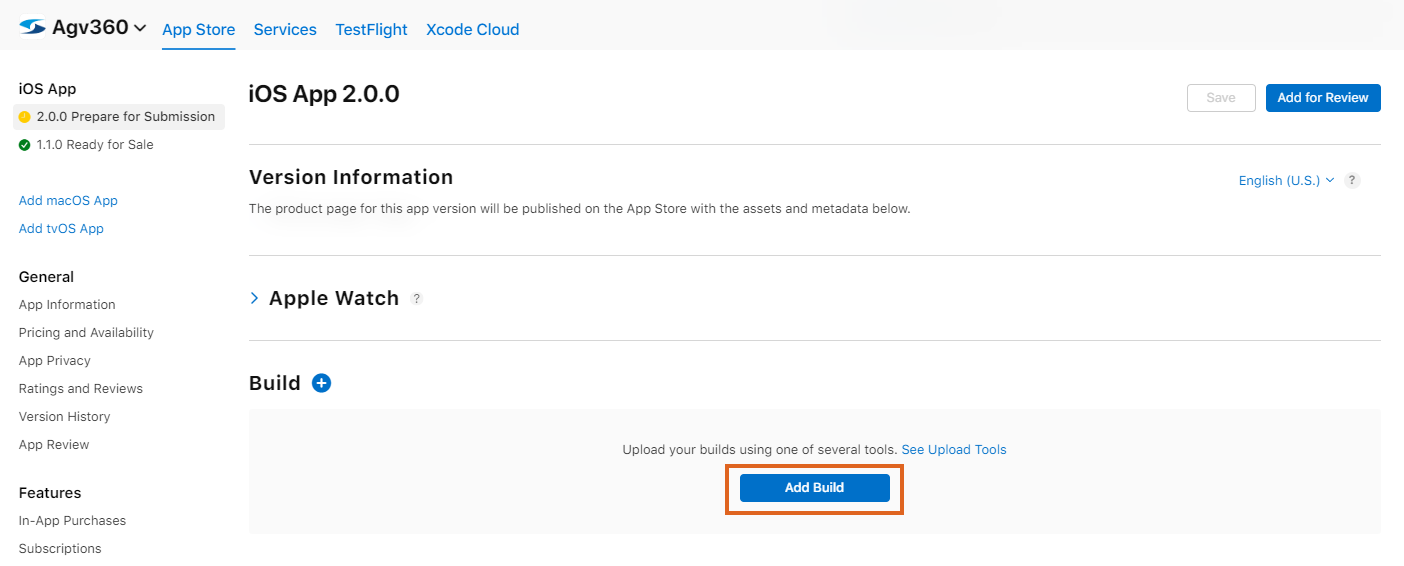
- Choose the 2.0.0 build and then choose Done.

- Fill in the What's New in This Version information.
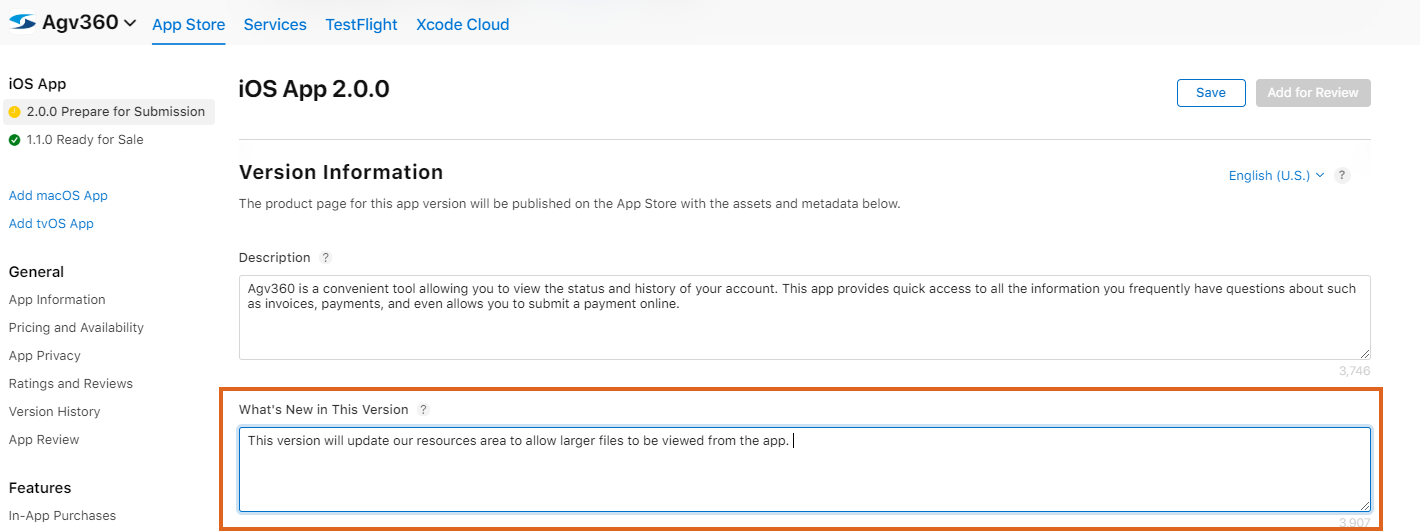
- Choose Save.
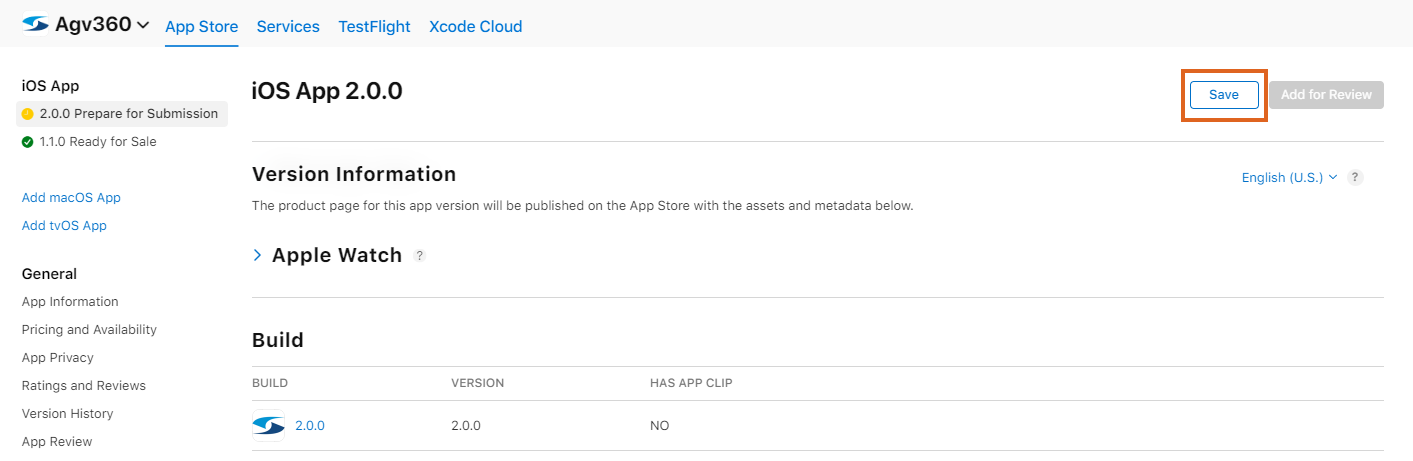
- After completing the app building process, add it to the latest version on the App Store by selecting Add for Review and it for review.
- Choose Submit to App Review.
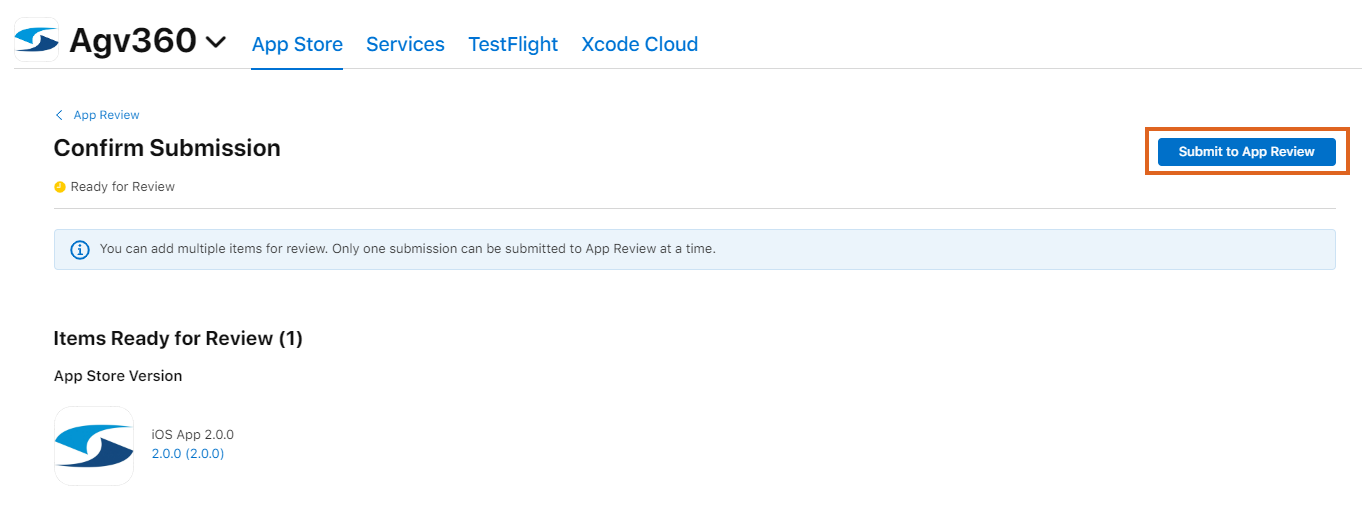
- A confirmation message will appear upon successful submission of the application.
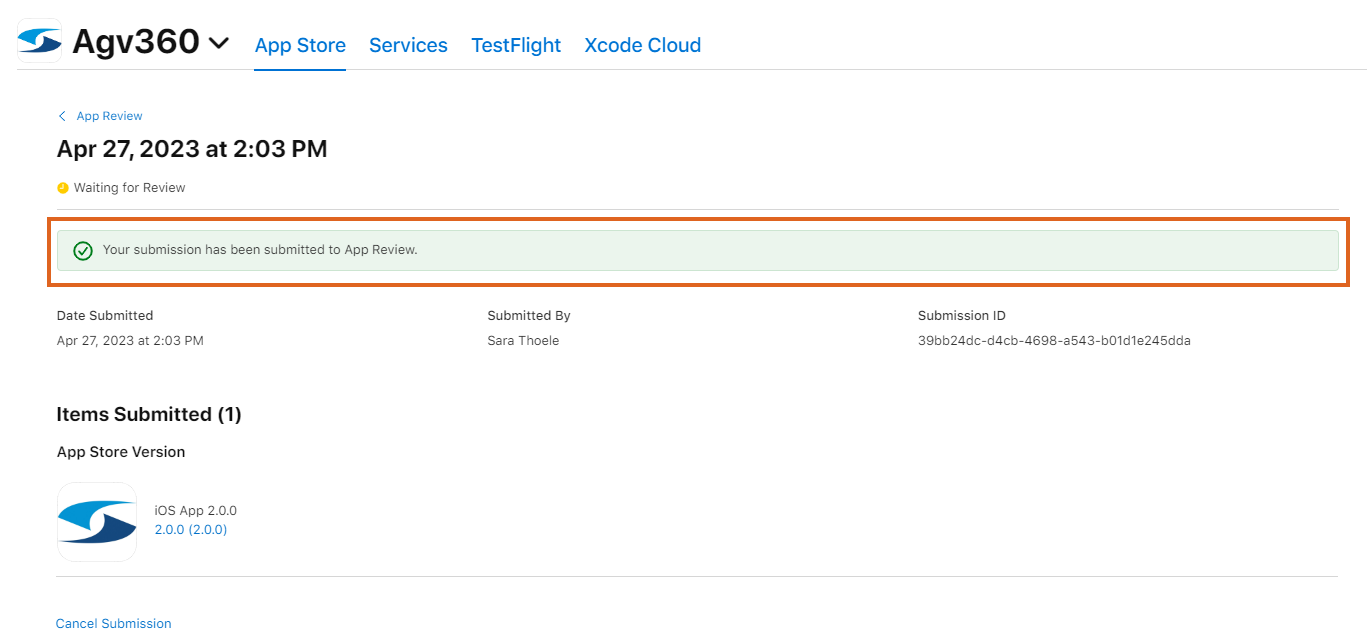
Apple will reach out if there is a problem with the submission or when it has been accepted. Please contact SSI Support with any questions.


