Account information displayed in Ledger adheres to GL Category and Profit Center Restrictions established in Agvance Accounting. If anticipated account information does not display, check with the Agvance Administrator to ensure proper user settings are enabled in Agvance.
Overview
When opening Ledger, a listing of all accounts displays. The Account ID, Total Debit and Total Credit for each account is listed. This information is filtered by Current Fiscal Year and the total debits and credits for all accounts are noted in the top gray bar.
Note: SKY User access for Ledger adheres to G/L and Profit Center rules established in Agvance.
The Debit column displays the total debit balance for all GL accounts. The Credit column displays the total credit balance for all GL accounts. The Debit and Credit columns should be the same.
Select the Filter button to filter the grid and totals by Fiscal Month or Date.
To export the list of accounts, select Export and open the link to the CSV file from the activity bar located at the bottom of the window.
Enter an account number or name in the Search bar to filter the list.

Selecting an account opens the Account Detail window. The Beginning Balance, total Debit, total Credit and ending Balance for the account are displayed in the top gray bar. The Balance reflects the total balance for the selected Fiscal Month or Date range.
Use the Search bar to filter the transaction grid by Vendor, Entry #, or Description.
The transaction grid displays Vendor, General, and Customer journal entries along with the Date, Fiscal Month, Ref/Check#, Debit, Credit, Balance and Description for each Journal Entry. The grid is sorted by most recent and the Balance column reflects how each transaction affected the account at the time of the transaction.
- Blue icons indicate a credit on the account.

- Red icons indicate a debit to the account.

Apply additional filters to the transaction grid by selecting the Filters icon. A navigation pane displays on the right side of the window with options to filter by Fiscal Month or Date. Filtering by Date allows for including prior year entries.
To export the Account Detail transactions, select Export and open the link to the CSV file from the activity bar located at the bottom of the window.
Choose the Ellipsis to Download KwikTag Docs, Edit Entry, or Reverse Entry. When editing an entry, optionally update the Entry Date, Ref/Check #, choose to Show Quantity, and add Comments and/or a JE Description.

View additional journal entry details by selecting the JE icon or the blue Entry #. Select the Download button next to the Ref/Check # to view or download the payment as a PDF.

The Journal Entry Details window provides detailed information about the transaction in the top gray bar.
The Transaction grid displays the Account ID, Account Name, Comments, Debit, Credit, and Quantity to easily identify the accounts affected by the transaction.
Add a Journal Entry
Create a manual Journal Entry in the ledger by selecting the blue + Add Entry button once drilled into an account.
Note: A Company Admin will have to turn on this ability in SKY Admin per user.

- Choose General or Vendor as the type of entry. If Vendor is selected, choose the Vendor from the drop-down and optionally select Prepay. Adjust the Entry Date if needed and key in a Ref/Check #. If needed, indicate if this should be a Future Journal Entry or should Reverse Next Month.

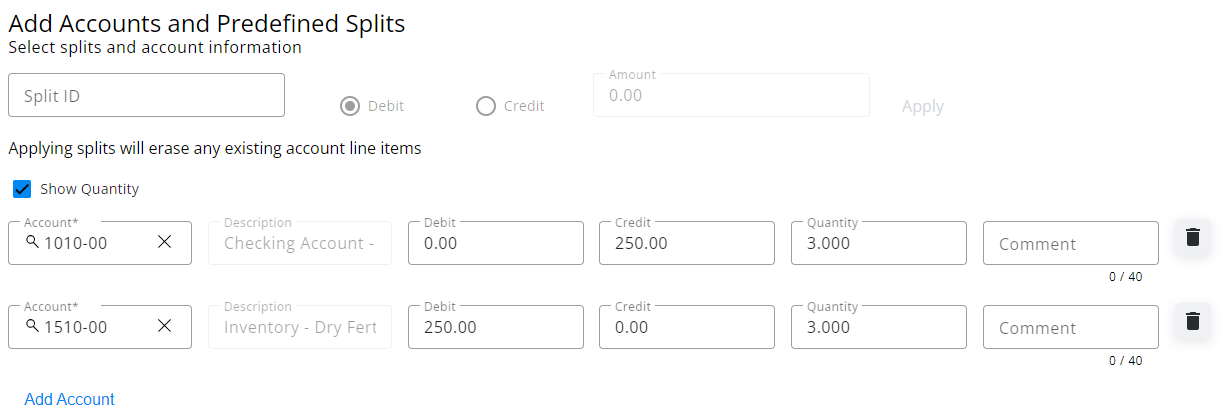
- Choose a Split ID from the drop-down if applicable. These Split IDs must first be set up in Agvance. Indicate if Debit or Credit, enter the amount, and select Apply. If not selecting a Split ID, choose Accounts from the drop-downs, enter the Debit/Credit amounts, and optionally enter a Comment. Check the Show Quantity option to include quantities in the transaction. Additional accounts can be added to the transaction by selecting Add Account.

- The JE Description field is optional.

- Review the Total Debit, Total Credit, and Difference between the two at the bottom of the screen to ensure accuracy.
- Select Post and Start New to create a new Journal Entry or Post Entry to post this entry and return to the Accounts screen. Choose Cancel to return to the Accounts screen without posting.


