Overview
Following is the recommended method of tracking grain owned by the customer but stored for later use in feed that they pay to have mixed.
Accounting Setup
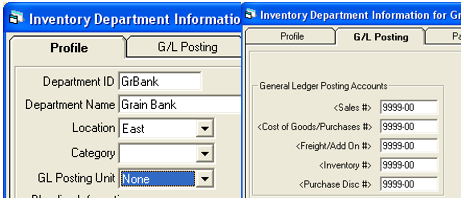
Add a department for Grain Bank for each location.
Select None for GL Posting Unit
Choose the same GL account for each of the key accounts. The account chosen does not matter as nothing will be posted for sales or purchases. SSI recommends using the Accounting clearing account.

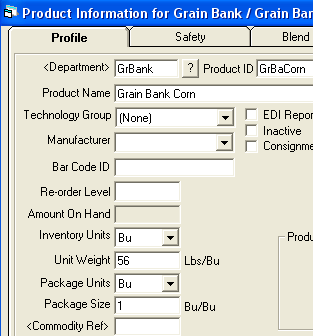
Add a product for each commodity / location
Product name displays on the invoice
Zero list and cost prices

Grain Setup
Edit the commodity and select the Agvance Grain Bank Product Linked to this Commodity / Location

Set the method for negative Grain Bank checking at Grain / Setup / Preferences. Options are:
- Don’t Check – this option will not check for negative grain bank balances on add of a transaction
- Warn Only – this option will check customer’s grain bank balance to determine if a transaction will create a negative balance. If the balance is negative, the user will receive a warning message asking how they want to continue with the transaction. An alternative product can then be selected. Only products with a commodity tied to them will be available.
- Allow Grain Bank to go negative is an option with Warn Only checking. If this option is chosen, the product that prompted the warning will remain on the invoice.
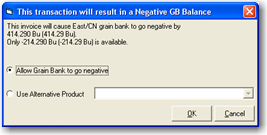
- Allow Grain Bank to go negative is an option with Warn Only checking. If this option is chosen, the product that prompted the warning will remain on the invoice.
Disallow – this option will check customer’s grain bank balance to determine if a transaction will create a negative balance. If the balance is negative, the user will receive a message requiring that an alternative product be selected. The transaction will not finish until a different product is selected. Only products with a commodity tied to them will be available.
Allow Grain Bank to go negative is not an option with Disallow checking.
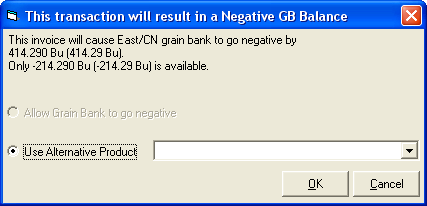


With both Warn Only and Disallow options, the only products available to select are ones that are tied to the commodity.

