The Ranco™/Agvance interface may be set up and used with the Agvance Blending module.
Setup
The following setup instructions should be completed before using the Ranco™/Agvance interface.
- Navigate to Blending / Setup / Product Sets. Edit the necessary Product Set, and on the Blender Interface / Print Preference window, set the Blender Type to SSI/Ranco Automation. If captured scale weights will be read from Ranco™, establish the data storage path for each Product Set being used for the blender interface.
Note: Optionally select the Round Done Amounts To Scale option. This rounds the finished amount from Ranco to the Agvance scale settings on the Agvance blend when returning final amounts.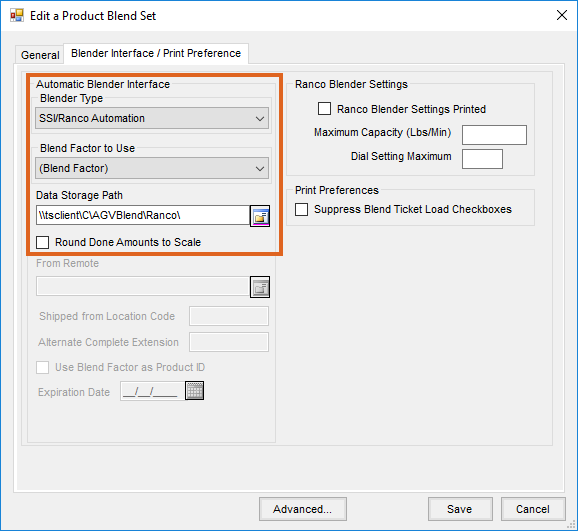
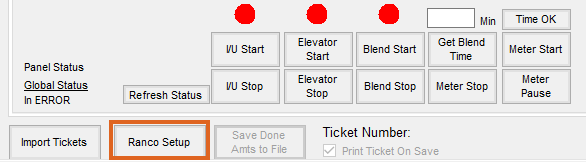
- On the Blending / Utilities / Automated Blender Interface window, select the Ranco Setup button.
 Double-click in each row of the Ranco Bin Assignments window to select the Agvance Product corresponding with each bin number assigned in the Ranco Panel. There are two options for prorating the weight of the mix after it is complete:
- Manually enter the weight from the scale head. If this is the desired process, select the Prorate Done Weight option.
- Capture the weight from the scale head. If this is the desired process, select the Configure Scale button, and set up the data to read from a scale head (in addition to selecting the Prorate Done Weight option).
Note: To configure the scale head, it is recommended to have a hardware person and/or representative from the scale company on site.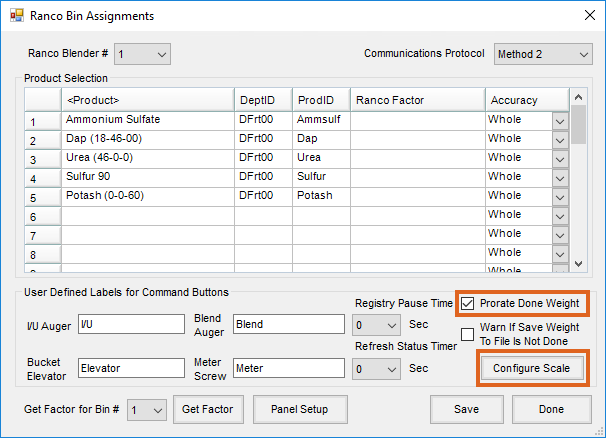
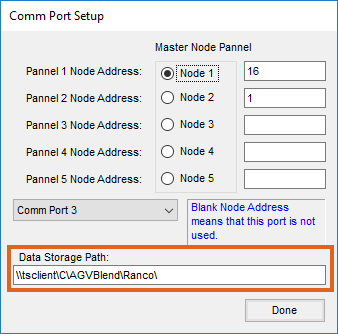
- Select the Panel Setup button on the Ranco Bin Assignments window. If reading final weights back into the Blend Ticket, the Data Storage Path must be complete. The Node Addresses and Com Port must be set up correctly
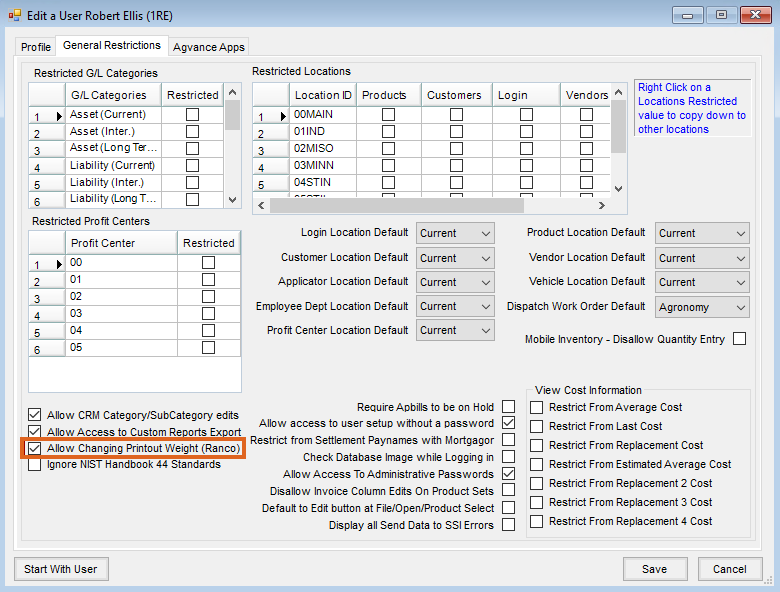
- In some cases, it may be necessary to enter the total weight leaving on a truck so it will be reflected on the Print Ticket (Capture Weight window) documents. This is necessary if a semi load had to be broken into multiple batches to accommodate the blender hopper capacity. To allow this, navigate to Hub / Setup / Users. Edit the User needing this ability, and select the Allow Changing Printout Weight (Ranco) option.

 Double-click in each row of the Ranco Bin Assignments window to select the Agvance Product corresponding with each bin number assigned in the Ranco Panel. There are two options for prorating the weight of the mix after it is complete:


Using the Interface
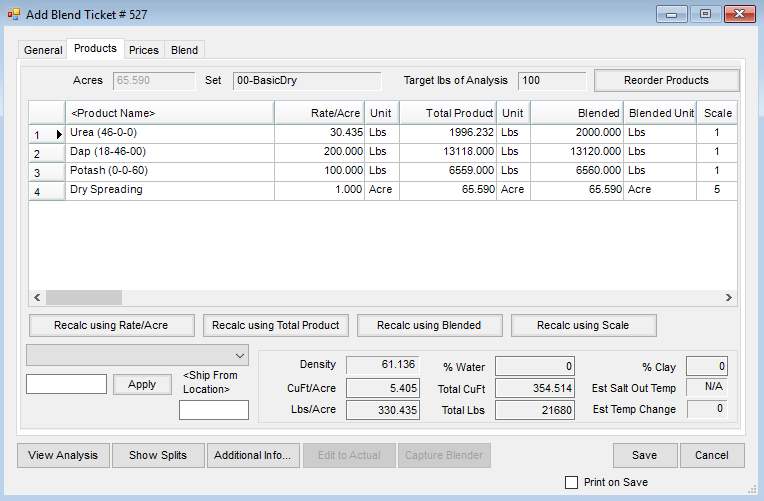
- Create a Blend Ticket in Agvance Blending.
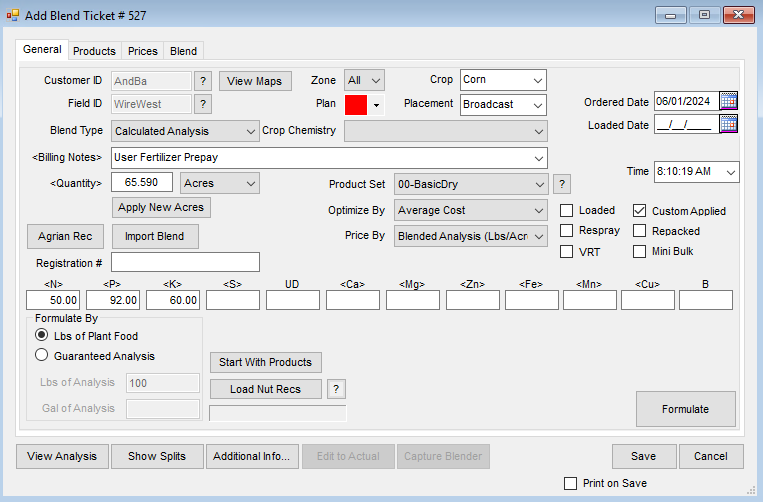
- In this example, Urea, DAP, and Potash are used with a service item. Any non-analysis items, such as application, will not be sent to the Ranco Panel.
- On the Blending / Utilities / Automated Blender Interface window, select the Import Tickets button.
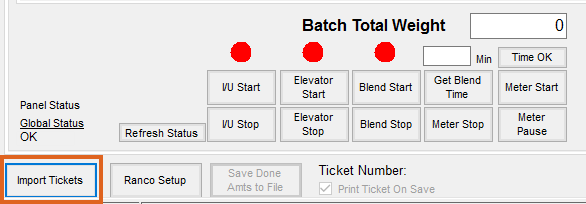
- Select the Blend Ticket to be mixed, and choose OK.

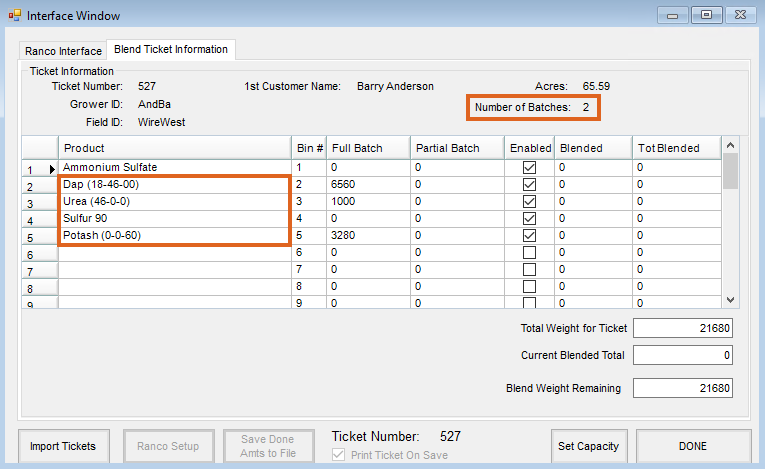
- The Blend Ticket Information tab displays various details of the Blend Ticket. In addition, the Number of Batches and weight for each Product per batch based on the batch breakdown determined on the Blend tab of the Blend Ticket appears on this tab.
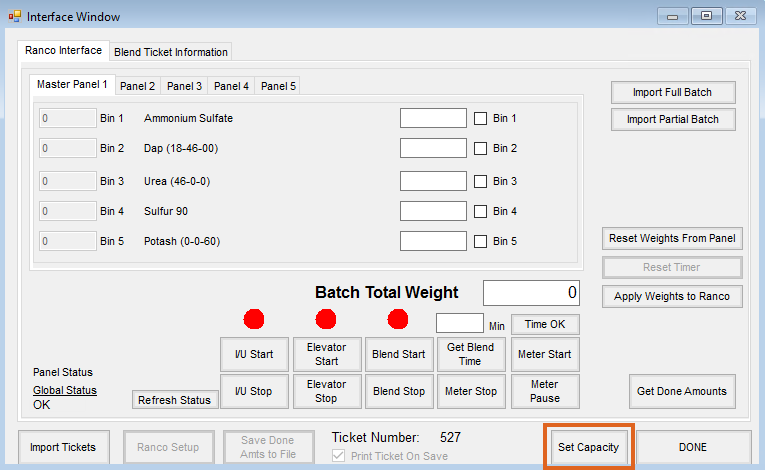
- Select the Set Capacity button.
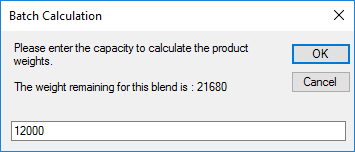
 Note: The full amount of the blend defaults into the following Batch Calculation window. If this mix needs made in multiple batches, enter the full amount to be mixed in the first batch as shown below.
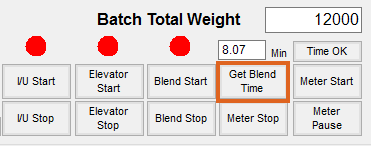
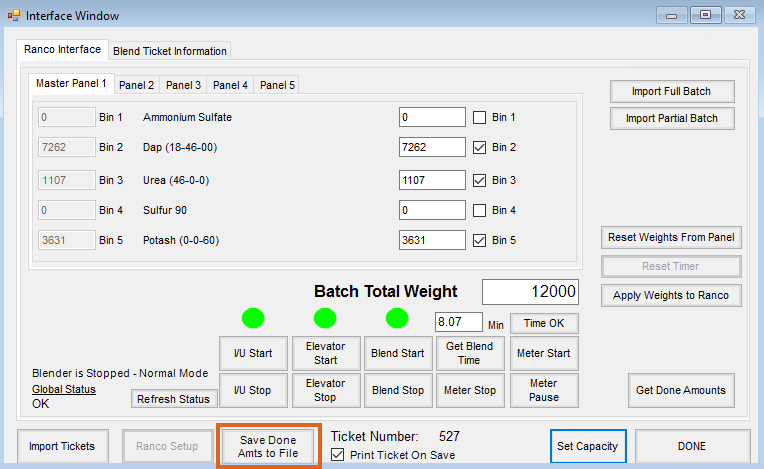
- After the Capacity has been entered, choose the Get Blend Time button on the Ranco Interface tab. Start mixing product by choosing the following buttons from left to right: I/U Start, Elevator Start, Blend Start, and Meter Start.
- The Ranco Panel is enabled when the product has run through. Verify the product is completely out of the screws and in the hopper. After the product has completely finished running into the hopper, select the Get Done Amounts button.

- On the Capture Scale Reading window, select the Capture Weight button. If a scale printer is connected, choose the Print Weight Stamp button. Otherwise, select Done.
Note: The Print Ticket button provides the option to print any of the blend documents (i.e., Blend Ticket, Consolidated Blend, Custom App Sheet, Haz Mat, etc., for the captured amount of that specific batch).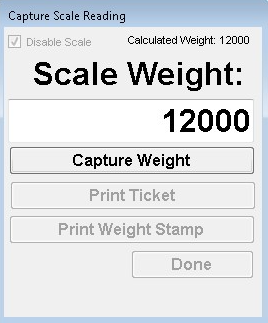
- Choose the Save Done Amts to File button to create a file for the amount blended.
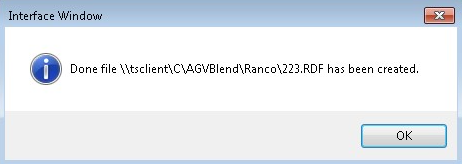
- A message displays indicating where this file was saved. Select OK.
 Note: At this point, other tickets can be mixed and the next batch for this ticket can be completed at a later time.
 - When the next batch for this ticket is ready to be mixed, choose the Import Tickets button and select the desired ticket. If no other tickets have been mixed since the last batch for this ticket, indicated by the Ticket Number at the bottom of the Interface window, select the Set Capacity button.
- If the amount displayed on the Batch Calculation window is the amount that needs to be mixed, select OK. If this batch needs broken down, type over the amount in the textbox, entering the desired batch amount to be mixed. Select OK.


 Note: The full amount of the blend defaults into the following Batch Calculation window. If this mix needs made in multiple batches, enter the full amount to be mixed in the first batch as shown below.


 Note: At this point, other tickets can be mixed and the next batch for this ticket can be completed at a later time.
The rest of the procedure for this process is the same as when completing the first batch for the Blend Ticket. See Steps 7 - 13.
Edit Blend Ticket with Blender Information
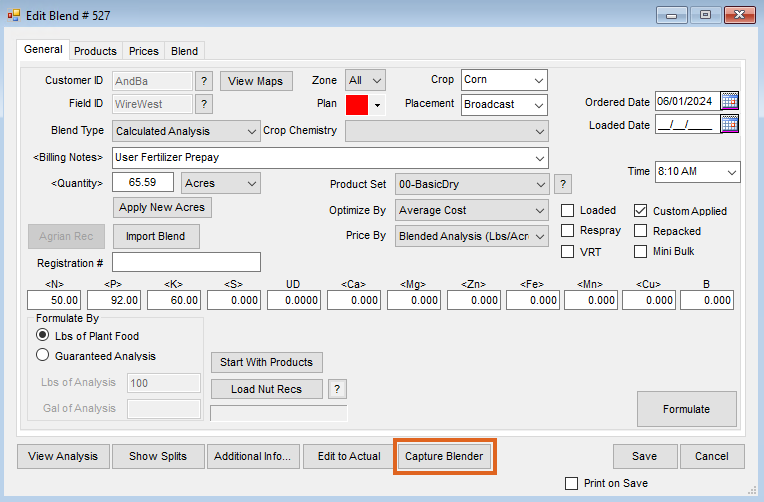
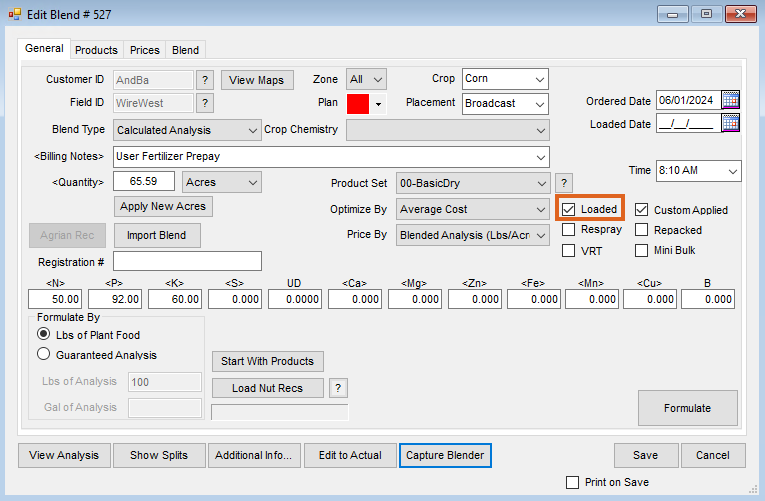
- After all batches for the blend are mixed, edit the Blend Ticket in the Agvance Blending module, and select the Capture Blender button at the bottom of the window.
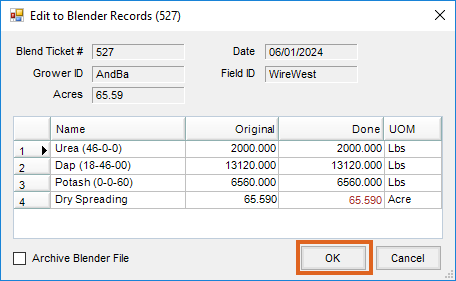
- If the weight was captured from a scale and pro-rated, those amounts will display in the Edit to Blender Records window. For items such as service items, the blended amount originally on the ticket defaults in the Done column. Any of the amounts, including the service item, can be changed on this screen. After the amounts have been confirmed, select OK.
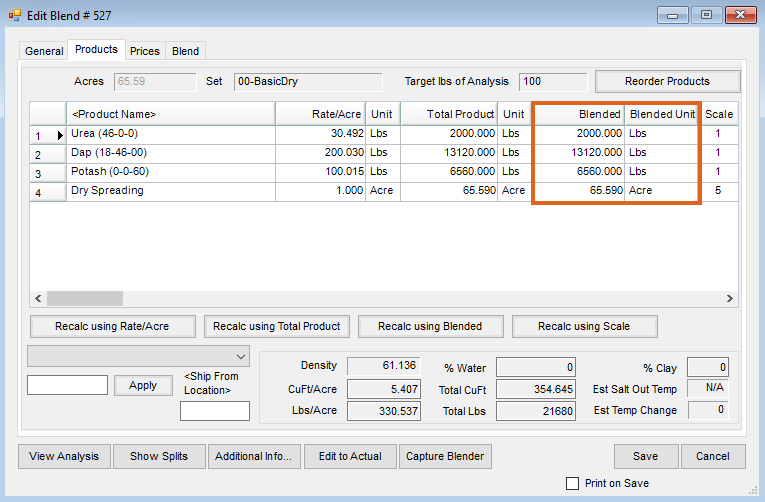
- The blended amounts will be updated on the Product tab of the Blend Ticket and the ticket will be marked as Loaded. Make any other necessary changes to the Blend Ticket and select the Save button.


Multiple Rancos on Same Terminal Server
Companies working over terminal services can run multiple Ranco automated blenders using the Agvance Ranco interface.
Example: A company has multiple Locations each with their own Ranco automated blender. They use terminal services and have the Agvance db-activated Ranco interface.
There are two options:
- Option 1 – Add a new blender number for each additional location so the products are setup correctly. It is a matter of correctly mapping the com port to the machine controlling the blender at each location. Locations can use the same com port number since they are mapped to different computers.
- Option 2 – Use a serial over USB device. Call SSI Support for details.
