For those wanting to run the import manually or with Automated Tasks see Import Customer Process.
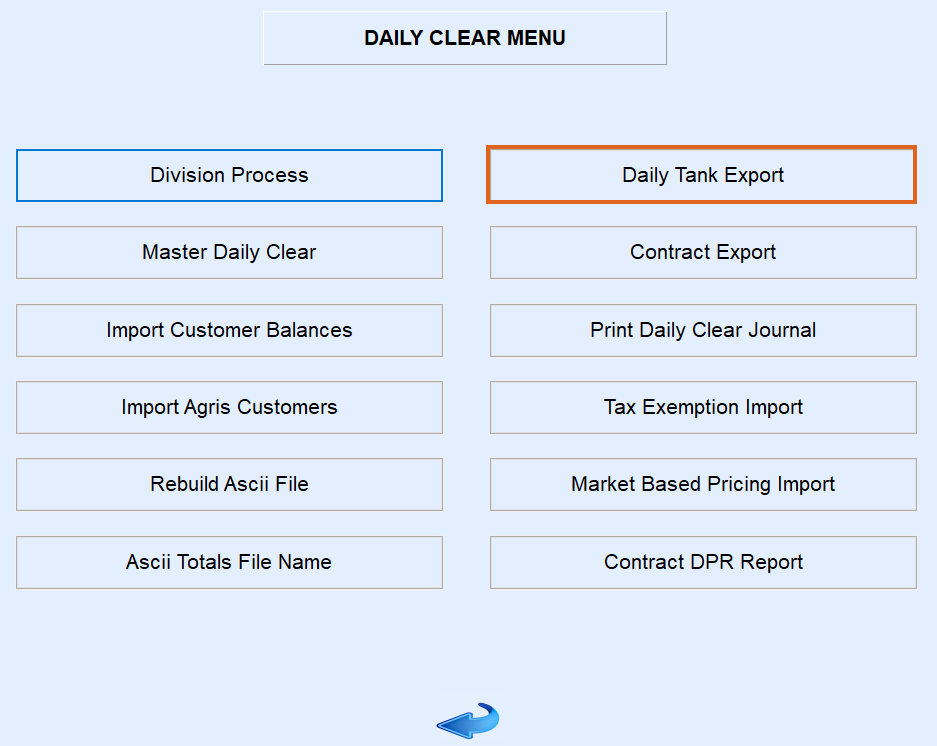
The Daily Clear Menu contains modules necessary to transfer sales and tank files to Agvance Energy. Each time Daily Clear processes are performed, files are exported to the CTLS93\DD85\Interface folder located on the server.
![]()
Once files are exported to the Interface folder, they are ready to be imported into Agvance Energy. Below is an example of the files that are exported during this process.
![]()
1. Division Process
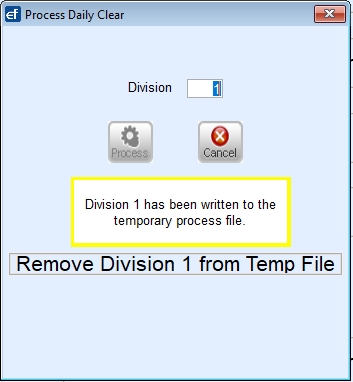
The Division process stores Sales Journals in a temporary holding file until the Master Daily Clear program is processed. It is important to verify Energy Force users are not actively utilizing the Posting Menu modules (Sales, Payments, Voids) during this time. If the system detects an open Sales Journal during the Division process, an error message will display to indicate the journal number and User ID. Advise exiting or select OK to proceed without the journal.

- From the main menu, select Posting Menu.
- Choose Daily Clear Menu.
- Select Division Process. Enter the posting Division to process and press Tab. Select Process.
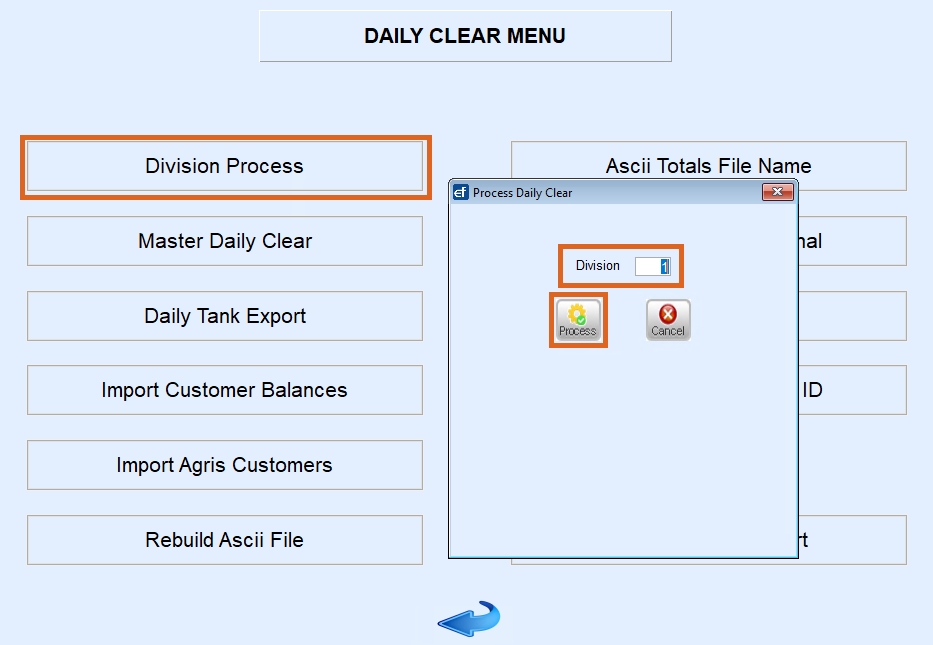
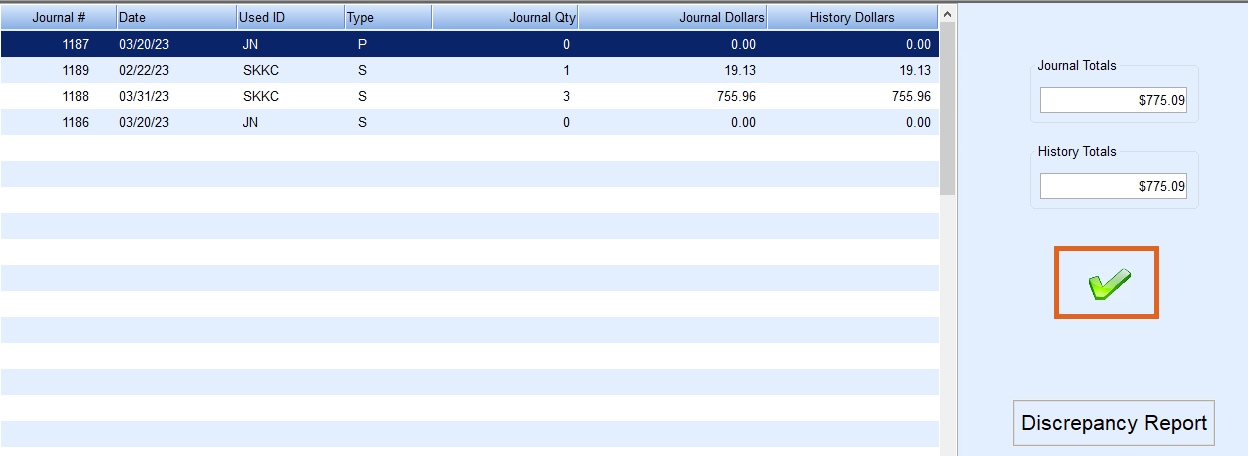
- Verify the information appears accurately (no duplicates, no out of balance issues indicated by a Warning message) and Journal Dollars vs. History Dollars are in balance.
- If an error is present, run the Discrepancy report and contact Support for assistance.
- Select the green Checkmark.
- Enter the next posting Division to be processed (if applicable) and press Tab. Repeat Steps 3 & 4 until all Divisions have been processed.
- Select Cancel when finished.
To continue select the 2. Master Clear tab above.
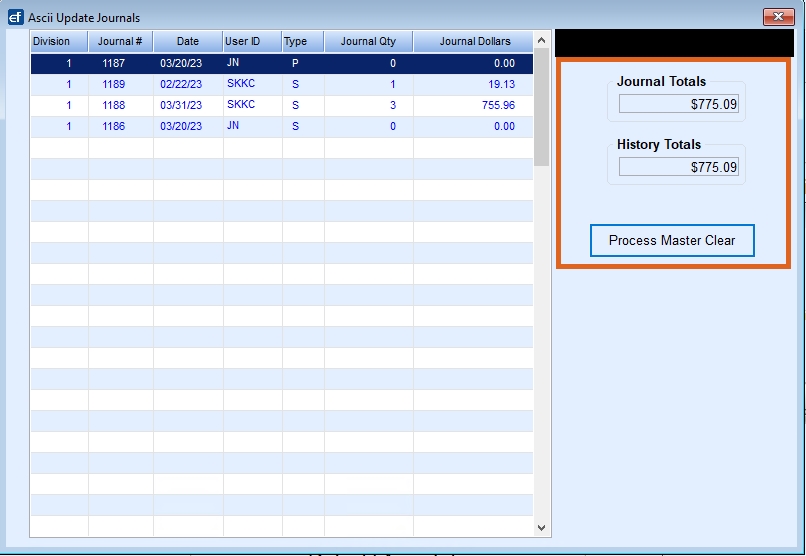
2. Master Clear
The Master Clear process references the Sales Journals in the temporary holding file from Step 1 and generates one complete sales file. This sales file is referred to as a PM.DAT file.
Use the following directions to complete the Daily Clear Process:
- Select Master Daily Clear.

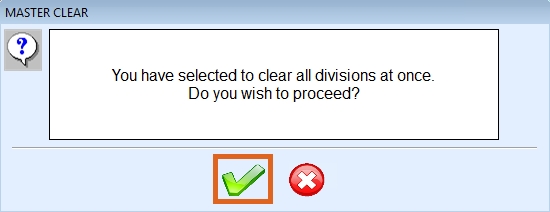
- The screen will display to process with Division as 0 for all. This value can be modified to process one posting Division at a time if desired.
- Entering one Division at a time will result in multiple daily clear files to import into Agvance Energy.
- If 0 for All is chosen, select the green check to clear All Divisions at once.
- Verify Journal and History Totals are in balance and select Process Master Clear. If an error message is present, contact Support for assistance.
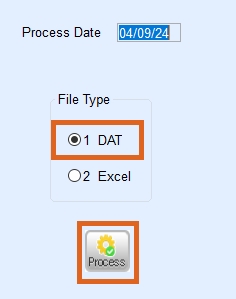
- The Process Date will auto-populate. Leave the file type as DAT and select Process.
- The Master Clear Report option will display. Select to send the report to Excel or Video and choose Print.
- Selecting Excel gives the ability to refer to this report, stored in the Daily Clear Interface folder.
- Video does not give the ability to view the report once it has been closed.
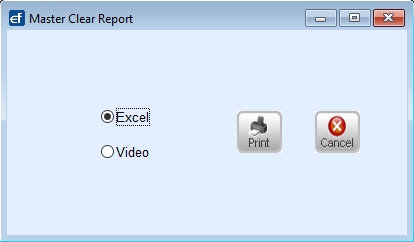
- Choose the appropriate printer and select Print.
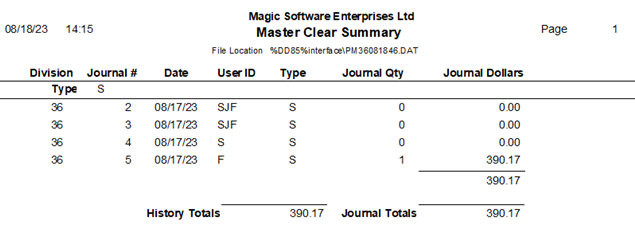
- The system will process and display a Daily Clear report (leave open). Minimize the report and press Esc on the keyboard to return to the Daily Clear Menu.
To continue select the 3. Daily Tank Export tab above.
3. Daily Tank Export
- Select Daily Tank Export directly under the Master Daily Clear button. This will export the new or modified tanks.
- The program will process and close automatically.
Once the Daily Clearing processes have been completed in Energy Force, Tanks and Sales will need to be imported into Agvance Energy.
If there is a need to export all tanks, the Last Run Date log entry for TankExp can be removed then select Daily Tank Export again.
To continue select the 4. Daily Tank Import tab above.
4. Daily Tank Import
Tanks and Splits should be imported prior to importing the Daily Clear Sales file. Agvance Energy must recognize that the Customer has a tank to import an Invoice against it.
- In Agvance Energy, navigate to Transfers / Import / Energy Force / Daily Tank.
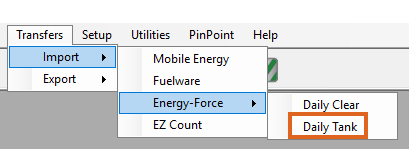
- The Import Energy-Force Tanks window displays with import paths.
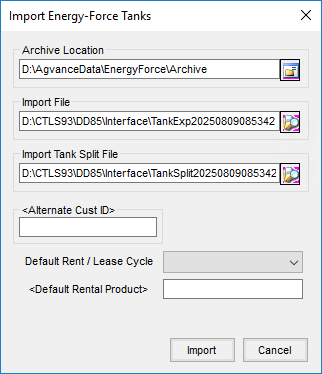
- Archive Location – Once the file has been imported, Agvance will move the file from the Energy Force Interface folder to an Archive folder.
- Import File – This is the path where the current Tank file can be found (Energy Force Interface folder).
- Import Tank Split File – This is the path where the current Split file can be found (Energy Force Interface folder).
- Alternate Cust ID – If utilizing an alternate Customer ID, double-click in this field to select the appropriate code.
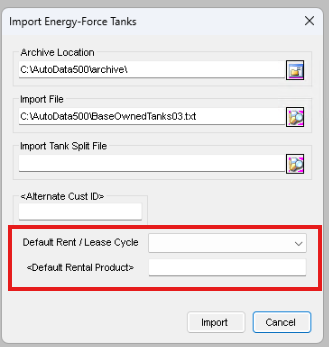
Note: This code is typically named EF Alt ID but may vary depending on Agvance Company Preferences setup. - Default Rent / Lease Cycle – Select the appropriate cycle from the drop down. The Daily Tank Export from Energy Force updates the Rent/Lease type in Agvance based on the following criteria within Energy Force:
- If Company Owned tank and Tank Rent = Y and Lease to Own is checked set to Lease.
- If Company Owned tank and Tank Rent = Y and Lease to Own is not checked set to Rent.
- If Customer Owned tank set to Owned.
- Needs to be populated by the default values that can be set upon the import of a tank file.
- <Default Rental Product> – Needs to be populated by the default values that can be set upon the import of a tank file.
- Select Import. The program will process and a message will appear to indicate when finished.
- Agvance Energy will display a list of Tanks imported.
- If an error occurs during import, an error report will display and the file will not import until the errors have been corrected.


To continue select the 5. Import Daily Clear tab above.
5. Import Daily Clear
Importing the Daily Clear file will process Invoices, Voids, and Payments made against the Customer account. A report will be generated to indicate the journals and sales that are imported.
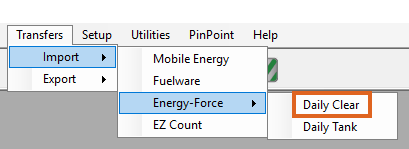
- Once tanks have been imported, and with Agvance Energy still open, go to Transfers / Import / Energy Force / Daily Clear.
- Indicate the Archive Location. This location will auto-save after the initial setting.
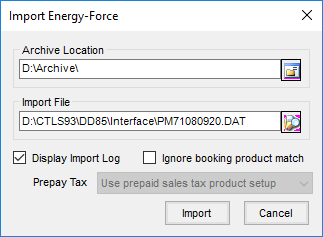
- Select the file to import. This file will be in the Energy Force Interface folder. The location will auto-save after entering the initial location. However, it will still be necessary to select the Search button and choose the correct PM file to be imported.
- Verify Display Import Log and Ignore Booking Product Match is selected and choose Import.
- The import process will begin and a message will display once completed.
- A report will be displayed to indicate the Invoices and dollars imported. Compare this report to the Daily Clear report from Energy Force to ensure all sales imported without issue.
Note: A transaction that is made and voided in the same import will display the original transaction as a positive number and S type, and the void will display a negative number and a V transaction type.
- If the report is out of balance, it is more than likely Invoices have been voided in the file that was imported.
- Void invoices are doubled in the overall report total. Take the report total and subtract/add voided values one time.
- If the report is out of balance, it is more than likely Invoices have been voided in the file that was imported.
- If Agvance Energy is unable to import the file, an error message and a rejection report will display. Correct the items, then issue and import again as necessary.

To continue select the 6. Export Customers and Contracts tab above.
6. Export Customers and Contracts
Customers and Contracts need to be exported from Agvance and imported into Energy Force daily. The customer file provides a listing of all Customers who have been classified as an Energy Force Customer along with their A/R balances.
Customer Export
Use the following directions to complete the Customer Export process:
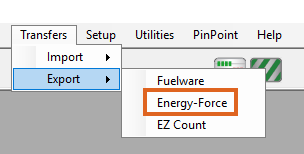
- In Agvance Energy, navigate to Transfers / Export / Energy Force.
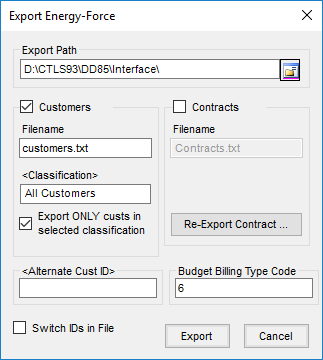
- Indicate the Export Path.
- For Customers, the Export Path will be the Interface folder
- For Contracts, the Export Path will be in the Contracts folder.
- Select the Customers option and make sure Contracts is unchecked.
- Enter customers.txt in the Filename field.
- Double-click in the Classification field and select the Customer Classification.
- Check the box for Export ONLY custs in selected classification.
- If utilizing a Customer ID other than Cust ID in Agvance, select the appropriate Alternate Cust ID Attribute. If using Alternate Cust ID, check Switch IDs in File.
- Select Export. A message will display when the file has finished exporting.
Note: See the Import Customer File section to import this file into Energy Force.
Contract Export
Use the following directions to complete the Export Contracts process:
If new Contracts/Bookings have been entered in Agvance, they will need to be exported to Energy Force. It is recommended to run this process at the end of each day to ensure all new Contracts will be in Energy Force for drivers the next day.
It is important to note that Contracts are only exported from Agvance ONE time. While there are methods to re-export, it is not without difficulties.
- With the Energy Force Export window still open, indicate the Export Path. For Contracts, the Export Path will be in the Contracts folder.
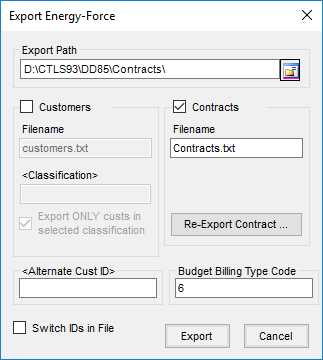
- Select the Contracts option and make sure Customers is unchecked).
- Input Contracts.txt as the Filename.
- Input the Budget Billing Type Code (code utilized in Energy Force). This code will automatically default after the initial input.
- Select Export. The program will process and indicate when the file has been completed.
Note: See the Import Contract File section to import this file into Energy Force.
To continue select the 7. Import Customers and Contracts tab above.
7. Import Customers and Contracts
The Customer file will automatically import into Energy Force each morning. Perform the following steps if new accounts in Agvance need imported based on an immediate need.
Customer Import
Use the following directions to complete the Customer Import process:
- From the Energy Force main menu, select Posting Menu.
- Select Daily Clear Menu.
- Choose Import Customer Balances.
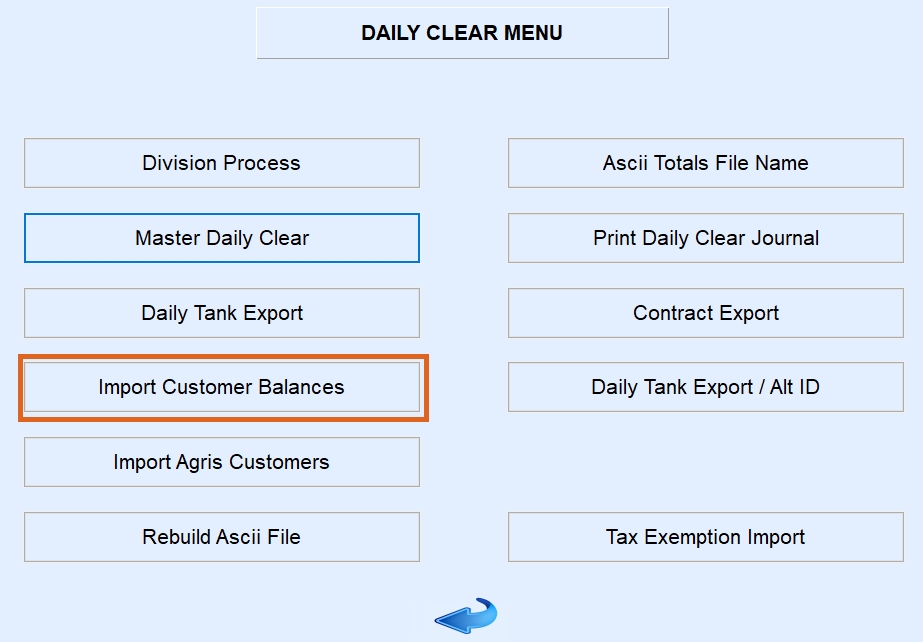
- Enter Customers as the File Name and select Process.

- There will be indication that it is importing and it will return to its original display when finished. Select Cancel to return to the Daily Clear Menu.
Contract Import
Use the following directions to complete the Contract Import process:
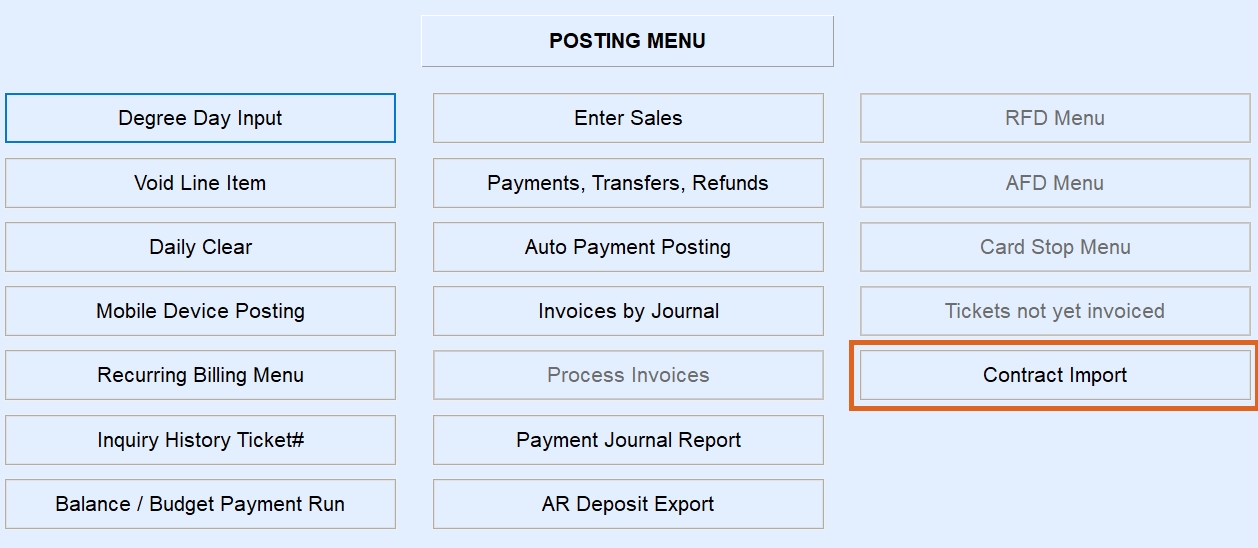
- From the Energy Force main menu, select Posting Menu.
- Select Contract Import. A new menu will be displayed.
- Choose Contract Import.
- Select the Contract file (Contracts.txt).
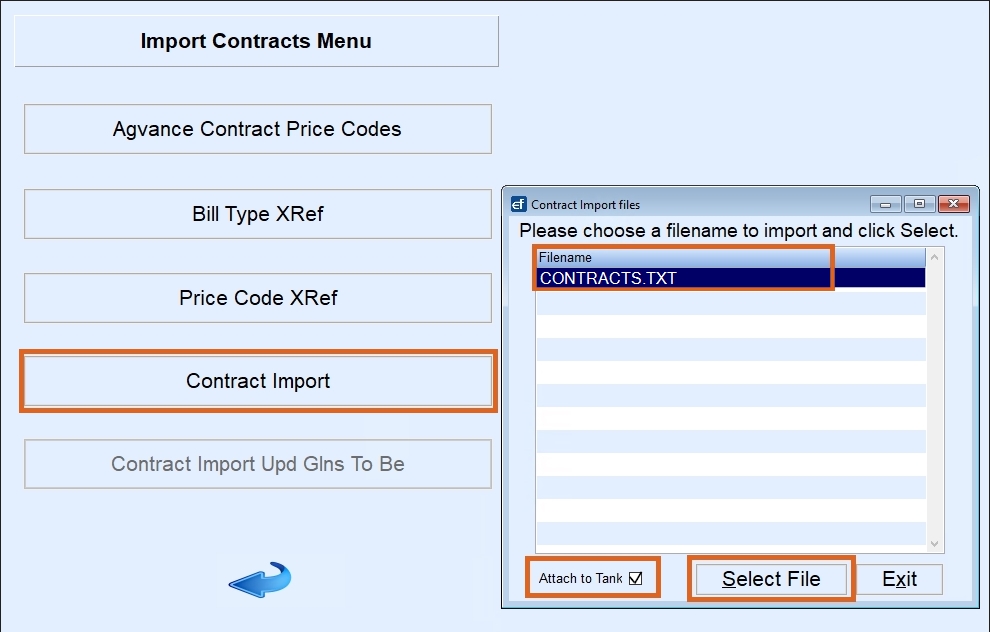
- Check Attach to Tank.
- Choose Select File. The program will import the Contract file.
- A report will be displayed upon completion to indicate the Contracts that imported successfully or Contracts that were rejected based on a specific reason.
- Rejected Contracts will have to be hand keyed into Energy Force.
- If there is an error with the original Contract in Agvance, such as an incorrect date or missing control code, be sure to return to Agvance and fix the contract in Agvance as well.
