To switch between job types, select the Blend Jobs or Delivery Jobs tab at the top of the screen. Tabs will only display if the User is set up for those specific job types.

Blend Jobs
Swiping a job from right to left gives the ability to Delete or allows the primary Applicator to reassign the job the a secondary Applicator. The job must have at least one secondary assigned for this functionality to be visible. If multiple secondaries are assigned, a list of those are provided for the User to select one. Choosing Delete removes the job from the Applicator’s device.
Select a job for more details and options related to that specific job. Tap Directions to get directions to a Meeting Point set on the map or to the job's location.

Overview
The Overview tab displays basic information for the Blend Ticket including Customer Name, Field Description, Crop, Contacts, Salesperson, Comments, and a map image of the Field Location.
Tap the Vertical Ellipsis to Refresh, Download Custom App Sheet, or Download Hazmat Sheet.

Global Layers from Agvance SKY Mapping display on the map.
Swipe the top half of the screen from left to right for more details regarding the selected Blend Ticket.
 |
 |
Map
On the lower half of the screen, a map of the job displays. The number of acres can be adjusted if necessary.

- Choose the Compass icon for the map to zoom to the current location.
- The Directions icon opens an independent map with directions to the Field Location or Meeting Point.
- Select the Full View Map icon to open a full view of the satellite map.
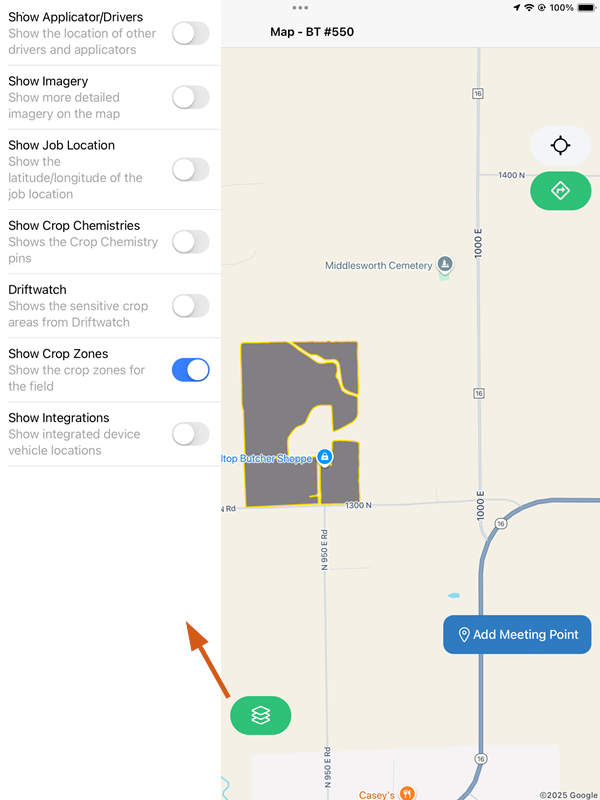
- The Compass and Directions icons are available here as well.
- Use + Add Meeting Point to drop a pin indicating where tender drivers should meet for refills. Only one Meeting Point can exist on a job. Any Applicator assigned to the job can move the Meeting Point by selecting + Edit Meeting Point.
- The Layers icon opens options on the left side of the screen to indicate what should and should not be shown on the map.

Start/Complete Job
Tapping Start Job updates the status of the job to In Process. A message displays to confirm the job should be started with the option to Start Job or Start Job and Capture Conditions. Capturing conditions will pull weather data from nearby weather stations but can be revised later.

Tap Postpone Job to put the job On Hold and come back to it at a later time. Once finished, tap Complete Job. This will give the option to Review Conditions or Capture and Review Conditions. For applicators with Require Conditions turned on in Agvance SKY Dispatch, entering conditions will be required before completing the job.
Selecting Capture and Review Conditions will pull weather data from nearby weather stations that can be revised and will navigate to the Conditions screen to review and edit as necessary. Once all Conditions have been entered, tap Finalize Conditions. That job will then be removed from the jobs list and will show as Completed in Agvance SKY Dispatch.
 |
 |
Products

- Blend Information for the job is available for review.
- Search for and select additional Products by tapping the blue + icon.
- Select the Product to view additional details.
- The Ship From Location, Rate/Acre, and Total Applied Qty can all be edited here.
Messages
Choose a Dispatcher and enter the message. Selecting the Paper Clip icon gives the ability to add an attachment and displays a prompt to select a file or image from Storage or Photos. Tap the Arrow to send.

Conditions
Record or view current Conditions at the time of application. Any text displaying in blue indicates that information can be edited. More information on choosing and requiring conditions can be found here.
Conditions include:
- Start of Job
- Field Conditions
- Vehicle
- Regulations
- End of Job

