Chemical Database Product information can be easily updated in Agvance manually or by using the Agvance Agent tool. This utility incorporates the Save Sets/Load Sets functionality found on several reports in Agvance.
Note: Agvance Agent can only work as a scheduled batch if full SQL is used. Without the full version of SQL, batches will not run and no email notification will be sent.
Updating Product Information Manually
Product information may be updated manually in two ways - individually or in a batch.
Individual Refresh
To refresh a Product individually, edit that Product and navigate to the Safety tab. Under the Chemical Database area, choose the Refresh button. The Product is then updated.

Batch Refresh Using Agvance Agent
Process the Chemical Database Link Report, found at Hub / Reports / Product Reports to view the chemical database Products needing linked.
Navigate to Hub / Utilities / Admin Utilities / Hub / Import Chemical Database Data. Select the necessary preferences, and choose OK. The Products are then updated with the correct information.

Updating Product Information Using the Agvance Agent
The Agvance Agent is run from a separate shortcut/icon on the desktop that points to the Agvance dataset. The Agent must be logged into and open for a scheduled batch to run automatically.
Creating the Agvance Agent Shortcut
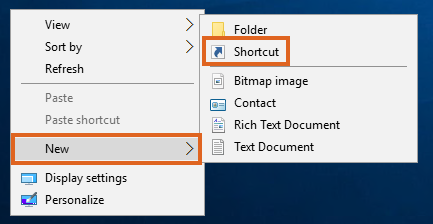
- To set up a shortcut, right-click on the Desktop or another folder where the Agvance Agent icon will be located. Go to New / Shortcut.
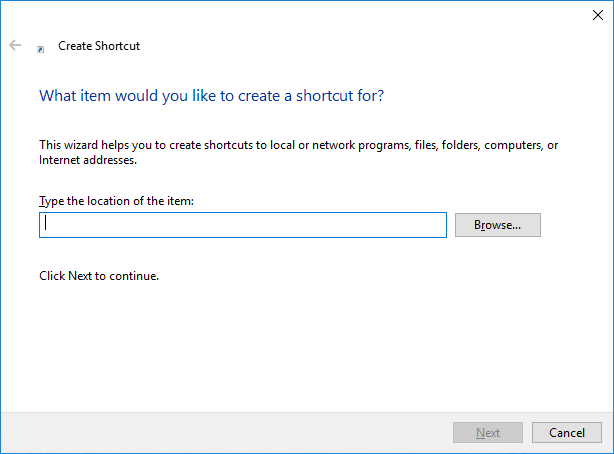
- On the Create Shortcut window, select Browse…
- The Browse for Folder window opens. Select the Agvance Agent executable file.
Note: The Agvance Agent executable file (AgvAgent.exe) can be found in the Agvance folder within the Program Files folder on the hard drive.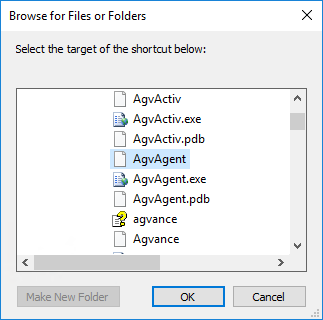
- Select Next on the Create Shortcut window. On the final step, name the shortcut, and choose Finish. The shortcut is now available.
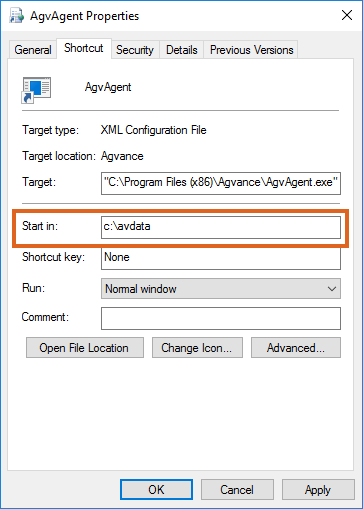
- Before running the Agvance Agent, the shortcut must be set up to start in the Agvance dataset. Right-click on the Agvance Agent shortcut, and select Properties. In the Start In field, enter the path to the Agvance dataset and select OK. After double-clicking on the shortcut, the Agvance Agent opens.


Using Save Sets on Batch Import
To use Save Sets on a Batch Import of Chemical Database data, a report must be created by selecting Save Set at Hub / Utilities / Admin Utilities / Hub / Import Chemical Database Data. The Save Report Set window displays. Enter a Description and select a User. Choose OK to save the setting and return to the Import Chemical Database Data screen.

Select Load Set to display the Select a Report Set window. Choose the User from the drop-down, and indicate the report set to be run. Choose Select.

A progress bar appears while the report runs. Below are two examples of the results displayed when this task is completed. The first example indicates there were Products updated while the second example shows no Products were updated.
 |
 |
Adding a Batch
After a Save Set is established, it can be scheduled to run automatically using the Agvance Agent utility.
In Agvance Agent, select Batch from the Setup menu. In the Select a Batch window, choose Add. Double-click the Task / Report column header on the Tasks tab.
The Select Tasks window appears. Select the User ID from the User drop-down and choose Apply. The available tasks appear in the grid. Choose the necessary task, then choose Select.

The Add a Batch window displays. Select the File Type for the report from the drop-down.

Enter the location for the file in the File Path column and an appropriate name in the File Base Name column. On the Batch tab, a Description can be entered, and a schedule to automate when the batch job will run can be set.
After the task is completed, a file will be stored in the location specified. The following is an example of a PDF document that was saved.

Running the Agvance Agent
The Agvance Agent allows reports to be run either on-demand from a batch or at a scheduled time.
Note: AgvAgent can only work as a scheduled batch if full SQL is used. Without the full version of SQL, the scheduled batches will not run and no emails will be sent.
The Agvance program cannot be open while running report batches from the Agvance Agent. If reports are set to run during the night, make sure Agvance is closed before leaving. The modules for the reports being scheduled to run must be activated on the desktop that is running the Agvance Agent. For example, if an Accounting report is included in the selected batch, then Accounting must be activated.
Only batches set up and saved by the User logged into Agvance Agent are available to select.
Polling
When the agent is polling, the batches scheduled to run at a specific time will run. However, when polling is turned off, the scheduled batches will not run. Polling can be turned on and off by selecting the Toggle Polling option in the File menu of the Agvance Agent. The Polling status is displayed on the title bar of the Agvance Agent module.

View Queued Batches
Queued batches may be viewed by navigating to View / Queued Batches. The grid lists the batches set to run at a scheduled time. Select the Delete box in the grid to delete the reports batch from the queue.

Editing a Batch
To edit a batch, select the batch from the list and select Edit. Any tasks may be added or removed. Changes can also be made to the Description or the schedule information. Choose Save to save the changes.
Deleting a Batch
To delete a batch, choose the batch to be removed and select Delete. If the batch is set to run on a schedule, the scheduled job is also deleted.
Manually Running a Batch
To manually run a batch, select the batch and choose Run. Any batch, including those set to run on a schedule, may be run manually.
Emailing a Batch
- To email reports from Agvance Agent, an email address must be set up for the corresponding User at Hub / Setup / Users. Additionally, the Mail Host must be specified on the General tab at Hub / Setup / Company Preferences. An email administrator can supply this information.
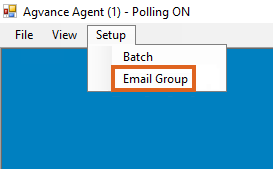
- Agvance Agent provides a setup area to establish Email Groups at Setup / Email Group. Before emailing various tasks/reports in Agvance Agent, Email Groups must be set up.
- Select Add to open the Email Group setup window. Email Groups can also be edited and deleted here as needed.
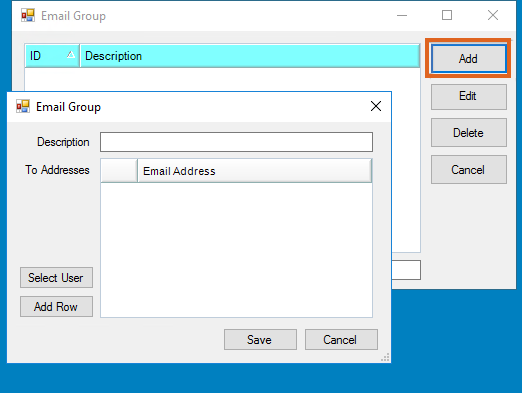


Individuals who can be added to the Email Group include the following:
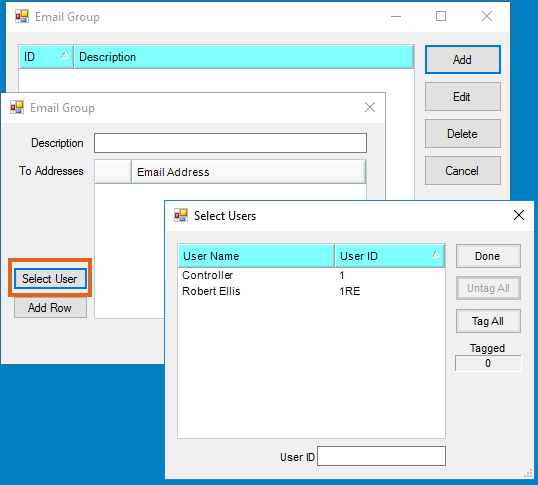
- Other Agvance Users Within the Company – choose the Select User button to select one or more Users from the list.
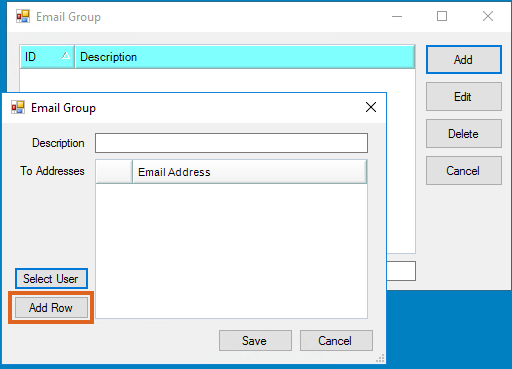
- Individuals Who are Not Agvance Users – Choose Add Row and manually enter the email address of the intended recipients.


Batch Refresh as a Service
Open a command prompt. Change the directory to the path where the Agvance Data to be updated resides, such as Z:\Avdata\.
Run the Util.exe application from the command line followed by three parameters:
- Use the ImportChemicalDatabaseData string. This must be exact.
- Enter the Agvance User ID used to run the report. In the example below, 1re is the Agvance User ID.
- Enter the path and file name of the PDF to save with the results of the import. In the example below, the path where the report will be saved is Z:\ChemUpdateReport\, and the file name will be chemproductimport.pdf.
These parameters must be separated by spaces. If the path or file name contains a space, the parameter must be in double quotes.

