The SSI Standard XML Interfaces with different Automated Blenders.
Blender Type: SSI Standard XML Interface
Product Setup
Edit the Product setup at Hub / File / Open / Products.
The Blender Factor found on the Blend Setup tab of the Product file in Agvance is required and must be set for the Product to be included in the XML file.
Note: For Kahler, the Blender Factor must match the Import/Export ID in Kahler. For Junge, Blender Factors cannot be between 41-70. For Murray and Yargus, the Blender Factors can be any sequential numbers.
Blending Units, also found on the Blend Setup tab in Agvance, must match the Import/Export Unit of Measure.
Product Set
Product Sets are maintained at Blending / Setup / Product Sets.
- On the Blender Interface / Print Preference tab, set the Blender Type to SSI Standard XML.
- Designate the Data Storage Path by selecting a path to a shared folder where the file is created for the blender interface.
The Shipped from Location Code is required for the SSI Standard XML. Enter a user-defined number. Some multi-Location companies use this area for the Location number. If the Location number is entered, Kahler uses it to set up batch information for multiple Locations.
How it Works
- The Blend Ticket is created in Agvance using one of the SSI Standard XML Product Sets using Products set up with a Blender Factor. The Blend Ticket is created for application of a whole order. Agvance sends the Product totals for each Product. The Automated Blender software allows the operator to resize batches to the truck.
- Agvance sends the ticket to the shared folder when the Create Automated Blender File option is selected on the Print Blend Documents window.
- The Automated Blender retrieves unimported tickets with a status of Ready from the shared folder.
- The Automated Blender will use a Product identifier in the XML file to recognize Products used, e.g. Blend Factor for Kahler and Product ID for Murray Control Pro.
- Some automated blender software programs store customer records. If that is the case for the User's automated blender, the Customer information will be compared to the information contained in the XML file. If the Customer does not exist in the automated blender software, a record for the Customer will be added.
- The Automated Blender uses the Import/Export Units to calculate the proper amounts to import.
- If any Product identifier cannot be matched, the Automated Blender does not import any of the batch information in the file and moves on to the next ticket.
- The XML can be modified in Agvance and exported with changes until any portion of the batch has been made. When the batch is created, the ticket status changes from Ready to In-Process.
- When the last batch in the Automated Blender is complete, the ticket status changes to Done and can import back into Agvance.
Note: There are three different ways to import.
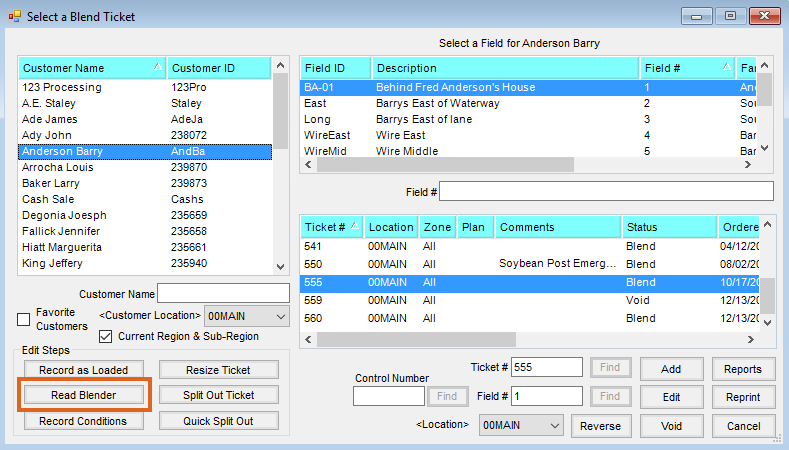
- In the Blending module, select the desired ticket and choose Read Blender. This feature looks for the file that matches that specific ticket.
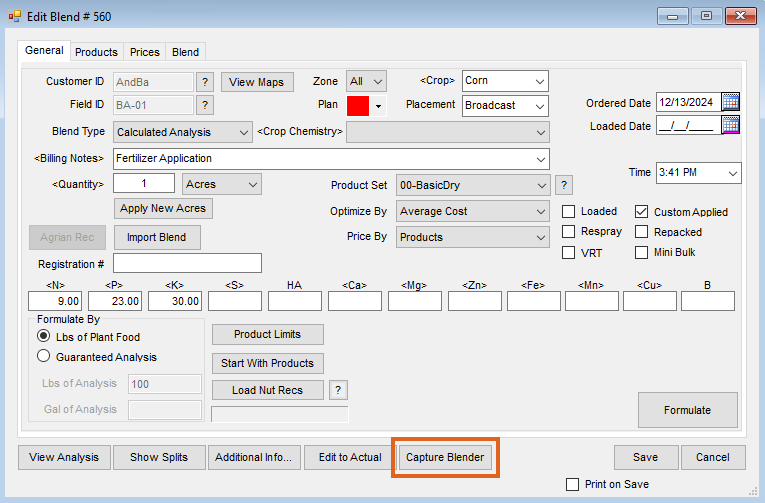
- Edit the desired Blend Ticket and select Capture Blender at the bottom of the window.
- In Blending, navigate to Edit / Import Automated Blender Done Files. This utility is useful when there are multiple files to import.


After the XML file is imported into the Blend Ticket, the Blend Ticket is automatically marked as Loaded and the inventory in Agvance is affected.
