When opening Inbound in Agvance SKY Grain, a grid displays to show Purchase Contracts. For more information on how this grid works, see Using Grids in Agvance SKY.
Note: Purchase Contracts are only available for those with the Role permission enabled in Agvance SKY Admin.

Contracts listed can be filtered by selecting the Filters icon and specifying criteria.
Use the Search bar to find specific contracts. Under the Ellipsis of the Search bar, there are options to Reprint or Delete. These are available when contracts have been checked in the far left column.
Options to Edit, Print, Migrate, and Delete a contract are available in the far right columns of the grid. Selecting the Purchase Contract number opens the Purchase Contract to view additional information.
Add a Purchase Contract
Select the blue + to add a contract.
General Information

- Enter the Contract ID (if auto-numbering is not turned on), and select the Customer from the drop-down.
- If applicable, select the Buyer Signature.
- Indicate the Commodity and Location. The Farm ID is optional.
- A Salesperson can be selected from the drop-down.
- Indicate the Date Established. Today's date defaults but this can be changed. The Expire Date and Price Date can also be chosen.
- If the Contract has been signed, check the Contract Signed box.
- Checking Print contract on Save will give the opportunity to send the Contract to a printer to print to PDF.
Contract Details

- Select the Contract Type and indicate if FOB and/or Spot.
- Enter the Contract Quantity. The amount entered will automatically be populated in the Original Contract Quantity field, but this can be changed if needed.
- If applicable, enter the Quantity Received. The Quantity Remaining will calculate automatically.
- Choose Open, Closed, or New Crop.
Pricing

- Enter the Futures Price and Basis Price. The Cash Price calculates automatically.
- Select the Bid Criteria, Futures Month, and Exchange from the drop-downs.
- A brief Pricing Note can be entered.
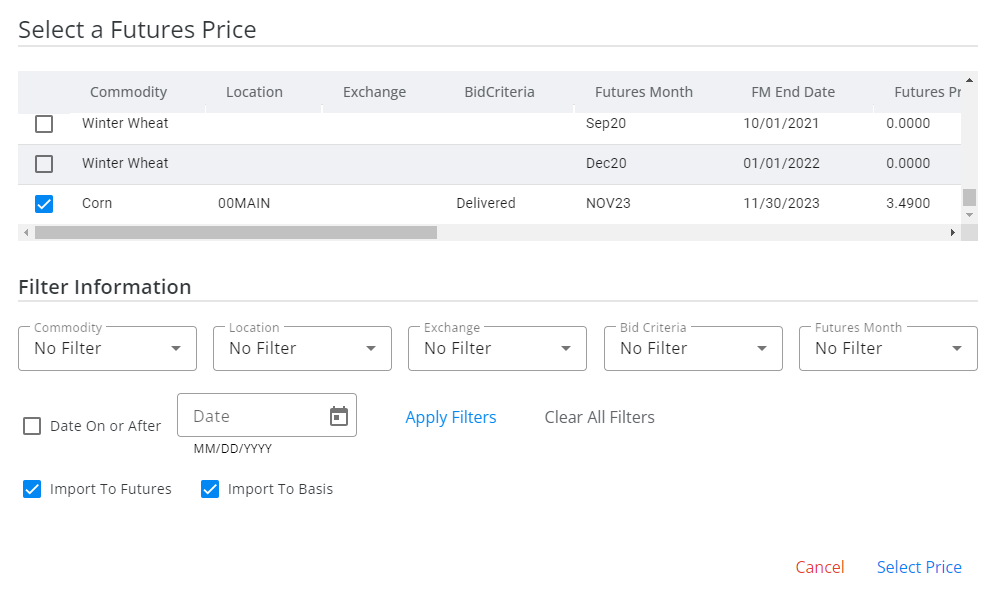
- Selecting Get Price opens the Select a Futures Price window. Results display based on filters selected. Make any necessary selections in the Filter Information area and choose Apply Filters. Alternatively, choose Clear All Filters to display all Futures Prices. Check the desired Futures Price row then choose Select Price.
Additional Information

- Indicate the Contract Format from the drop-down.
- The Destination and MOT can also be selected.
Note: For more on requiring an MOT, see Grain Preferences. - If applicable, check the Direct Ship option.
Deliveries

- Enter the Start Delivery date, Complete Delivery date, and Quantity.
- Choose + Add Another Delivery if another date range and quantity needs entered.
Grade Factors & Schedules
- Select Add Grade Factor to choose from the list of Grade Factors that displays. Once the Grade Factor is selected, choose Assign Grade Factor to apply to the Contract.
Note: Multiple Grade Factors on different Schedules cannot be selected. If two Grade Factors on different Schedules are chosen, a prompt will display asking which Grade Factor should be removed from selection.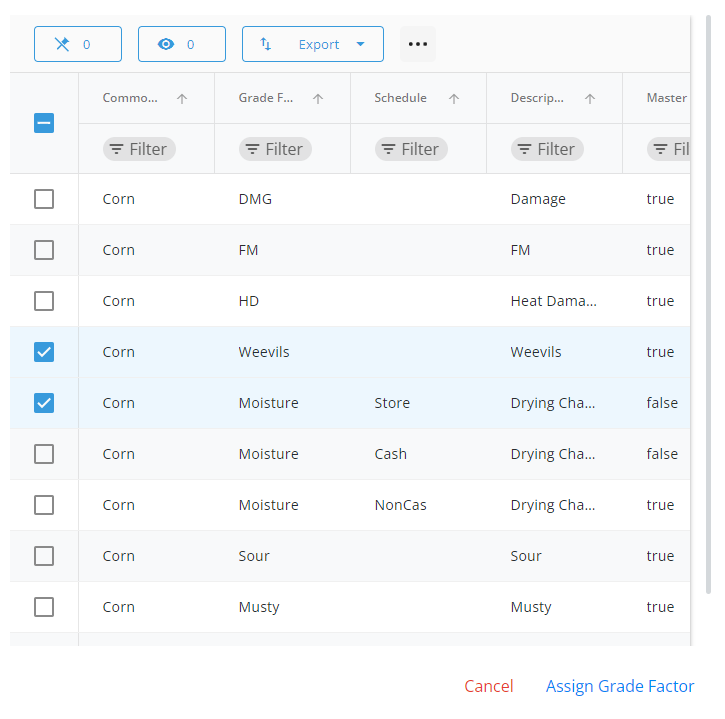
- Selecting Add Schedule displays a Schedule Type drop-down. Choose from the list then select Apply Schedule.
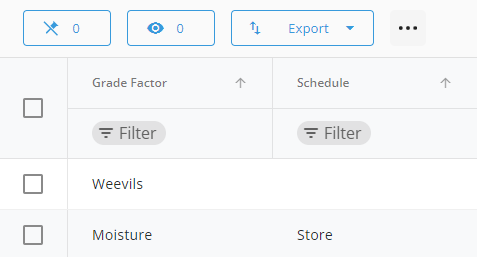
- Once Grade Factors and Schedules are applied, they will display in a grid.
Comments

- Enter any applicable Comments.
- Choose Select Saved Comments to choose from a list of saved Comments.
- Choose Clear to remove comments and Add for any additional notes.
- Use the navigation on the left to return to different sections of the contract for review/editing. When finished, select Save & Start New to save the contract and start a new one or Save Contract & Close to save the contract and return to the Purchase Contract list.